In some cases, there is a need to (temporary) change the logging logging level of a BWCE application. This document contains instructions on how to do that.
BWCE
Using JMX monitoring for BusinessWorks Container Edition
Using JMX monitoring for BusinessWorks Container Edition
The JMX standard offers the option to monitor Java based platforms and applications. BusinessWorks Container Edition (BWCE) can be monitored using JMX. This document contains an overview of the steps required to enable JMX monitoring. Within this document the tool visualvm is used to show the monitoring information.
OpenTracing with BWCE
This document contains a ‘howto’ to test OpenTracing in conjunction with BWCE.
Mini Course: using TIBCO BusinessWorks Container Edition on Docker
Introduction
This document contains an step-by-step (hands-on)process that can be used to get a better understanding of TIBCO BusinessWorks Container Edition on Docker.
Deploying BusinessWorks Container Edition on Azure Container Service
Microsoft Azure offers a Docker based service named Azure Container Service. TIBCO BusinessWorks Container Edition can run on it……
This document is also published at the TIBCO Community Wiki: https://community.tibco.com/wiki/deloying-bwce-azure-container-service
Microsoft Azure offers a Docker based service named Azure Container Service (https://azure.microsoft.com/en-us/services/container-service/). TIBCO BusinessWorks Container Edition (http://www.tibco.com/assets/bltac2e394e00bd3553/ds-businessworks-container-edition.pdf) can be run on Azure. This document describes how to do this.
Preparation
Preparation A) Generate a SSH key pair using Putty Key Generator.
With an SSH keypair you can create Virtual Machines on Azure that default to using SSH keys for authentication, eliminating the need for passwords to log in. Use the following steps to generate SSH keypair using Putty on Windows. Alternatively linux can be used to generate the SSH keys. See for more information: https://azure.microsoft.com/en-us/documentation/articles/virtual-machines-linux-mac-create-ssh-keys/
Step A1) Download Putty Key Generator: http://www.chiark.greenend.org.uk/~sgtatham/putty/download.html.
Step A2) Run the program. Make sure SSH-2 RSA is selected and that 2048 bits keys are used (default values). Click 'Generate'.
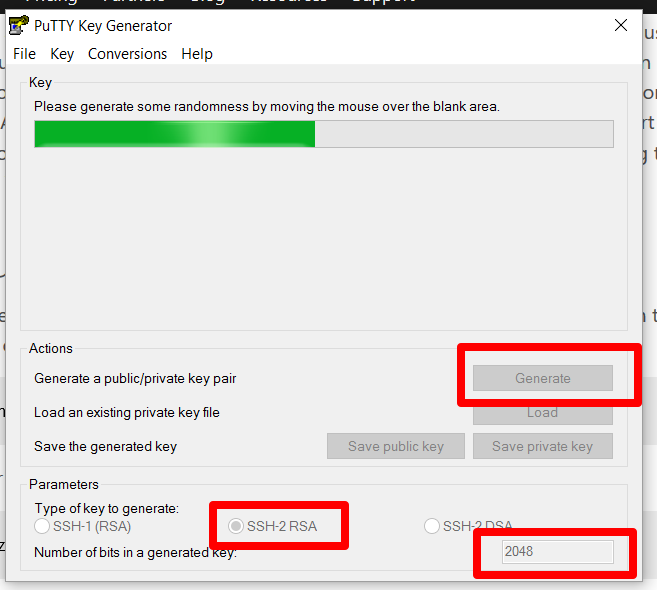
Step A3) Move the mouse until the keys are generated (the progress bar will proceed faster if you move the mouse faster).
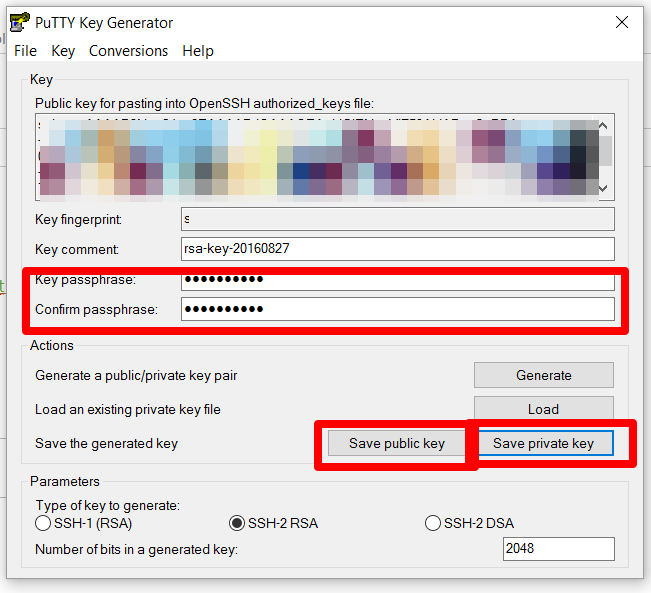
Step A4) Create a password and save the the public and private key:
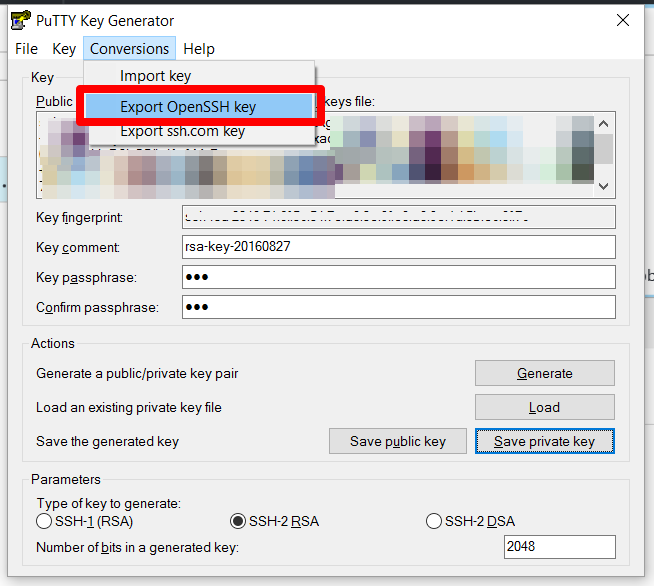
Step A5) Also save the private key in the OpenSSH format (we will this format when using SSH from Linux to setup an SSH tunnel later on). Click conversion –> export OpenSSH key. Name this key openssh.
Preparation B) Have available a Azure account.
Step B1) If you don't have it yet, create a free trial account at Azure (https://azure.microsoft.com/en-us/free/?b=16.33).
Preparation C) Have available a docker VM. Although we will not run any docker containers on this VM, we need the docker client on this VM. In this document it is assumed docker is installed on CentOS.
Step C1) If you don't have a CentOS VM available download it from open osboxes.org.
Step C2) Install docker using the following documentation: https://docs.docker.com/engine/installation/linux/centos/
Preparation D) Create a BWCE VM. In this document it is assumed BWCE is installed on CentOS.
Step D1) If you don't have a CentOS VM available download it from open osboxes.org.
Step D2) Download BWCE from eDelivery. If you don't have access to eDelivery [https://edelivery.tibco.com/storefront/eval/tibco-businessworks-container-edition/prod11654.html] (for TIBCO Customers only), you can get a trial version from [http://www.tibco.com/products/businessworks-ce].
Step D3) Install BWCE on your Linux VM. See for more information: https://docs.tibco.com/pub/bwce/2.1.0/doc/html/GUID-D4D790E3-04BD-46AB-BD4C-BA7328D332F9.html. The link refers to the BWCE 2.1 documentation. For other versions see docs.tibco.com.
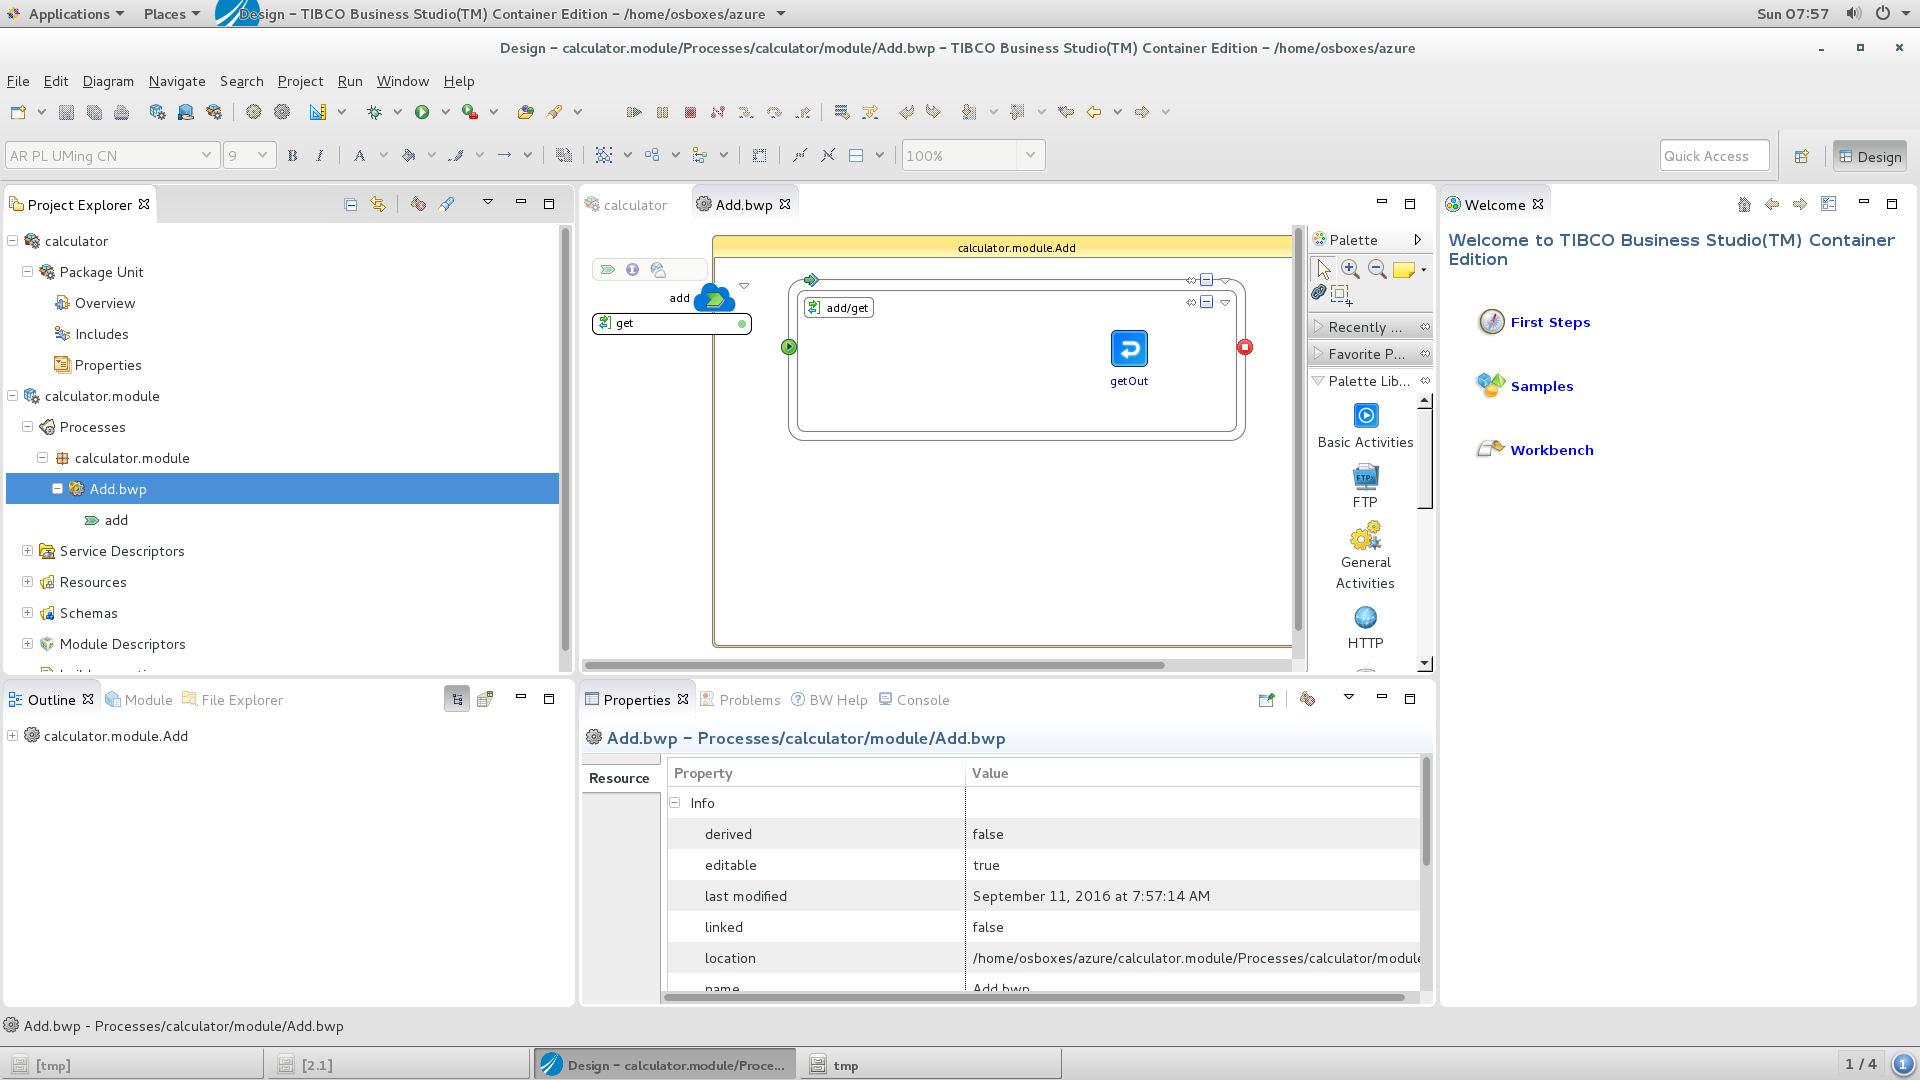
Preparation E) Create a simple Restful BW6 application.
As part of this exercise we will deploy a BW application in a docker container. Create a simple (restful) application. Any will do. In this document I will use the following application. It takes two parameters and returns the addition.
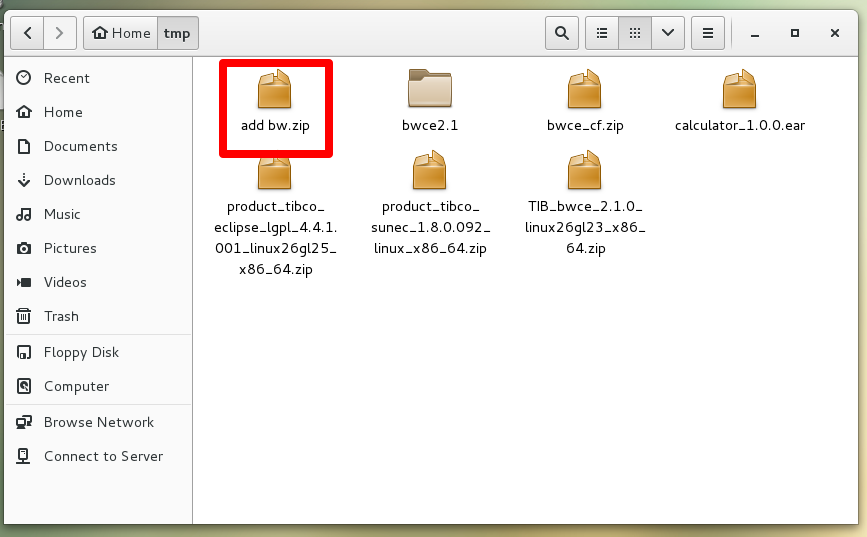
add bw.zipadd with host bw.zip
To open the application use the following steps:
Step E1) Goto the BWCE VM created in preparation step D.
Step E2) Open BWCE (default location: /opt/tibco/bwce/studio/4.0/eclipse/TIBCOBusinessStudio)
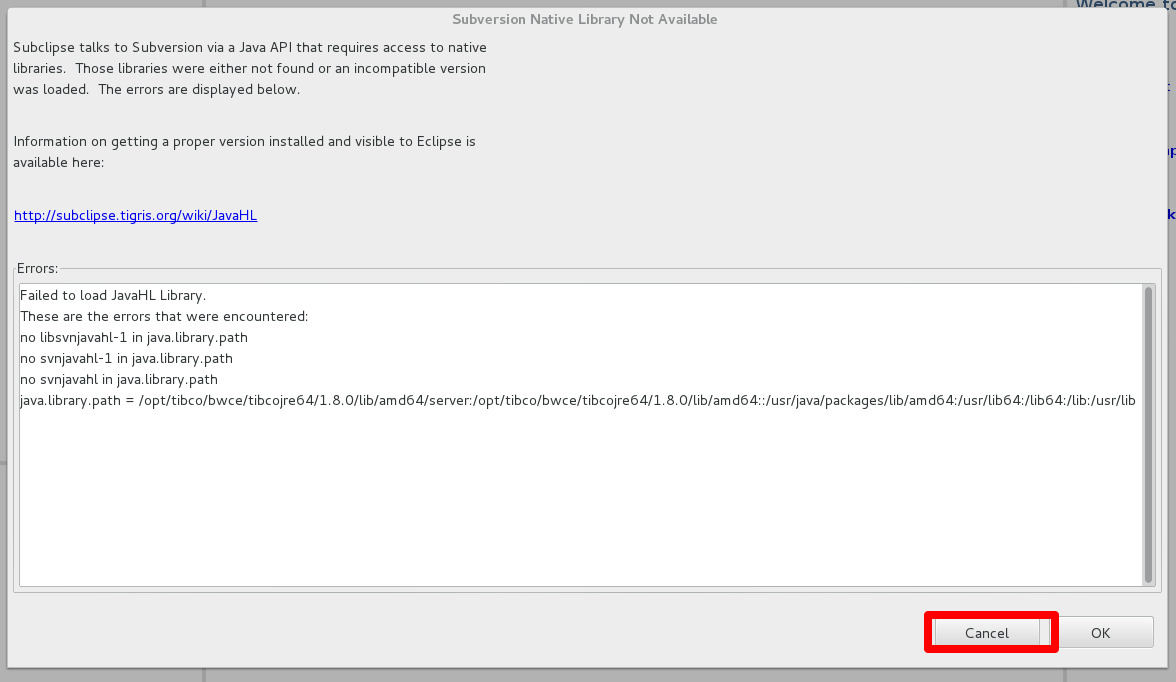
Step E3) If you get a warning 'Subversion Native Library' not available, ignore it by clicking 'cancel'
Step E4) Copy the zip file the BWCE VM.
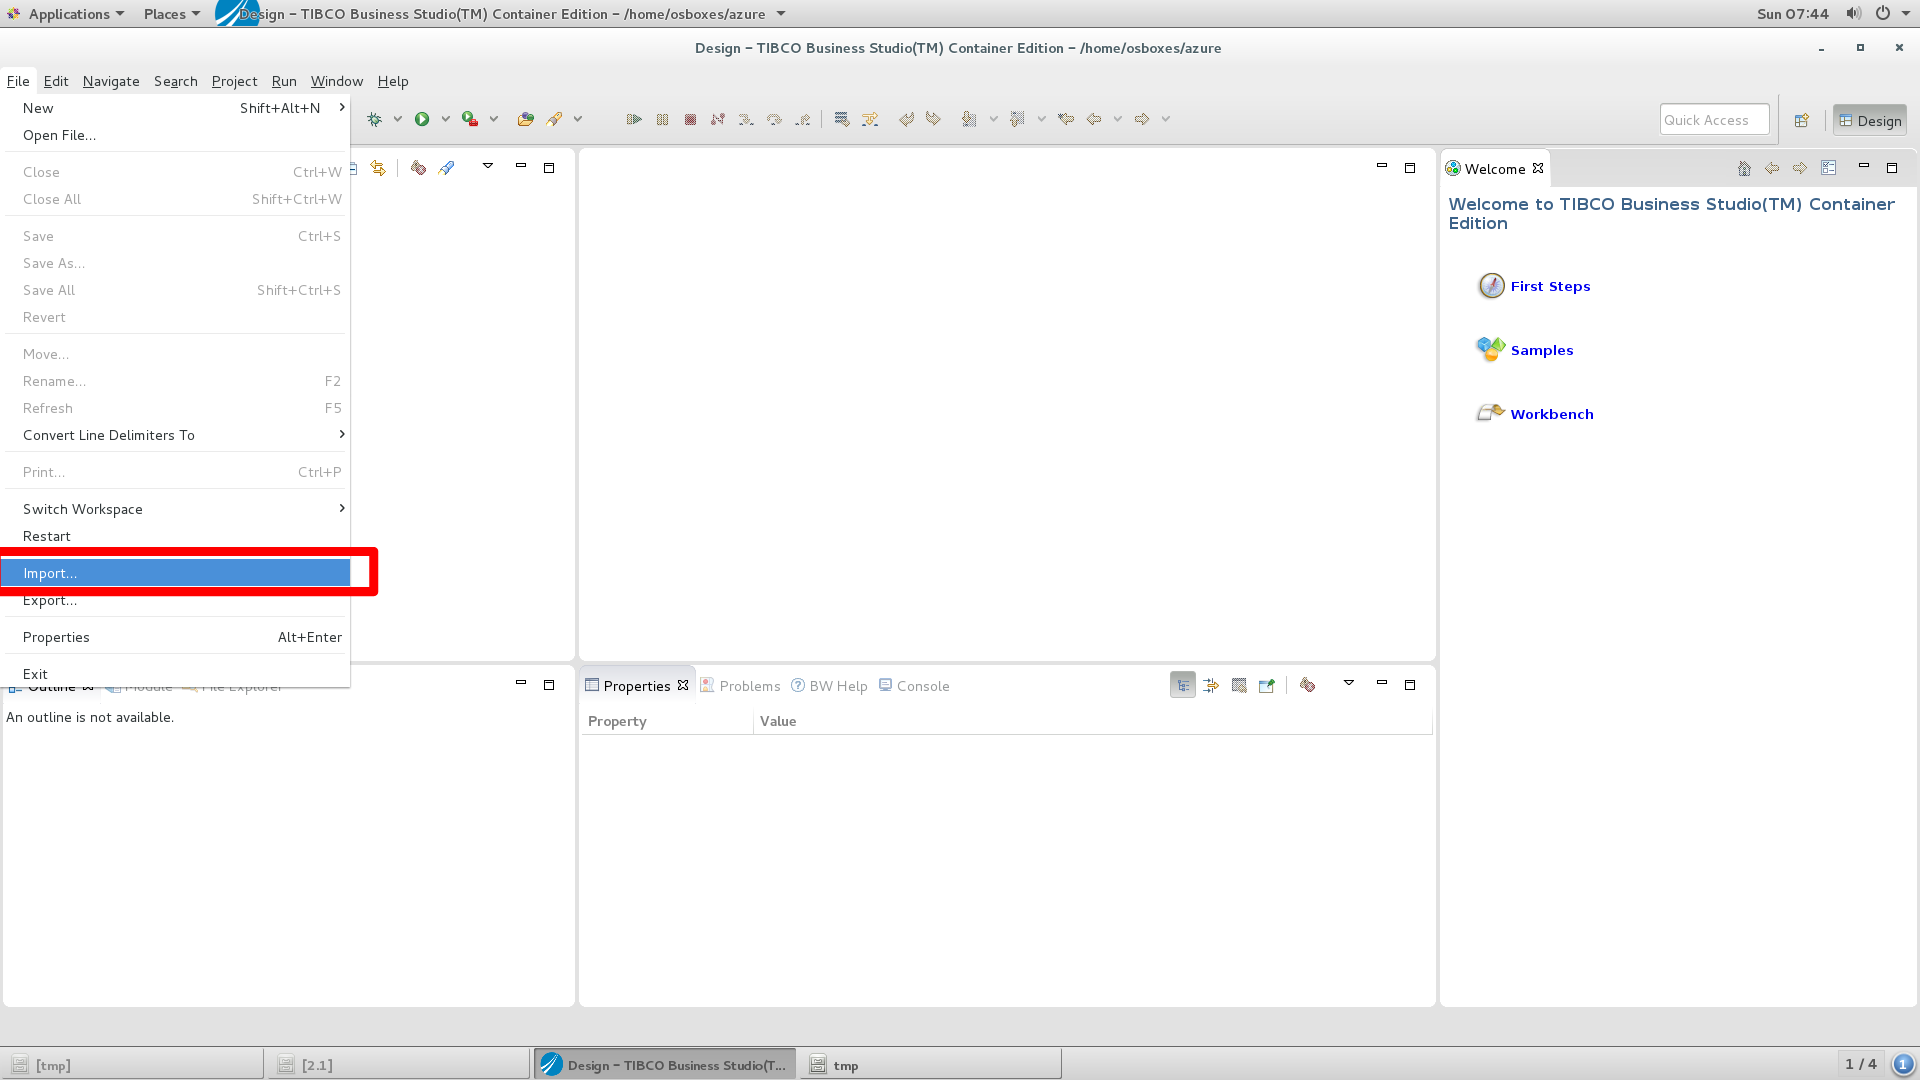
Step E5) Open BusinessStudio and click File -> import
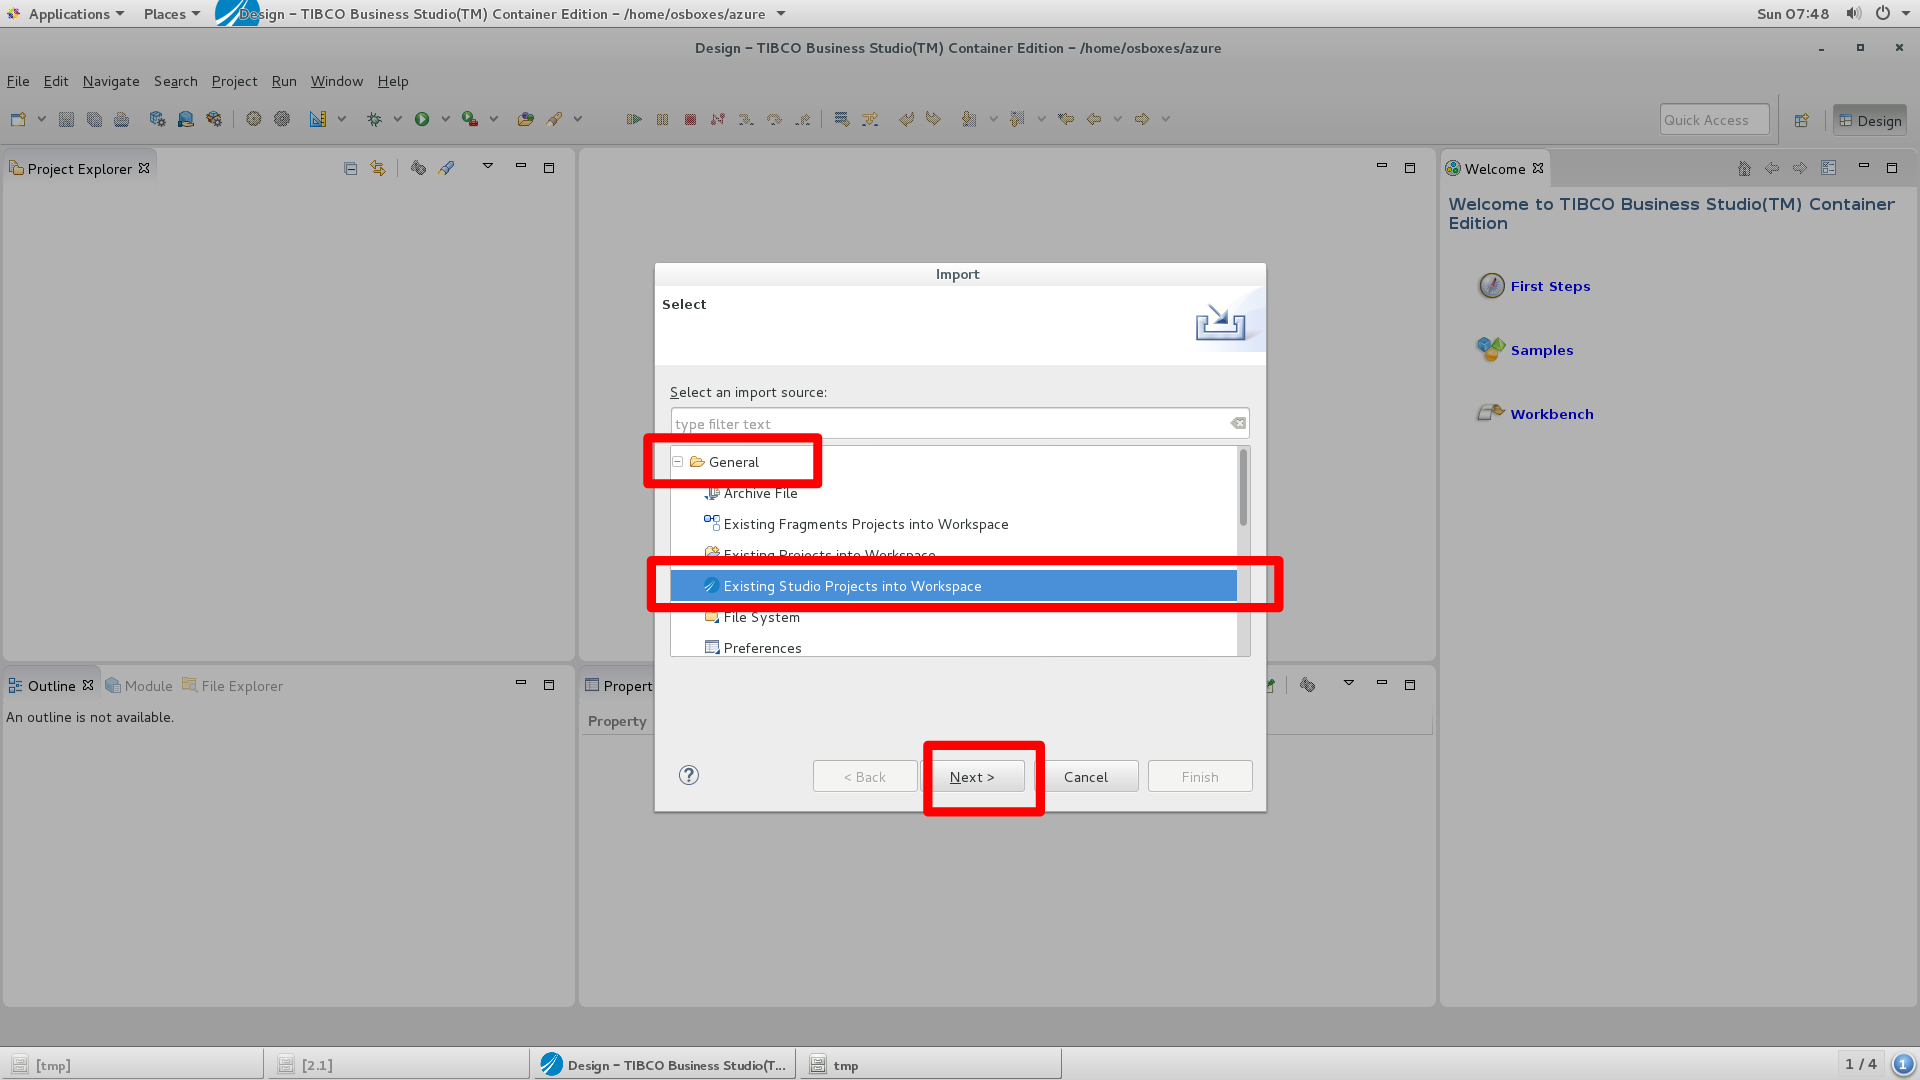
Step E6) Click General –> Existing Studio Project into Workspace and click next.
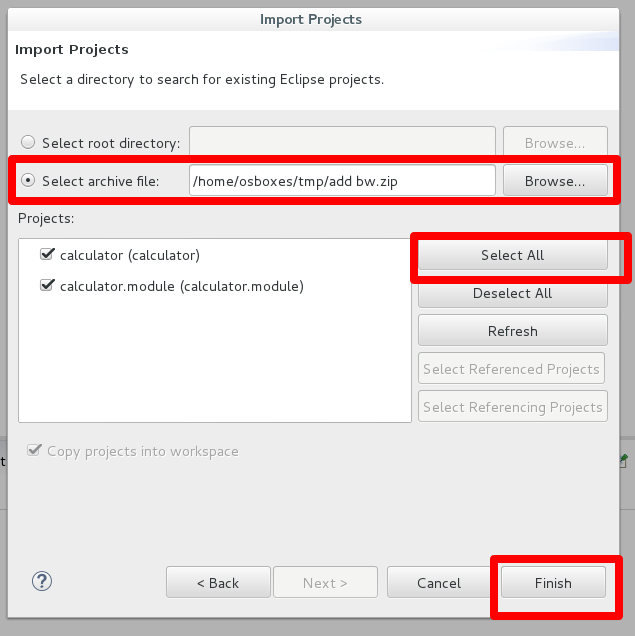
Step E7) Select the add bw.zip, make sure all modules are selected and click ' Finish'
After the project loaded, take a look at the simple add module:
Create a Docker environment on Azure
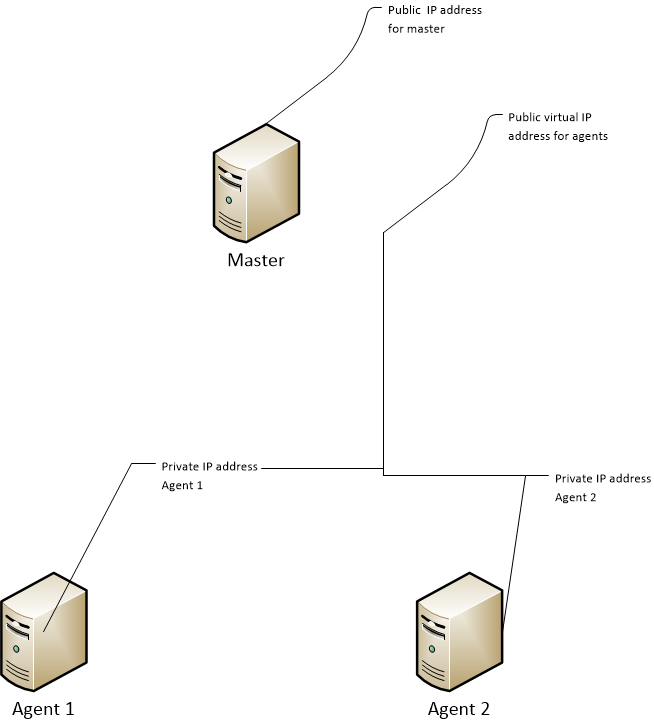
As part of this section of the description, we will create a minimum instance of an 'Azure Container Service' with Swarm. This environment consists of three VMs:
A Master VM, a Agent1 VM and an Agent2 VM. The Agent VMs are used to run a 'Docker Swam cluster'. Every docker image and container will run on both VMs.
The Master VM is used to run Docker Swarm. Swarm will distribute the docker deployments over both VMs.
The Master VM has it's own public IP address. Apart from that, one public virtual IP address is used for the agents. Both agents have a private IP address. A load balancer is used to distribute incoming traffic on the public virtual address to the private addresses.
The figure below contains a schematic overview of the basic setup offered by Azure.
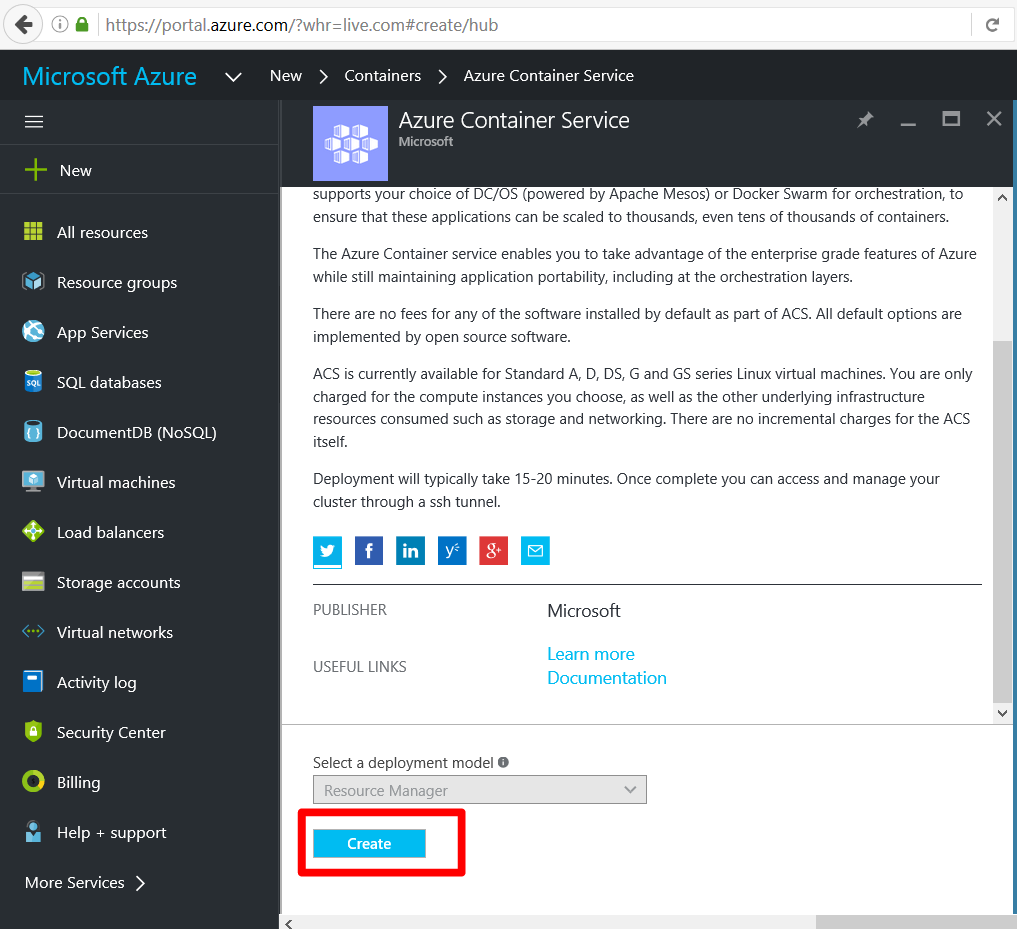
In order to create an 'Azure Container Service' with Swarm use the following steps.
Step 1) Login to the Azure portal (https://portal.azure.com/) and select

Step 2) Click on 'create'
Step 3) Fill out the form as listed below. Copy the SSH public key from Putty Key Generator.
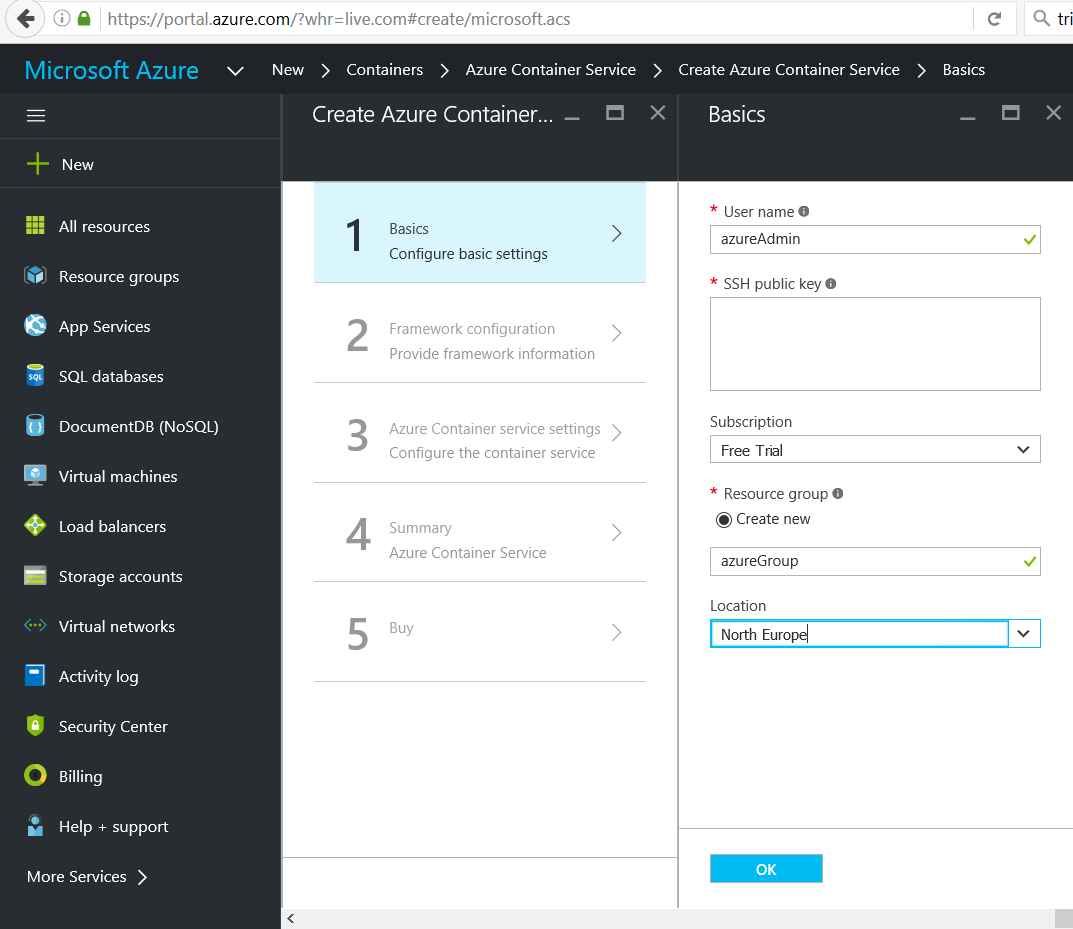
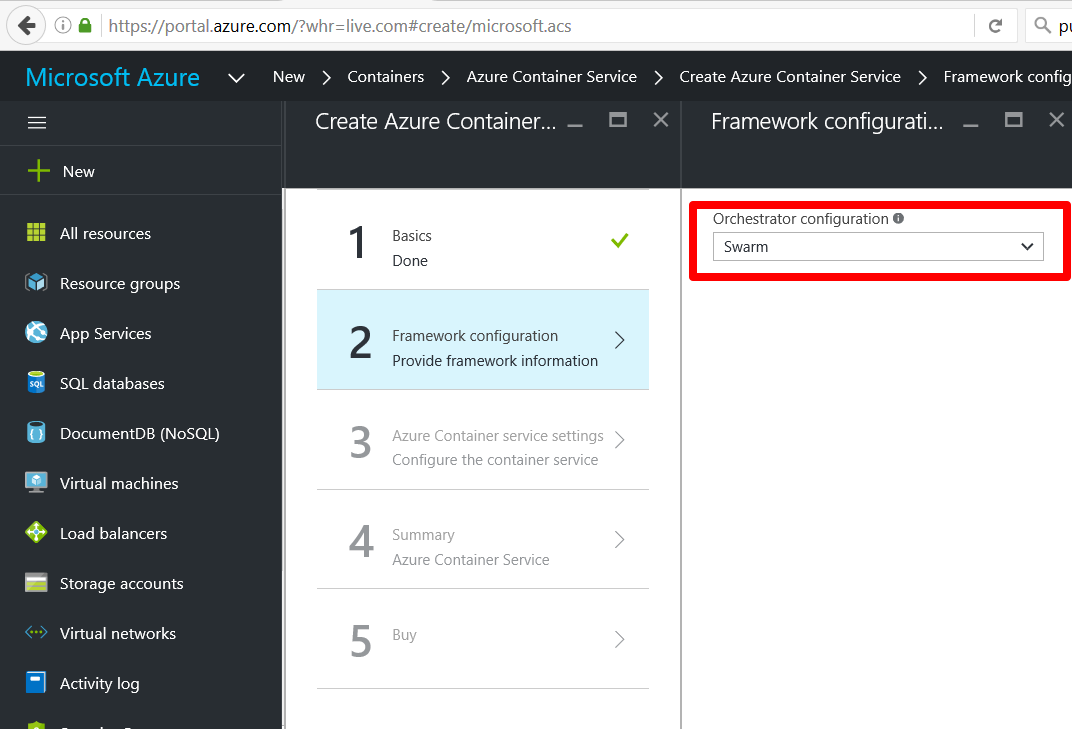
Step 4) Select 'Swarm' as the orchistration configuration.
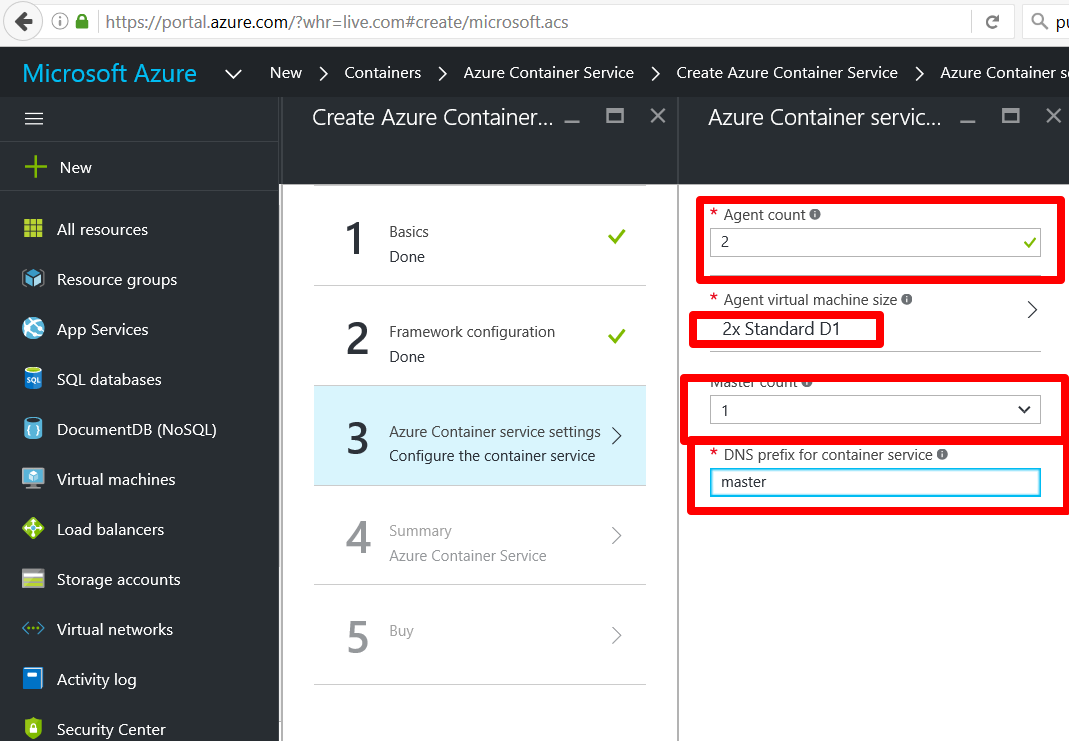
Step 5) Select a 2 agent cluster. Use D1 servers for the agents and create the 'master' DNS prefix.
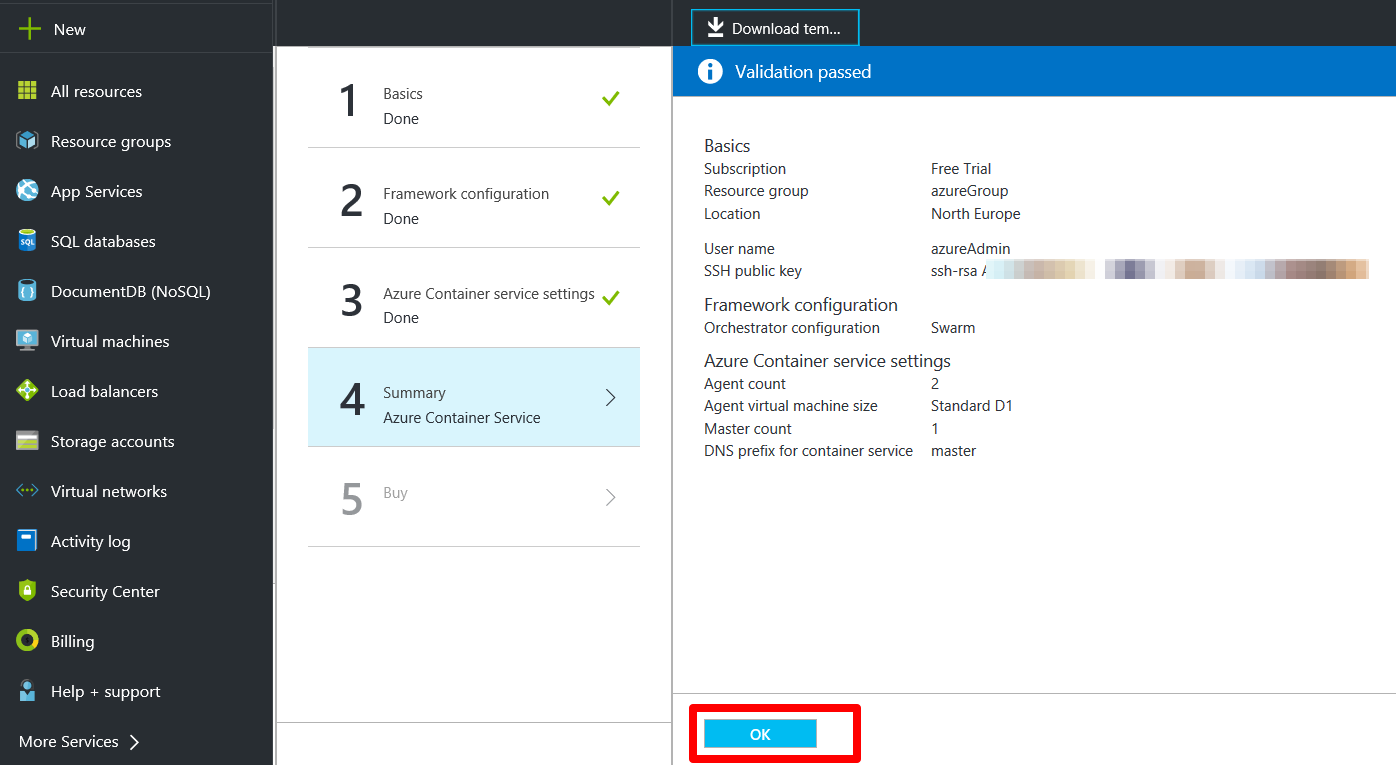
Step 6) Wait for the validation to be finished and click OK
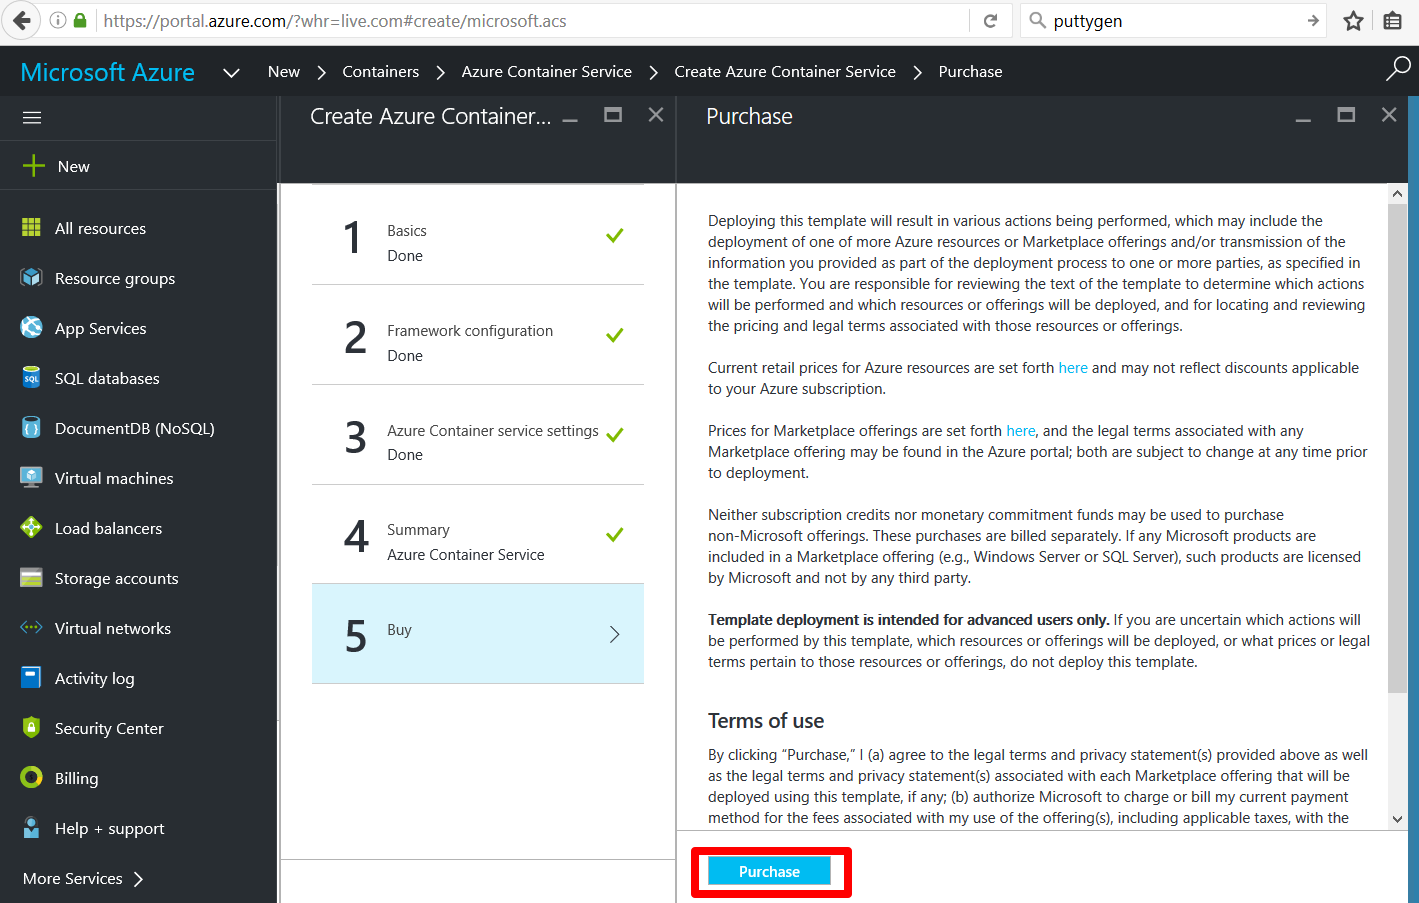
Strep 7) Check the T&C's and click purchase.
Step 8) Wait for the provisioning process to finish.
Connect to the Azure Container Cluster. The Azure Docker Swarm clusters that are deployed by Azure Container Service expose REST endpoints. These are available via a SSH connection. In the following steps a SSH tunnel is going to be setup from the Docker client VM to the master VM provisioned in Azure.
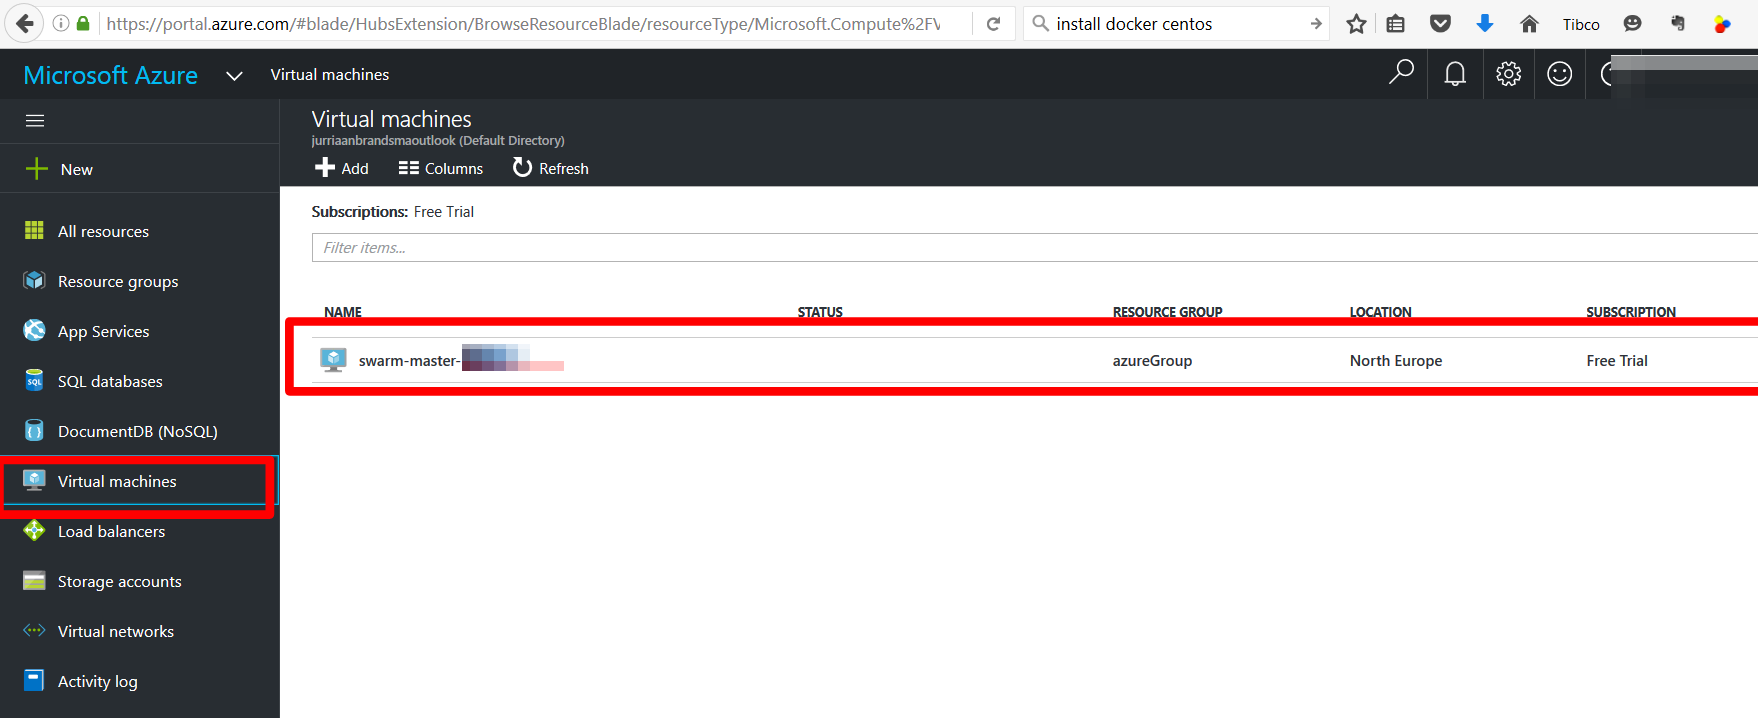
Step 9) Determine the IP address of the master VM.
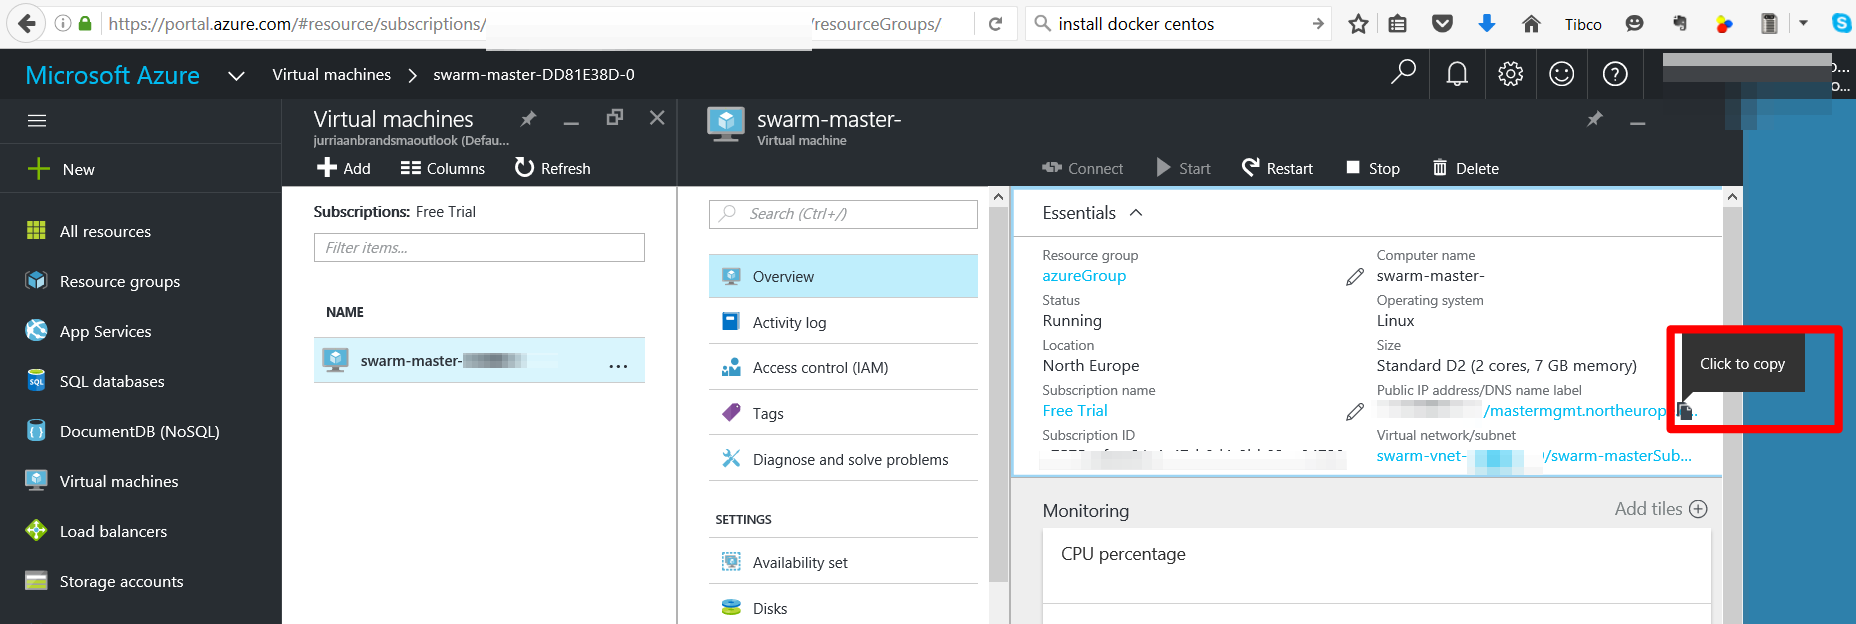
Goto the Azure portal and select Virtual machines and select the swarm-master.
Step 10) Copy the IP address and the DNS name on the clipboard. Save the IP address and DNS name.
Step 11) Copy the openssh private key to the docker client VM. IMPORTANT: use the SSH key saved in the openssh format!
Step 12) Open a terminal on the docker client VM and run the command: "ssh -i <openssh filename> -L 2375:localhost:2375 -f -N <userName>@<azure host name> -p 2200"
<openssh filename> = the name of the openssh private key.
<username> = the user name entered in the first step of the Azure provisioning process.
<azure host name> = the DNS name recorded in the previous step.
Please mind: Microsoft uses 2200 as the SSH port (instead of the standard port 22).
I used the following command.
"ssh -i ~/ssh/openssh -L 2375:localhost:2375 -f -N azureAdmin@mastermgmt.northeurope.cloudapp.azure.com -p 2200"
You will be asked to type the password of the private key. Use the password you entered when you created the SSH keys.
Remark 1: If anything goes wrong during this step use the following command options to generate a logfile: ssh -v -v -v -i <openssh filename> -L 2375:localhost:2375 -f -N <userName>@<azure host name> -p 2200 -E <logfile>
Remark 2: After this step a tunnel is created from localhost:2375 to the masstermgmt server on Azure. This tunnel is to be used to run docker commands.
Step 13) In order to test if the tunnel was setup correctly, startup a browser on your Docker client VM and goto localhost:2375/_ping. It should give back 'Ok'.
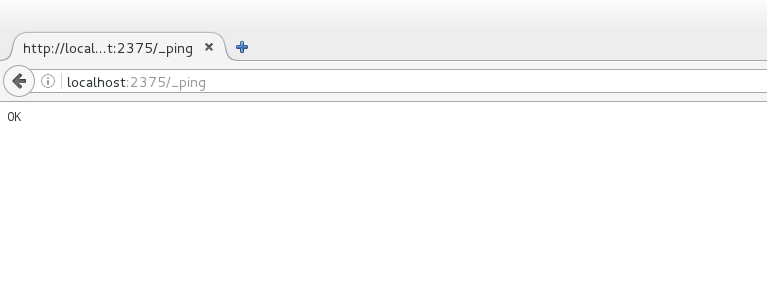
Alternatively you can use 'nc -v localhost 2375' from a terminal. It should respond with: Ncat: Connected to ::1:2375.
Now that a tunnel is established we can use the docker client to manage Swarm.
Step 14) Test access to docker swarm on Azure by typing: docker -H tcp://localhost:2375 info
Step 15) In oder to avoid having to type the -H option every time, run the following command: export DOCKER_HOST=:2375
Step 16) Test by using: docker info
Notice that there are two nodes in our cluster.
–Expected output–
Containers: 0
Running: 0
Paused: 0
Stopped: 0
Images: 0
Role: primary
Strategy: spread
Filters: health, port, dependency, affinity, constraint
Nodes: 2
swarm-agent-XXXXXXXXXX: 10.0.0.4:2375
└ Status: Healthy
└ Containers: 0
└ Reserved CPUs: 0 / 1
└ Reserved Memory: 0 B / 3.528 GiB
└ Labels: executiondriver=, kernelversion=3.19.0-65-generic, operatingsystem=Ubuntu 14.04.4 LTS, storagedriver=aufs
└ Error: (none)
└ UpdatedAt: 2016-09-09T11:20:27Z
swarm-agent-XXXXXXXXXX: 10.0.0.5:2375
└ Status: Healthy
└ Containers: 0
└ Reserved CPUs: 0 / 1
└ Reserved Memory: 0 B / 3.528 GiB
└ Labels: executiondriver=, kernelversion=3.19.0-65-generic, operatingsystem=Ubuntu 14.04.4 LTS, storagedriver=aufs
└ Error: (none)
└ UpdatedAt: 2016-09-09T11:20:39Z
Plugins:
Volume:
Network:
Kernel Version: 3.19.0-65-generic
Operating System: linux
Architecture: amd64
CPUs: 2
Total Memory: 7.056 GiB
Name: 7500f88c0c79
Docker Root Dir:
Debug mode (client): false
Debug mode (server): false
WARNING: No kernel memory limit support
Building a base BWCE image on Azure
While the Swarm cluster on Azure is up-and-running and you established a connection to it, it is time to create a BWCE base image.
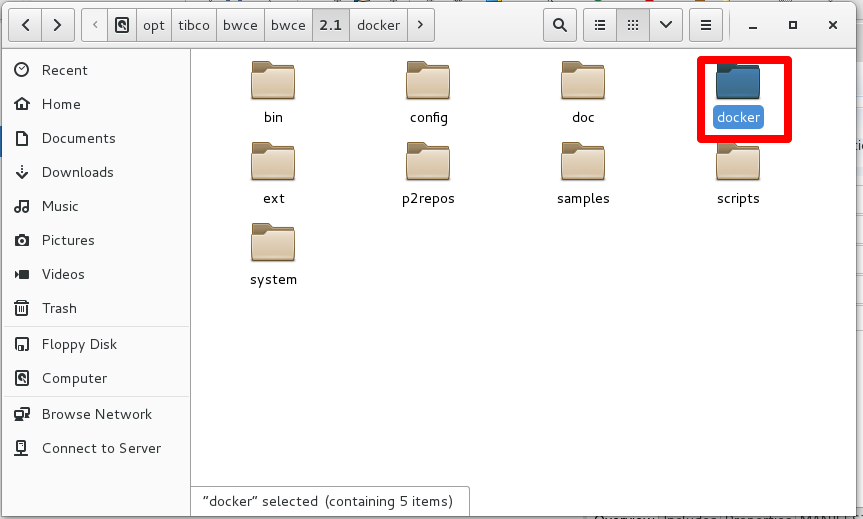
Step 16) Copy the directory <TIBCO HOME>/bwce/<version>/docker from the BWCE VM created in preparation step D to the docker client VM.
There are various ways to do this. This also depends on the hypervisor used to host both VMs. I used Windows + VM Workstation.
Step 16.1) Open the BWCE VM created in preparation step D and copy the directory <TIBCO HOME>/bwce/<version>/docker to the clipboard (if you used a default installation that is opt/tibco/bwce/2.1/docker).
Step 16.2) Past the directory to a temporary directory on the host and copy it again.
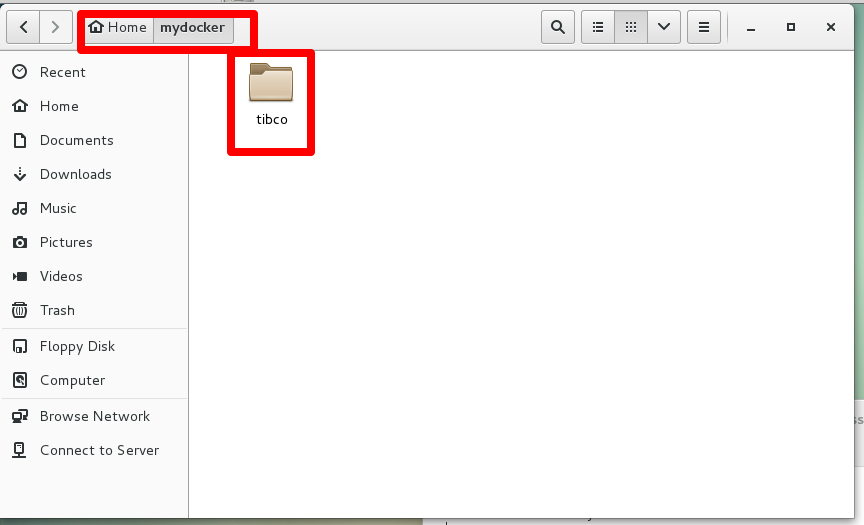
Step 16.3) Open the Docker client VM and past the docker directory to a directory of your choice (I used ~/mydocker/tibco).
Step 17) Download bwce_cf.zip from edelivery. Please mind: it must be downloaded seperately. It is included in the BWCE package. Make sure you select 'container' as the category. If you don't have BW license you may download a trial version from: [http://www.tibco.com/products/businessworks-ce].
Step 18) Copy bwce.cf.zip to home/mydocker/tibco/docker/resources/bwce-runtime (on the docker client VM).
Step 19) Open a terminal on the docker client VM and run 'docker build -t tibco/bwce:latest .' from the directory home/mydocker/tibco/docker
Step 20) type 'docker images' to verify that the BWCE image was created successfully.
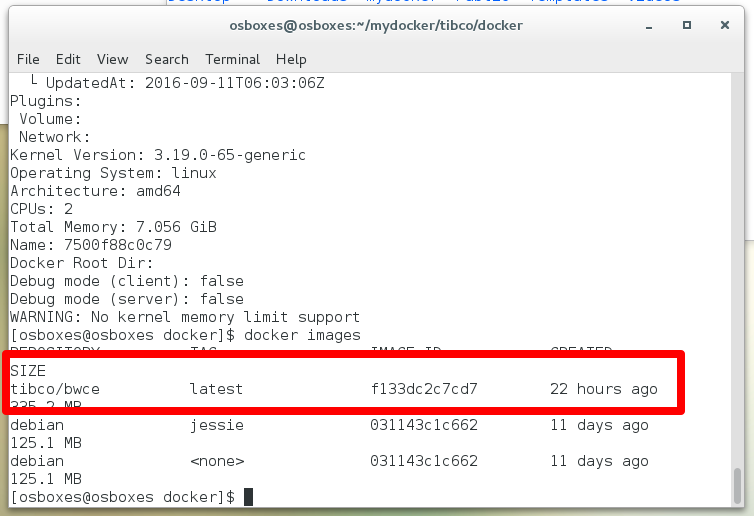
After this step a base BWCE image (on ubuntu) is created on Azure.
Creating an ear file for docker deployment
Now that the base BWCE image is available at Azure, it is time to create an EAR file to be deployed.
Step 21) Open the BWCE VM and open Business studio. Make sure you have the test application loaded (see preparation set E).
Step 22) Switch BWCE to docker (for details see: https://docs.tibco.com/pub/bwce/2.0.0/doc/html/GUID-82095A28-F502-4048-B065-CD187CF48E221.html)
a) Click Windows–>Preferences
b) click BusinessWorks Container Edition -> Container Platform
c) Select 'Docker'
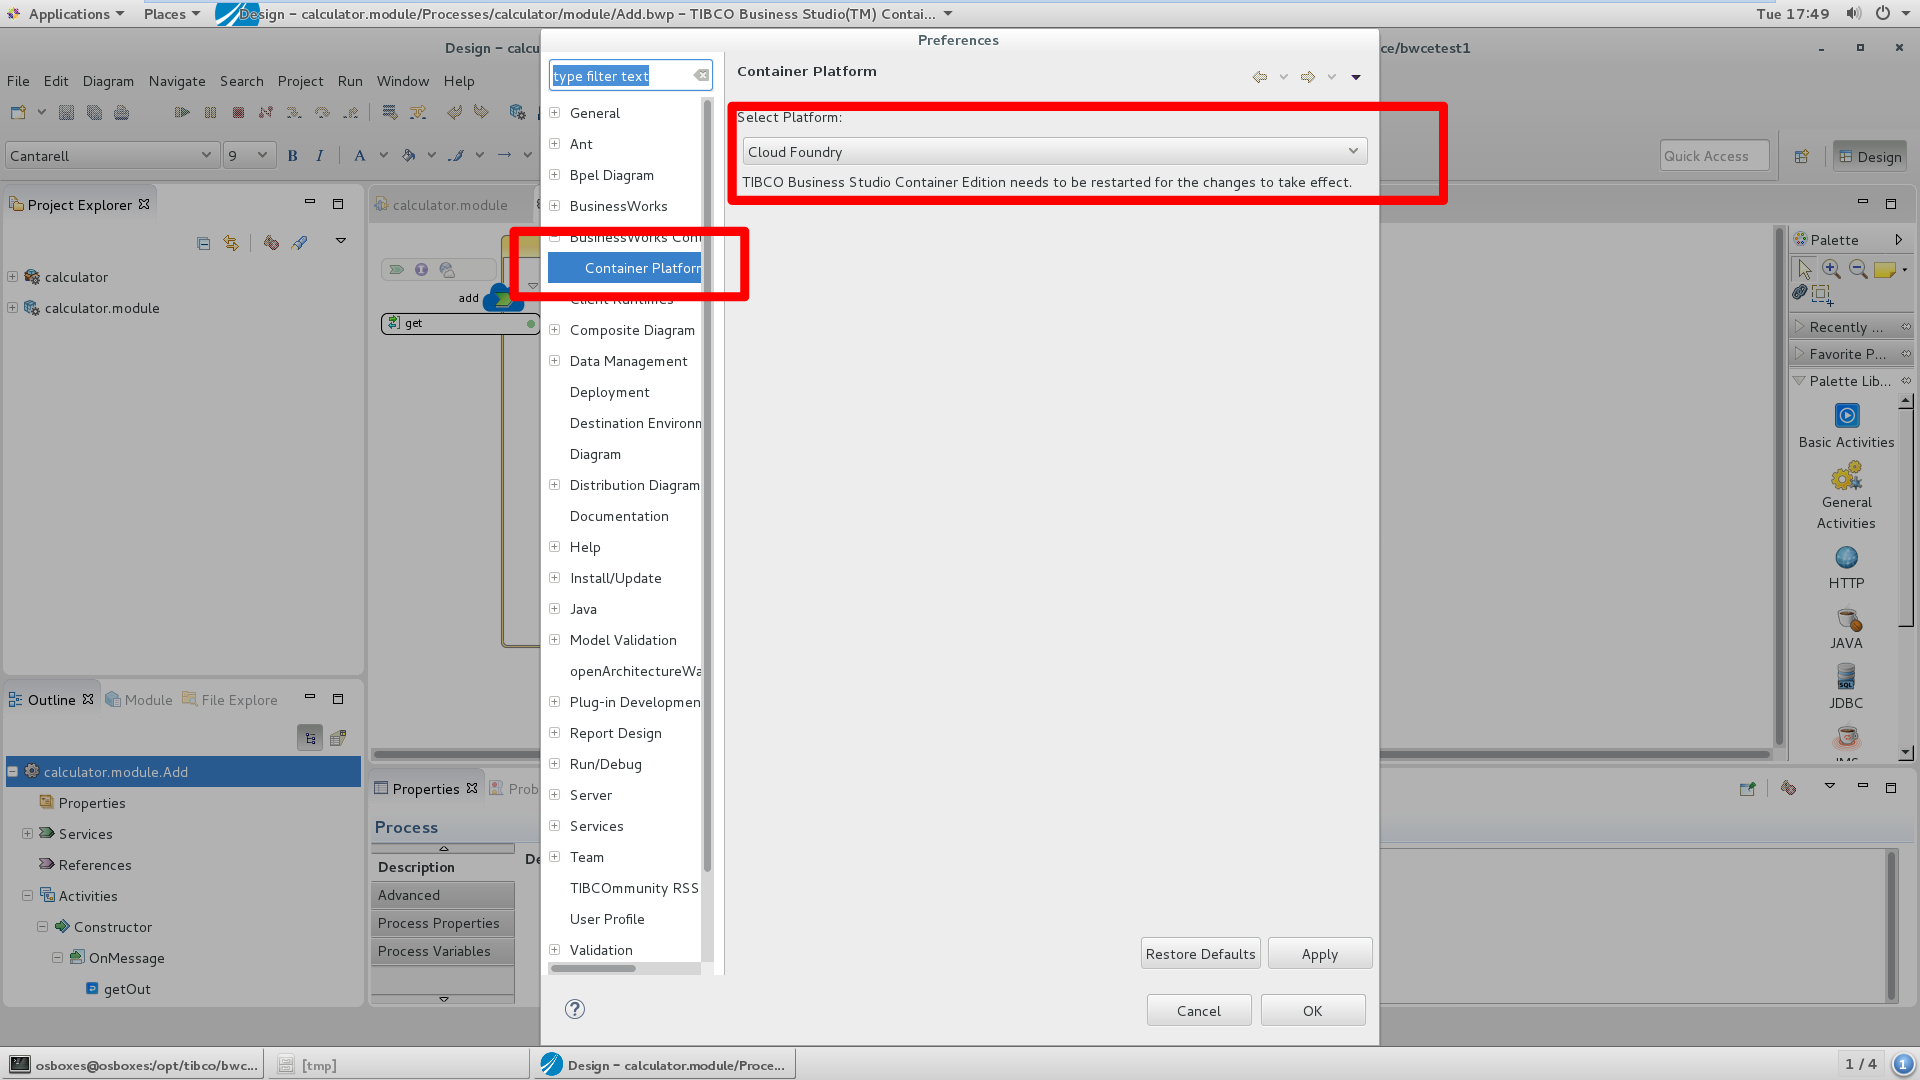
d) restart studio.
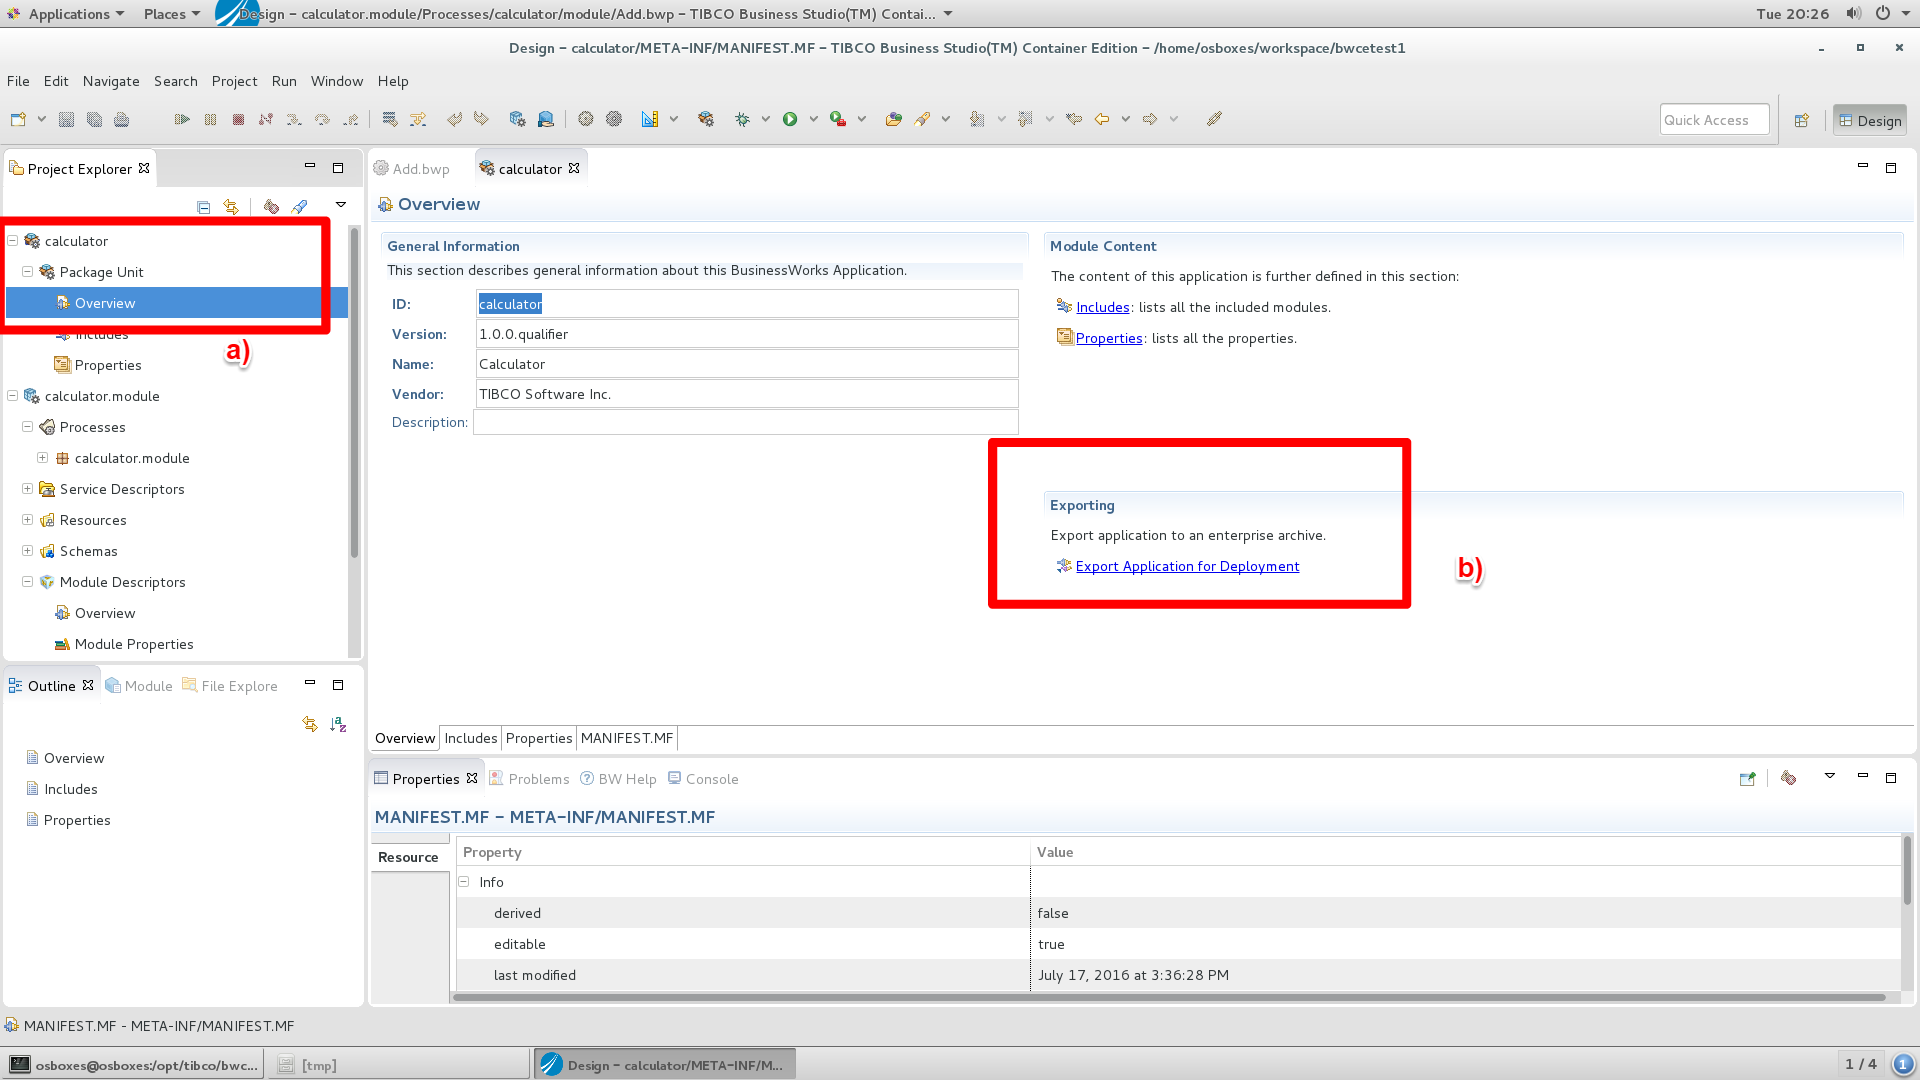
Step 23) Create an EAR file
a) Open calculator –> Package Unit –> Overview (double click)
b) Select 'Export Application for Depoyment'. Name the file calculator_1.0.0.ear.
Step 24) Copy the ear file to the docker client VM.
Deploy the EAR file
The next couple of steps are used to deploy the EAR file on docker on Azure.
Step 25) In the directory in which you stored dcalculator_1.0.0.ear create a file name Dockerfile (mind the capital 'D') with the following content:
FROM tibco/bwce:latest
MAINTAINER tibco
ADD calculator_1.0.0.ear /
EXPOSE 8080
The Dockerfile is used to build a new image (based on the BWCE base image) that includes the calculator ear. For more information on Docker files see: https://www.digitalocean.com/community/tutorials/docker-explained-using-dockerfiles-to-automate-building-of-images
Step 26: Build the application image by running the command: docker build -t add-app . (don't forget about the '.' at the end) from the directory in which you created Dockerfile.
Step 27: Run the command 'docker images'. You should see the newly created image.

Step 28: Run the command 'docker run -i -p 8080:8080 add-app' to start the container. You should get the following response:
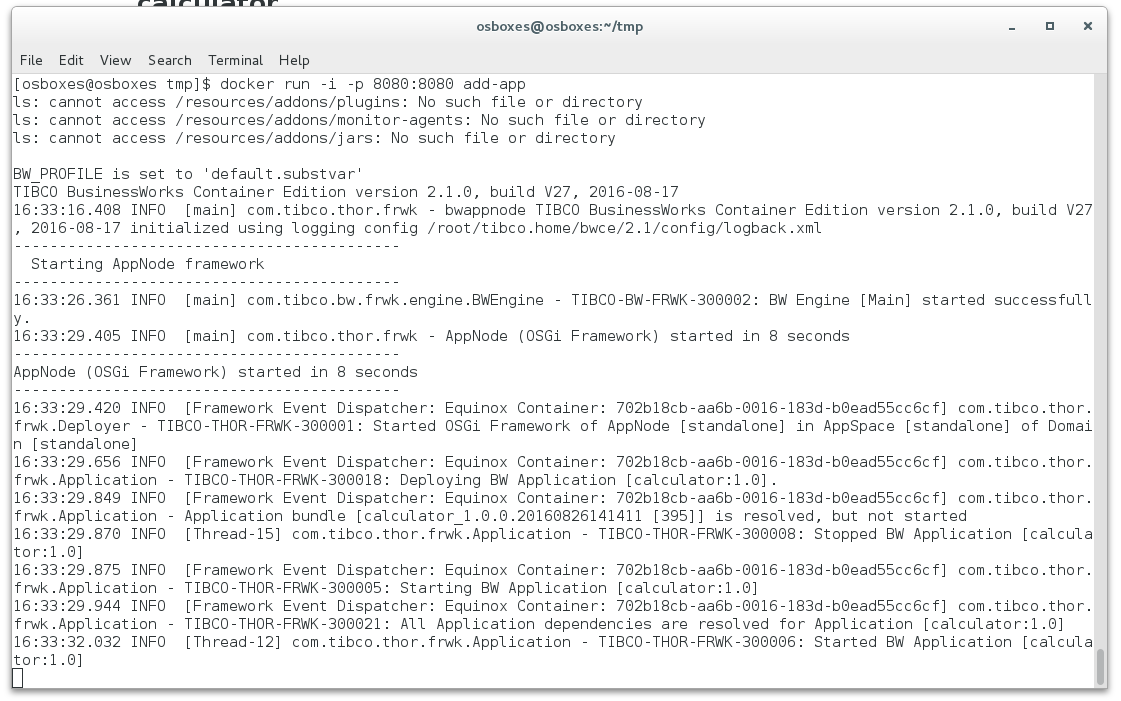
Test the implementations
Now that the containers run successfully, it is time to do a test.
Step 29: Find out the public virtual IP address of the Swarm agent cluster.
Open the azure portal and select Load Balancer–> swam-agent-lb-* –> Overview. Find the public IP address and copy it to the clipboard.
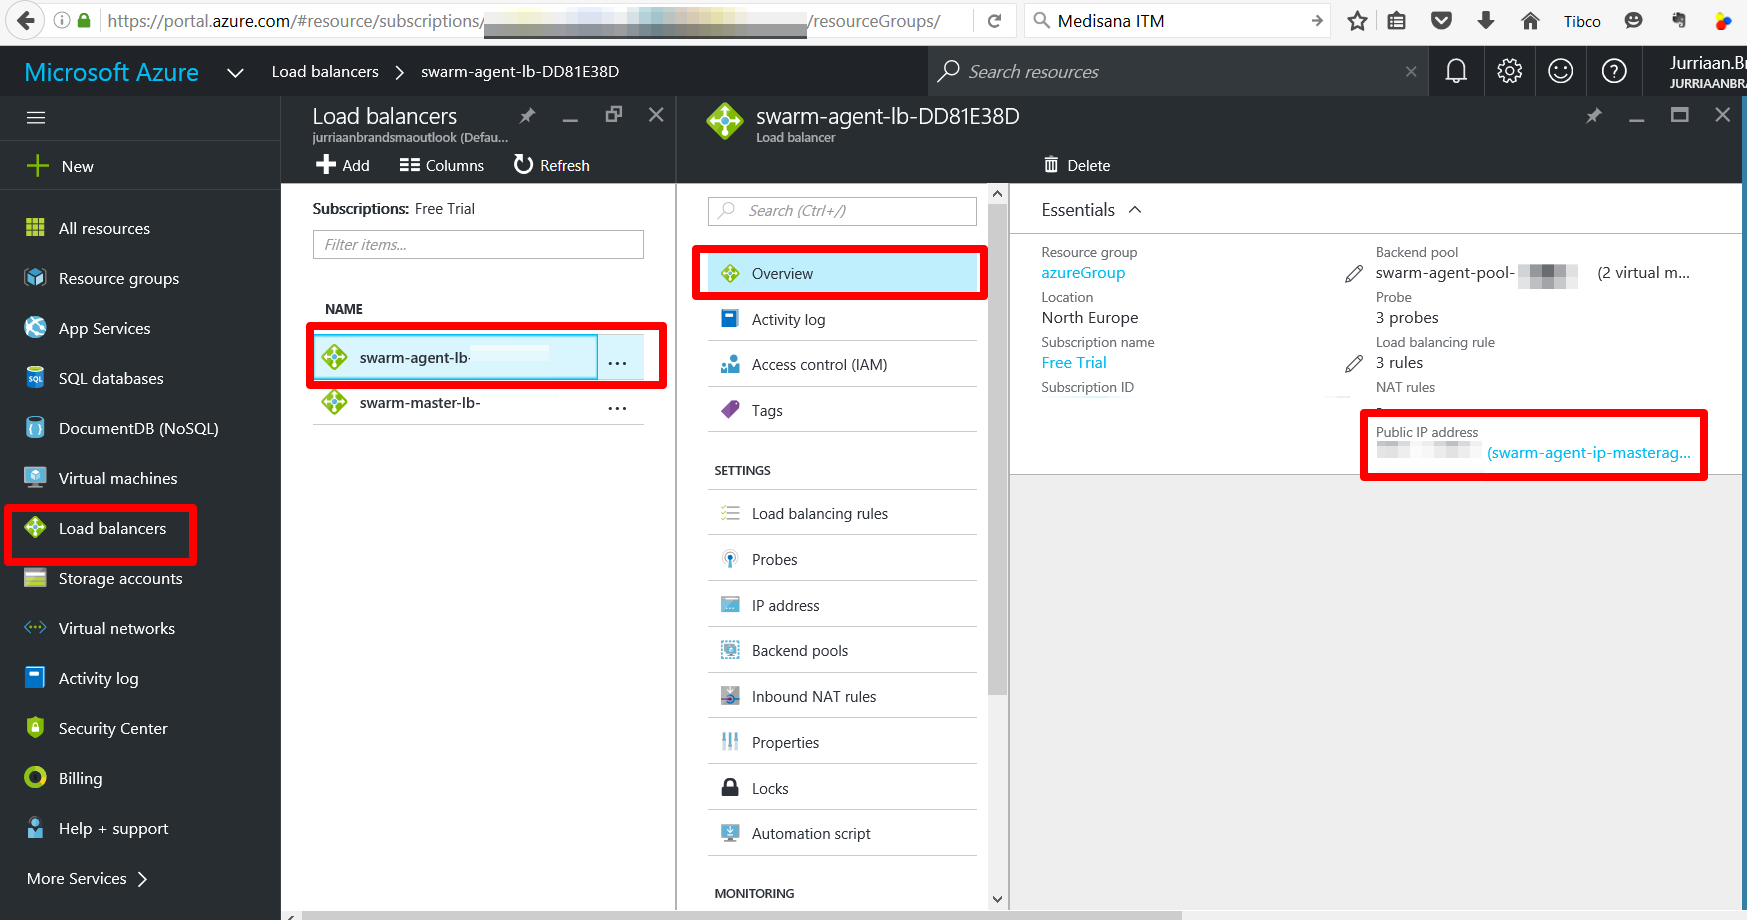
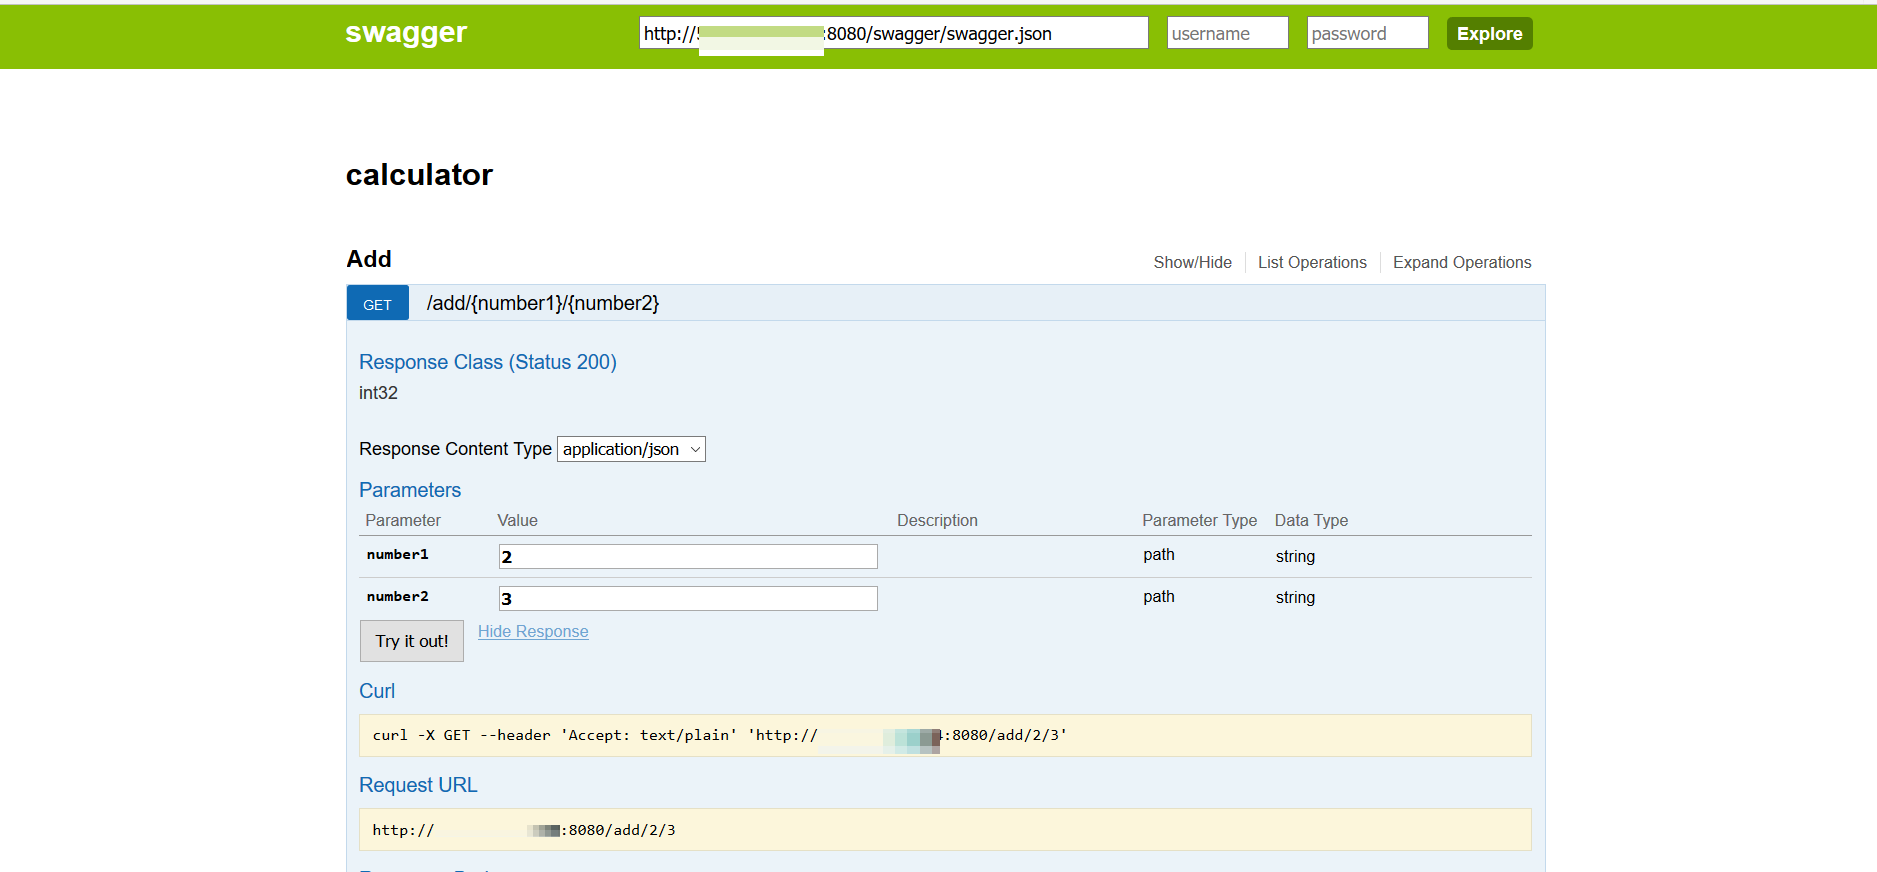
Step 30) Open a browser (on any client connected to the internet) and open the address http://<public virtual agent address>:8080/swagger/ and make a call to the add service.
Reference:
Connect to the Azure Container Service: https://azure.microsoft.com/en-us/documentation/articles/container-service-connect/#swarm-tunnel
Open a port on Azure:https://azure.microsoft.com/en-us/documentation/articles/virtual-machines-windows-nsg-quickstart-portal/