This document contains a description on how to access a TIBCO EMS queue via the Java API. This document assumes the use of Windows and EMS 8.x.
Prerequisites:
- It is assumed that you have Eclipse (Kepler) for Jave EE for Windows installed. Eclipse can be downloaded here.
- It is assumed JAVA 8 JDK is installed.
Step 1) Download EMS.
Download the latest 8.x version of EMS from https://edelivery.tibco.com if you have a licence. If you haven’t get a trial version from https://www.tibco.com/products/tibco-messaging/downloads.
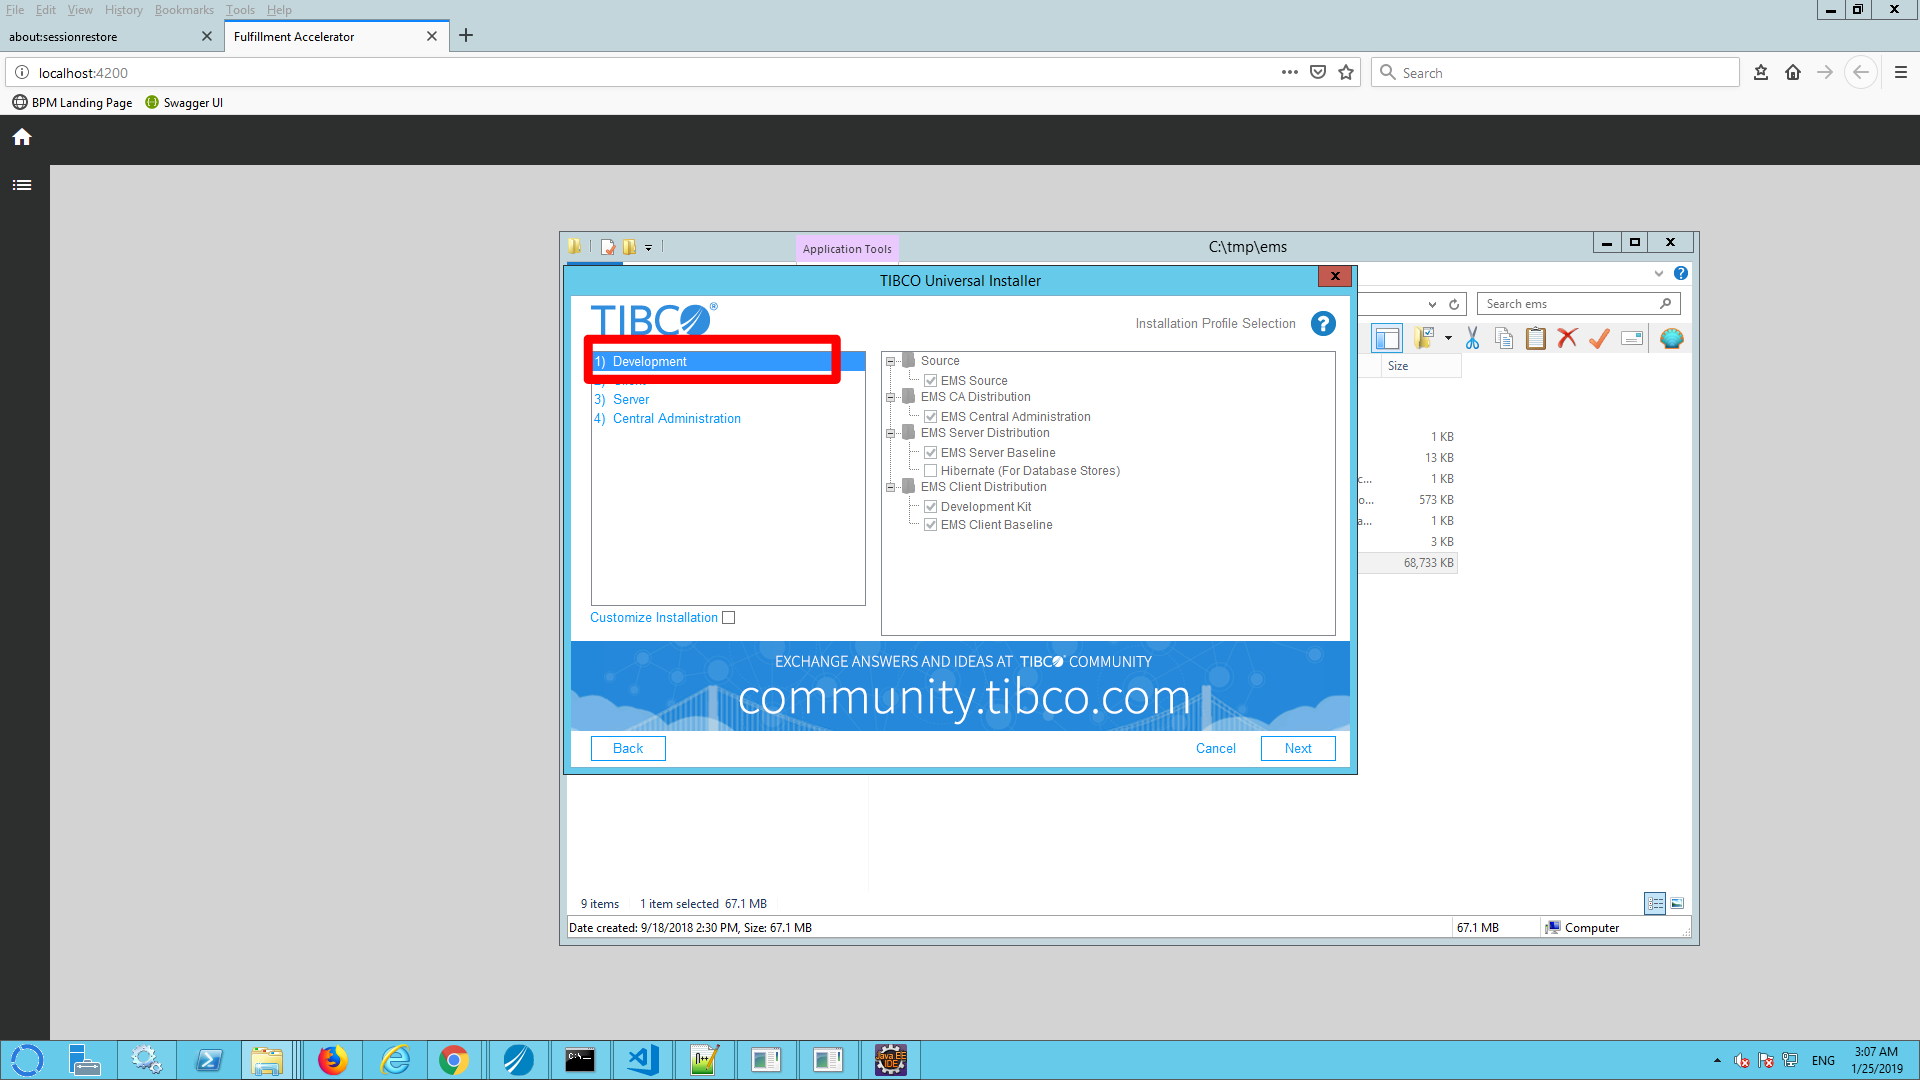
Step 2) Install TIBCO EMS. See for details here. Use the ‘install in gui mode’ and select the developer profile.
Step 3) Start the EMS server
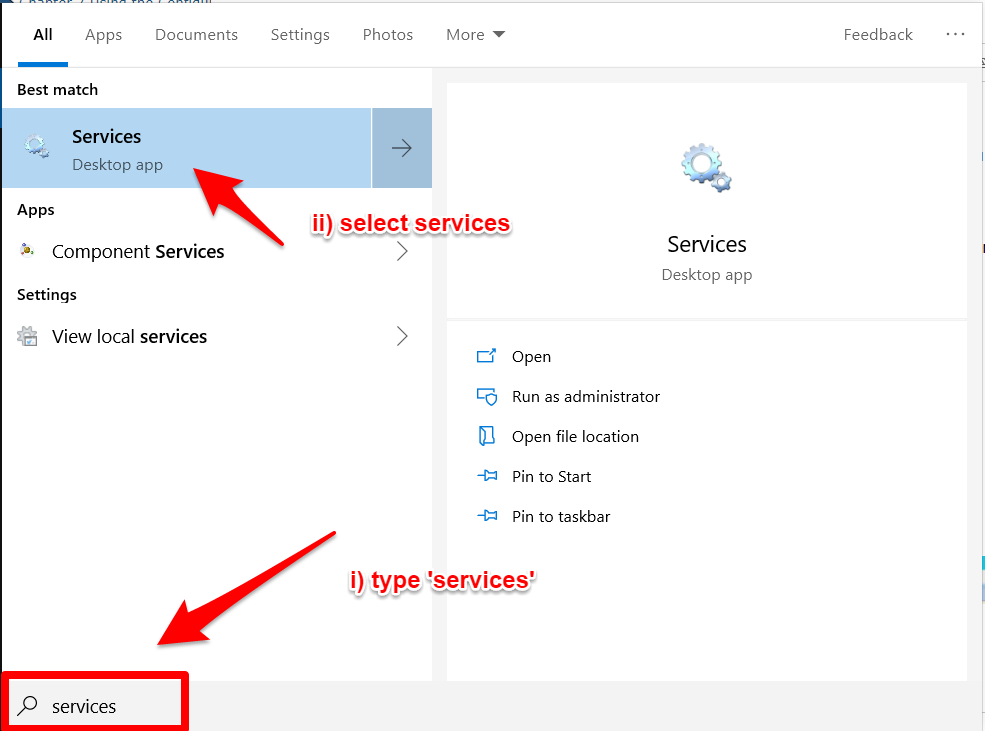
a) Click the ‘search’ button in windows:

b) Type ‘services’ and select ‘services’
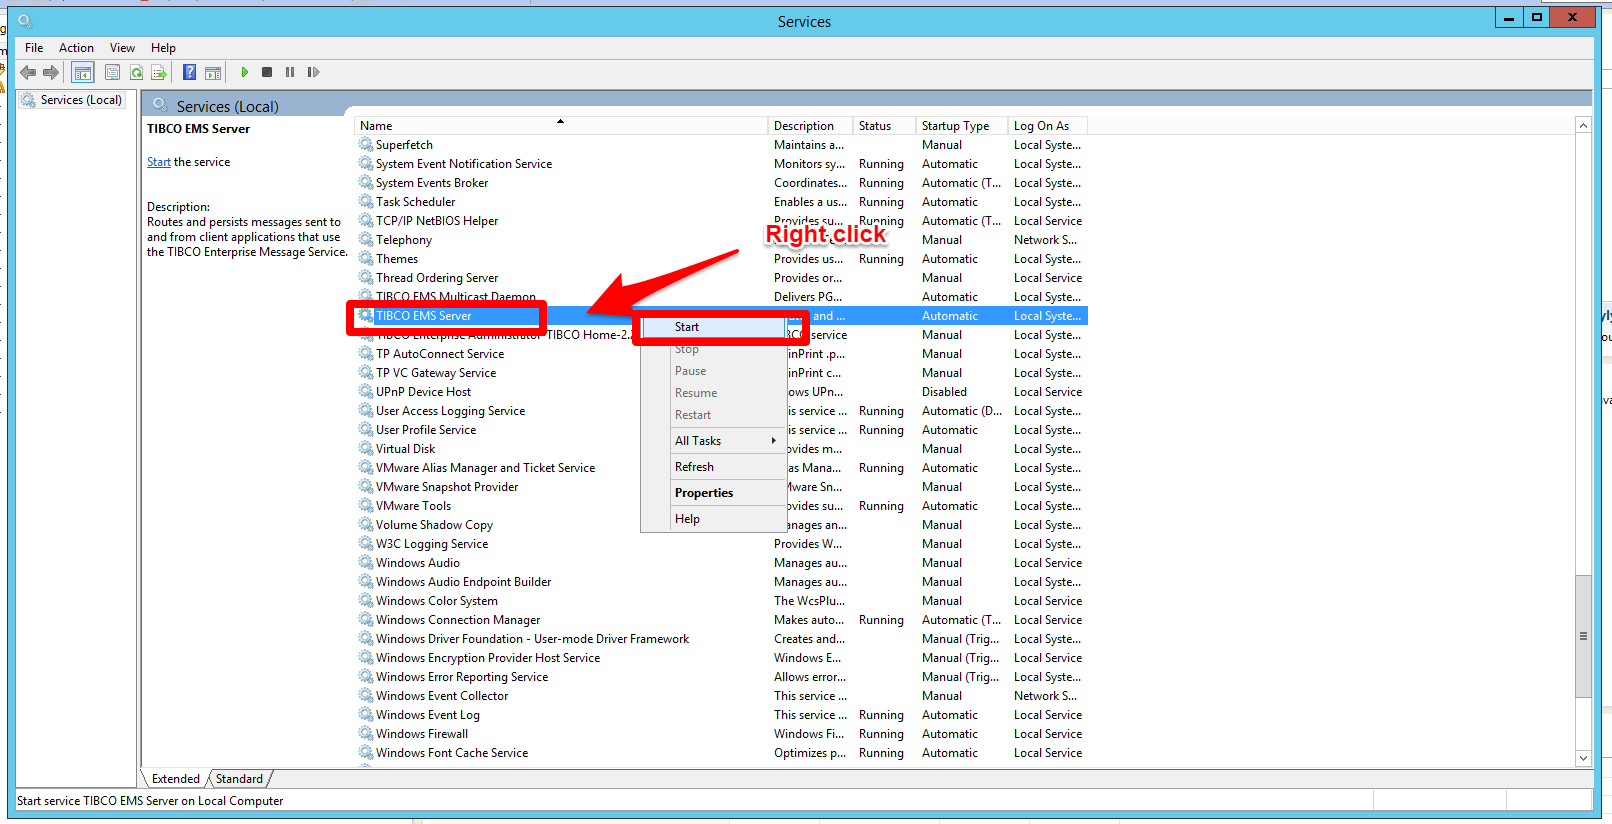
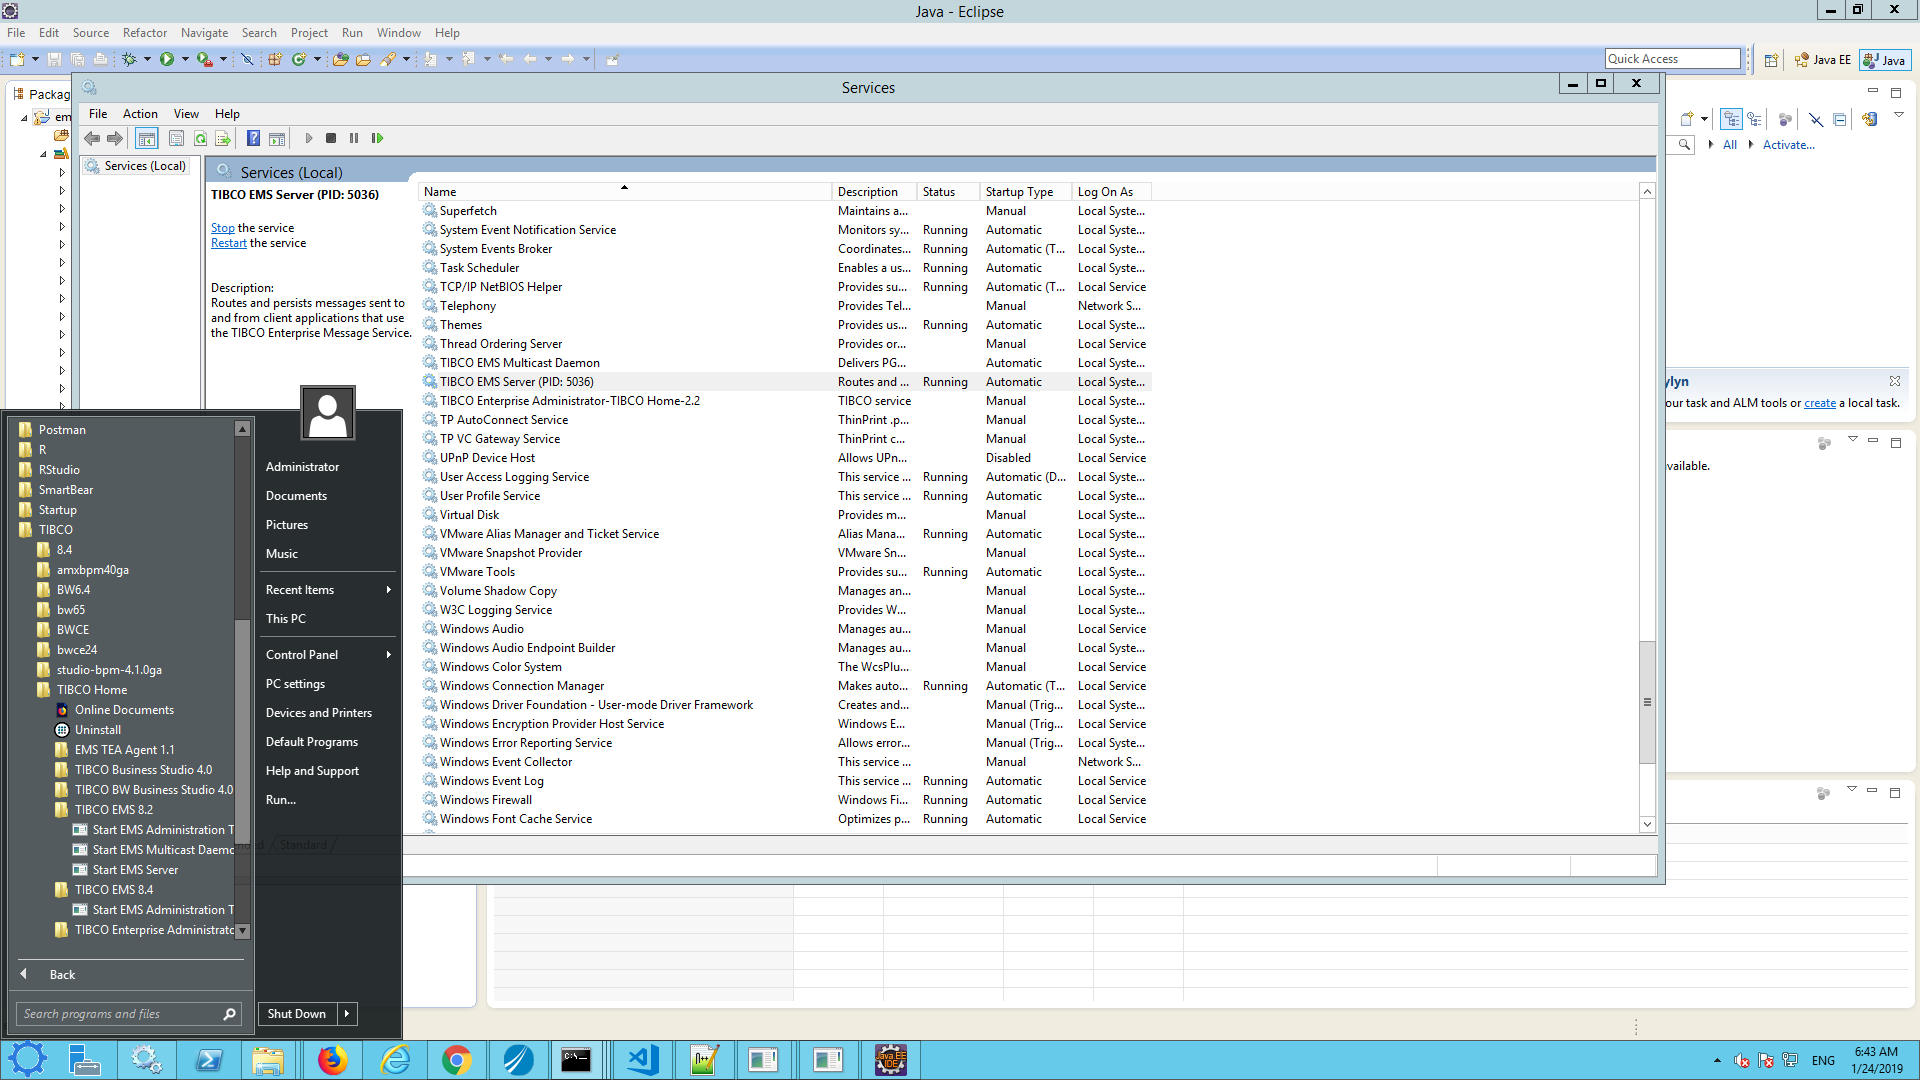
c) Scroll down to find TIBCO EMS Server, right click the entry and select ‘start’
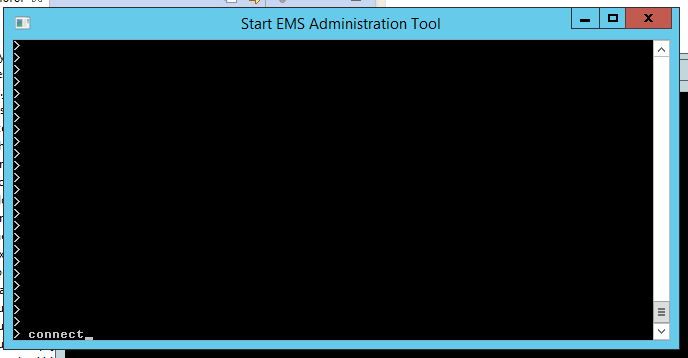
Step 4) Open a EMS console
a) In windows select start –> all program’s –> TIBCO –> tibco home -> ems -> <version> –> start EMS administration Tool
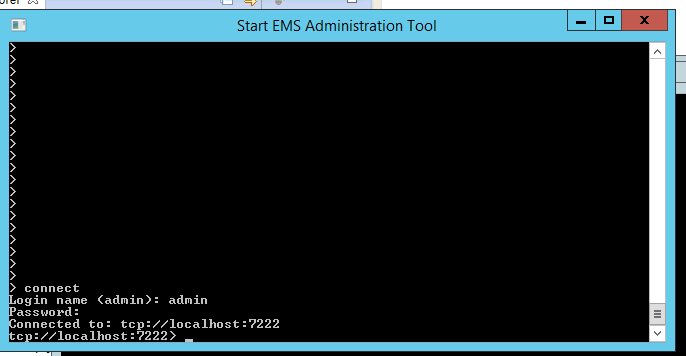
b) Type ‘connect’ (in the Administration tool)
c) Use ‘admin’ as the userID with an empty password.
The Admin console should look like this:
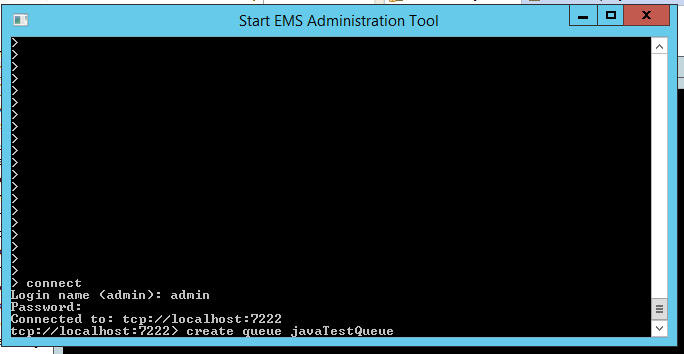
Step 5) Create a test queue
a) Go to the Admin console and type ‘create queue javaTestQueue’.
This will create a new queue named ‘javaTestQueue’. We will use this queue later on.
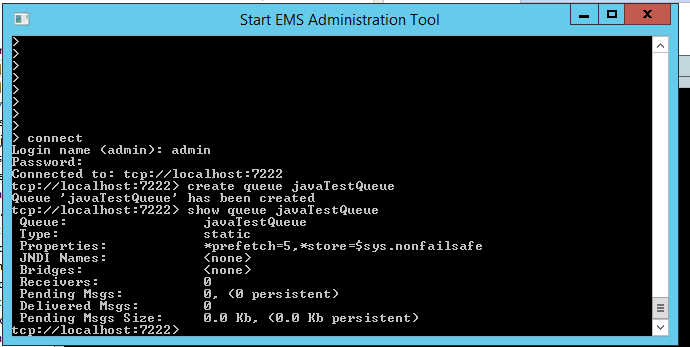
b) Verify that the queue is created by typing ‘show queue javaTestQueue’. You will get the following response.
Please mind: currently no messages are stored in the queue (Pending Msgs = 0).
Step 5) Import the sample project in Eclipse
a) Download the following zip and store it on your harddisk
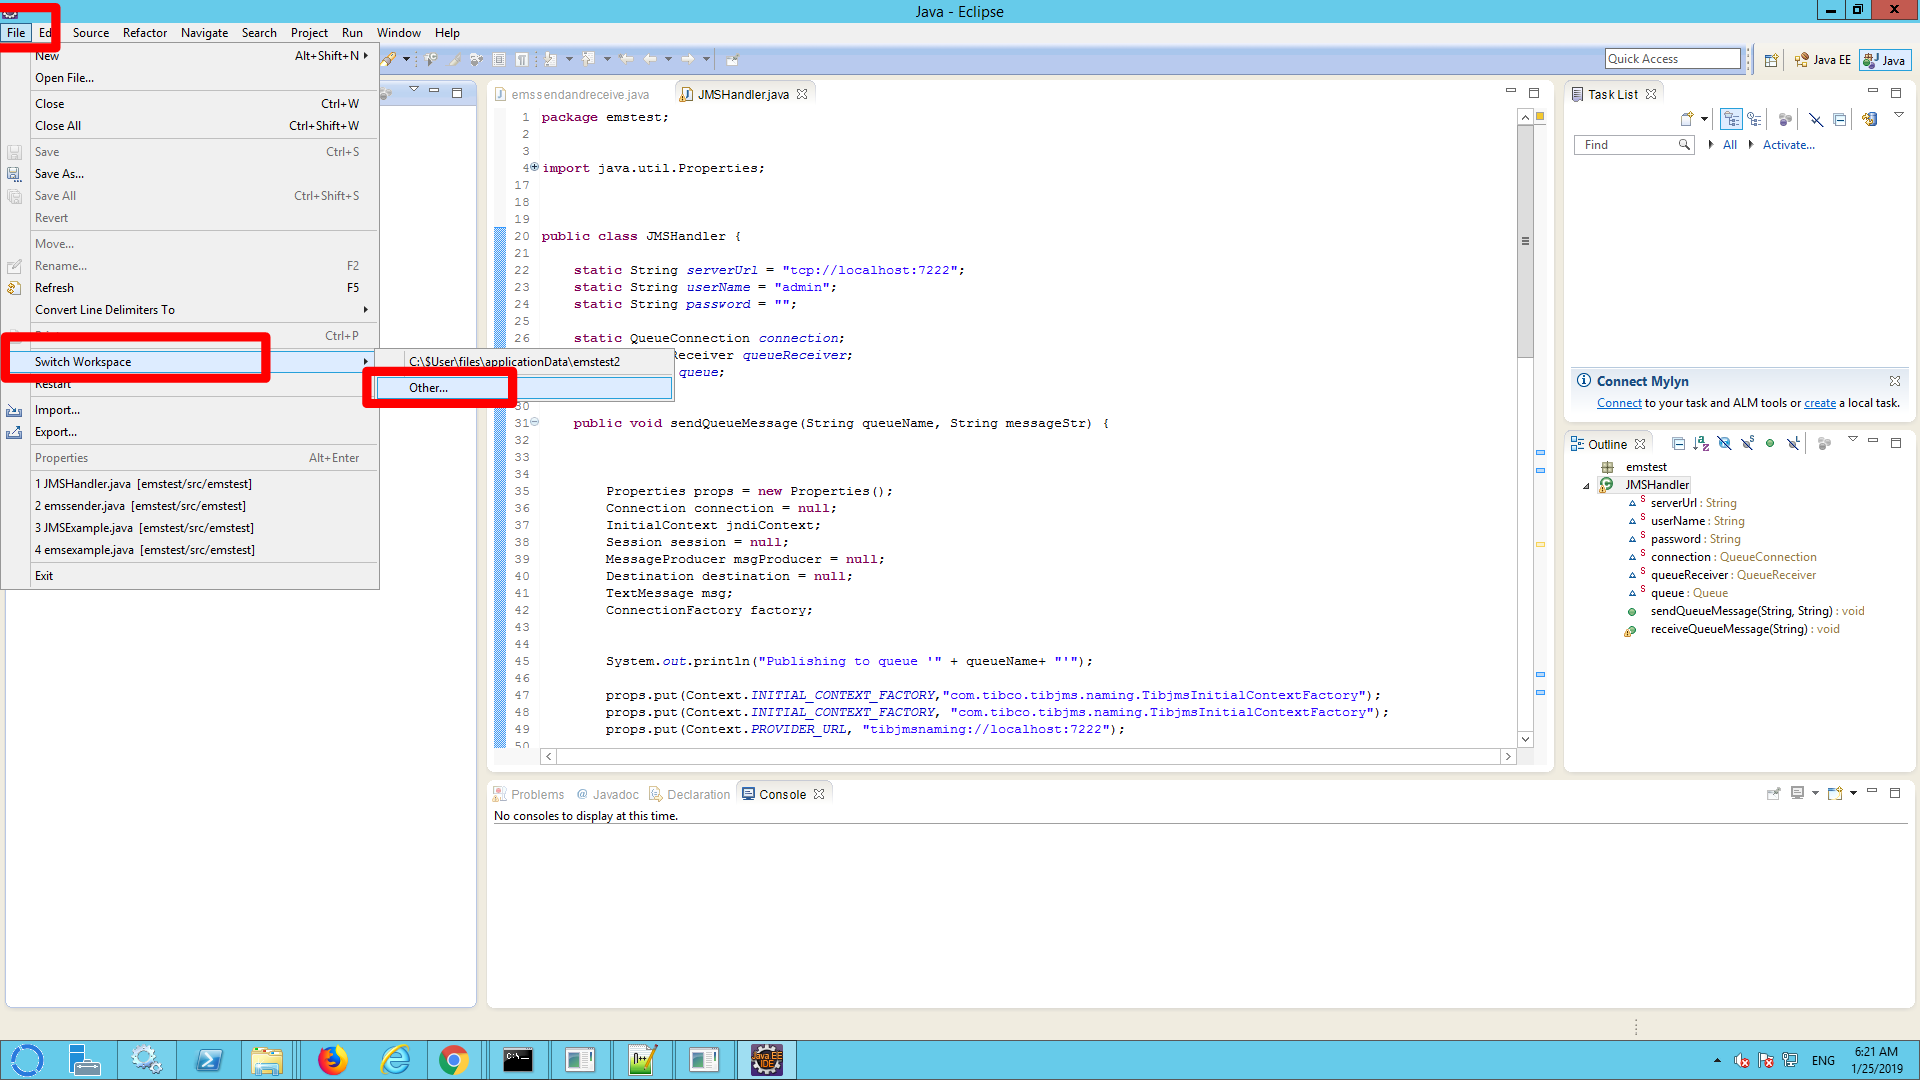
b) Startup eclipse and click File –> Switch Workspace –> Other
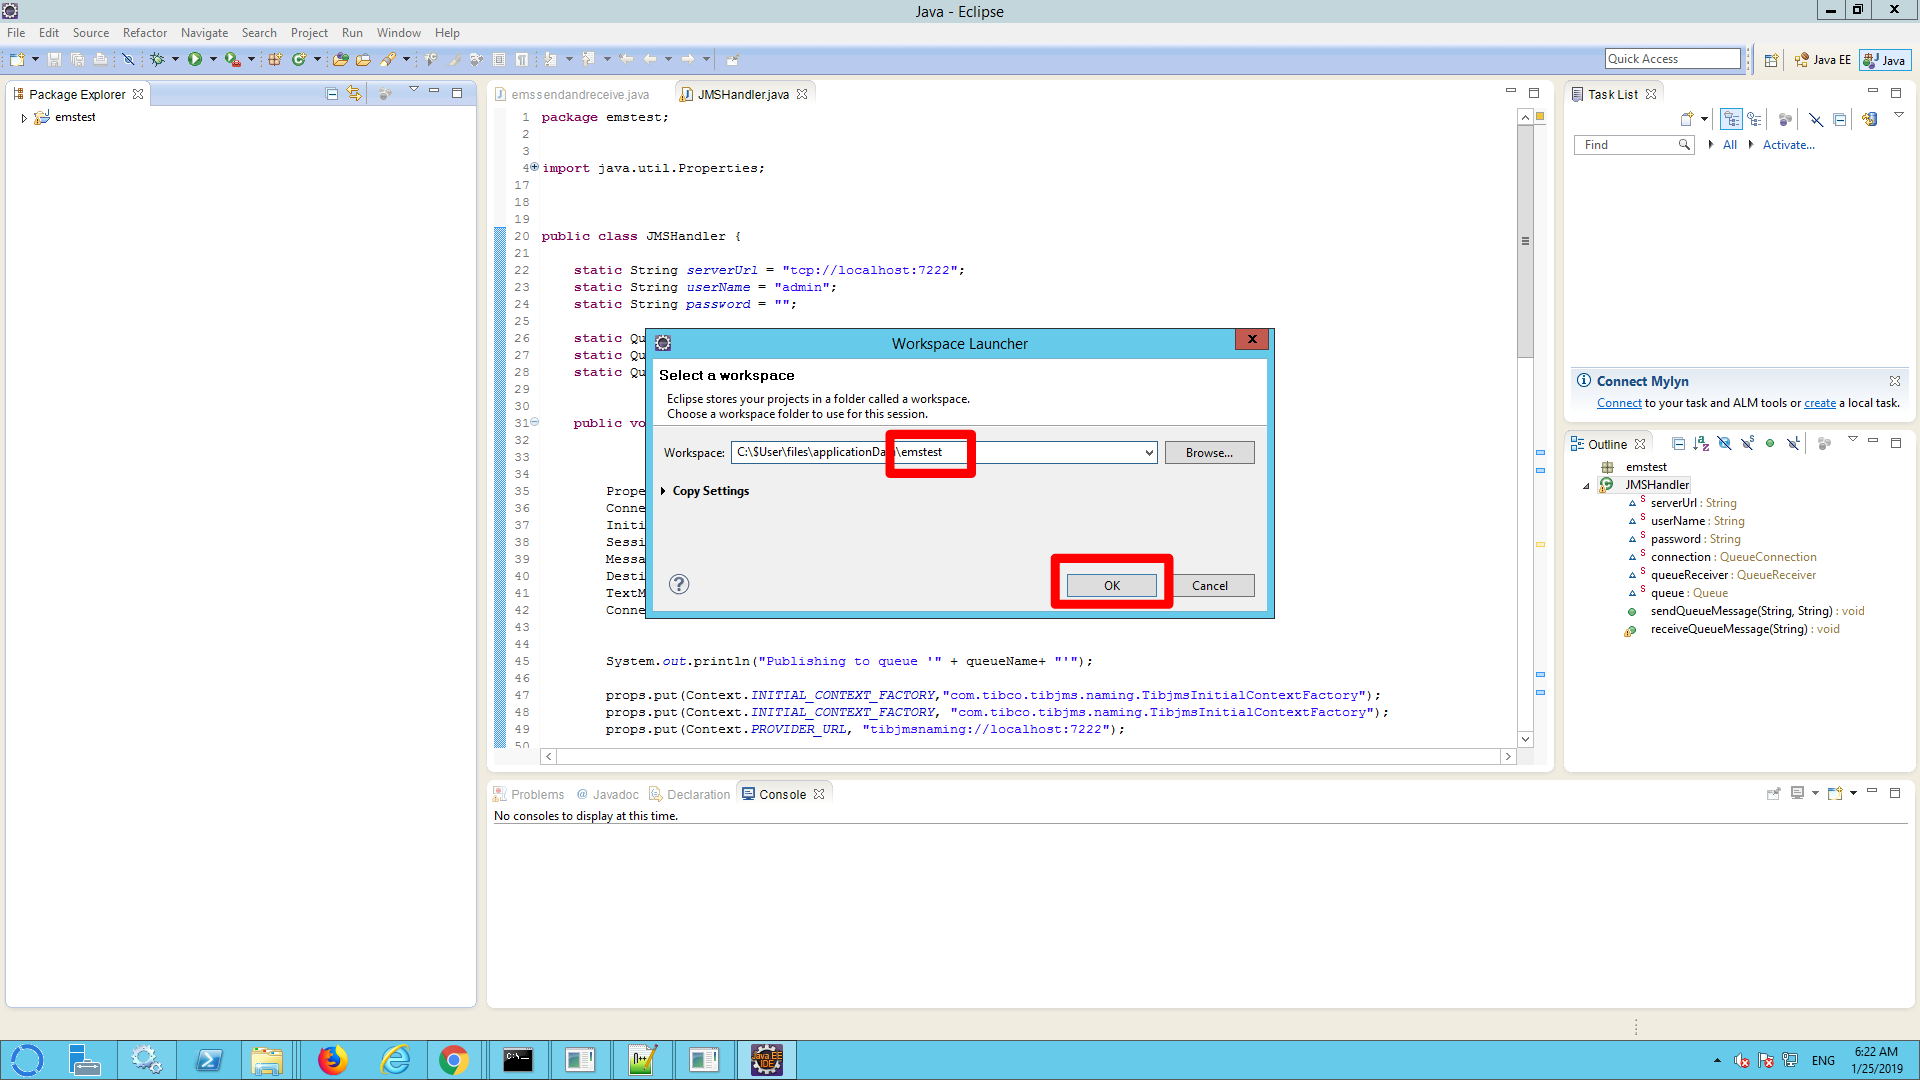
c) Create a new workspace name emstest (in any desired directory) and click ‘ok’.
d) Close the welcome screen

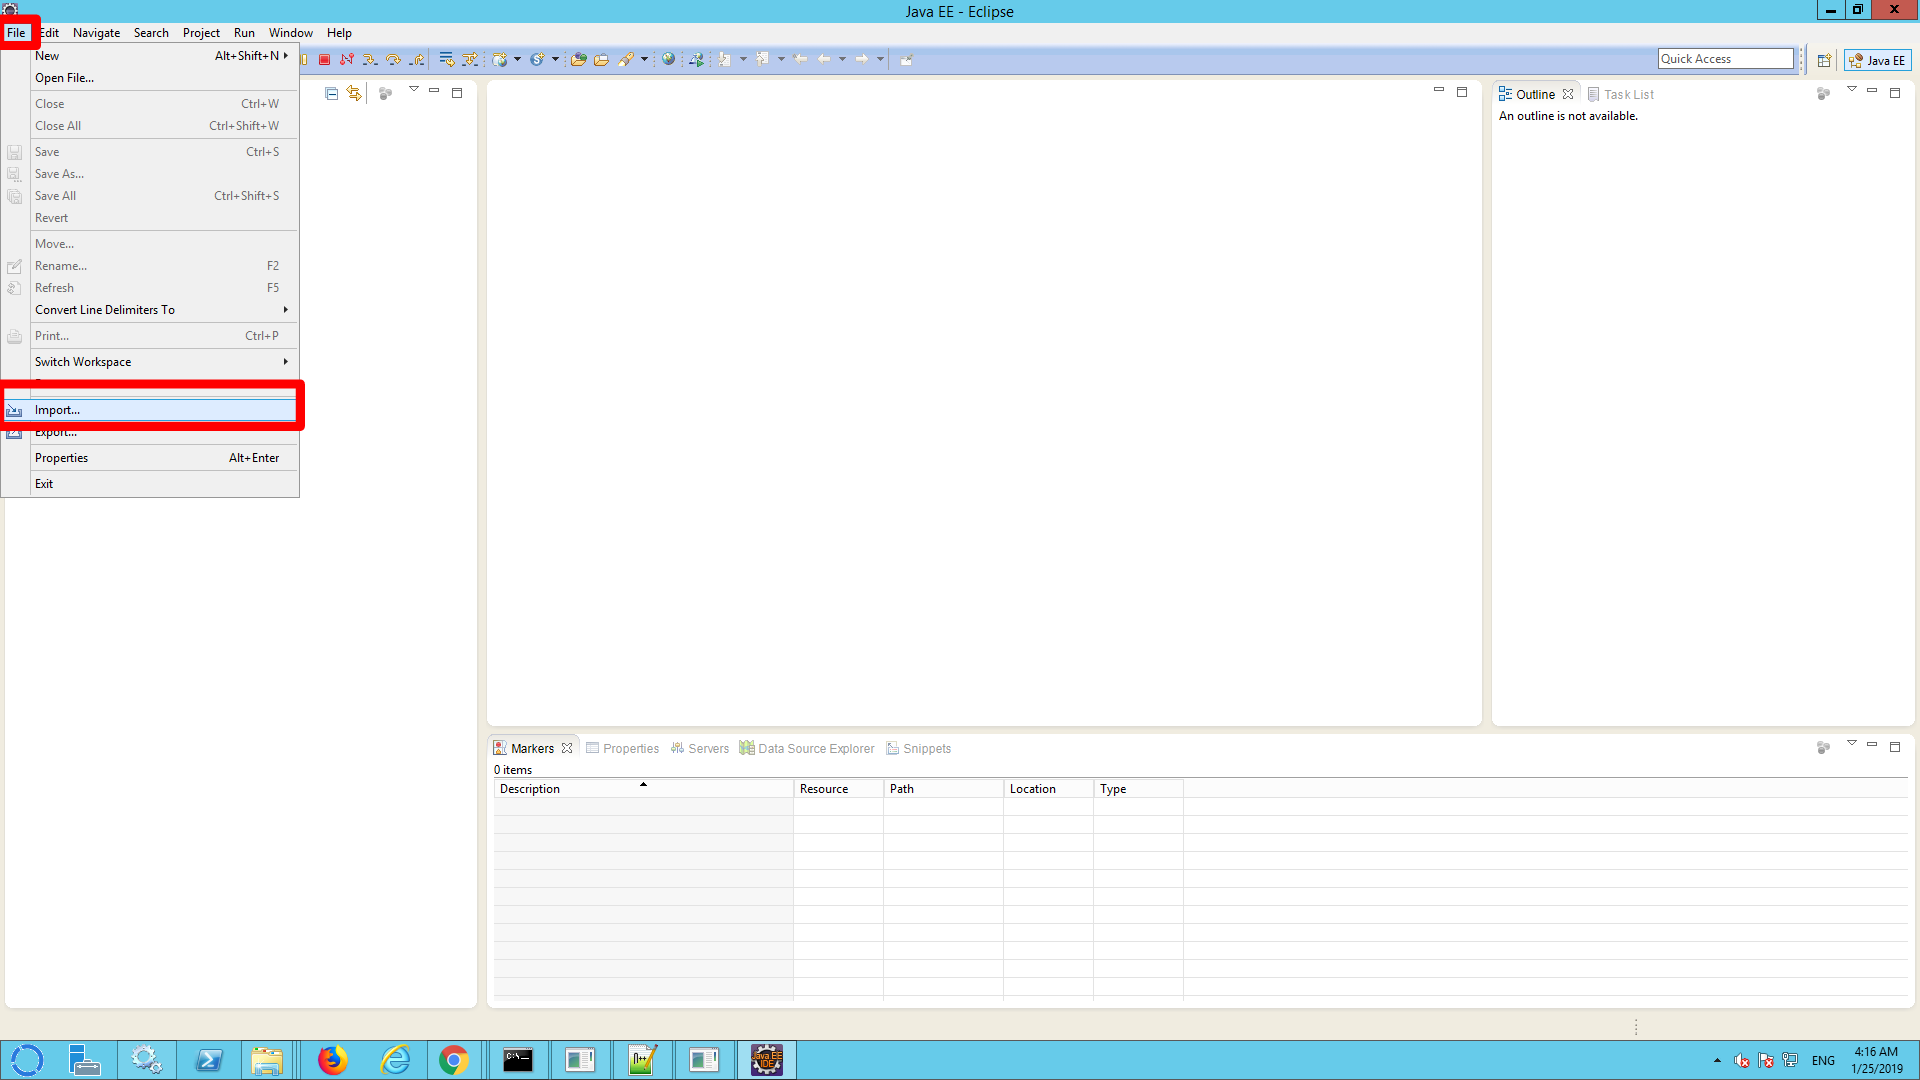
e) click file –> import
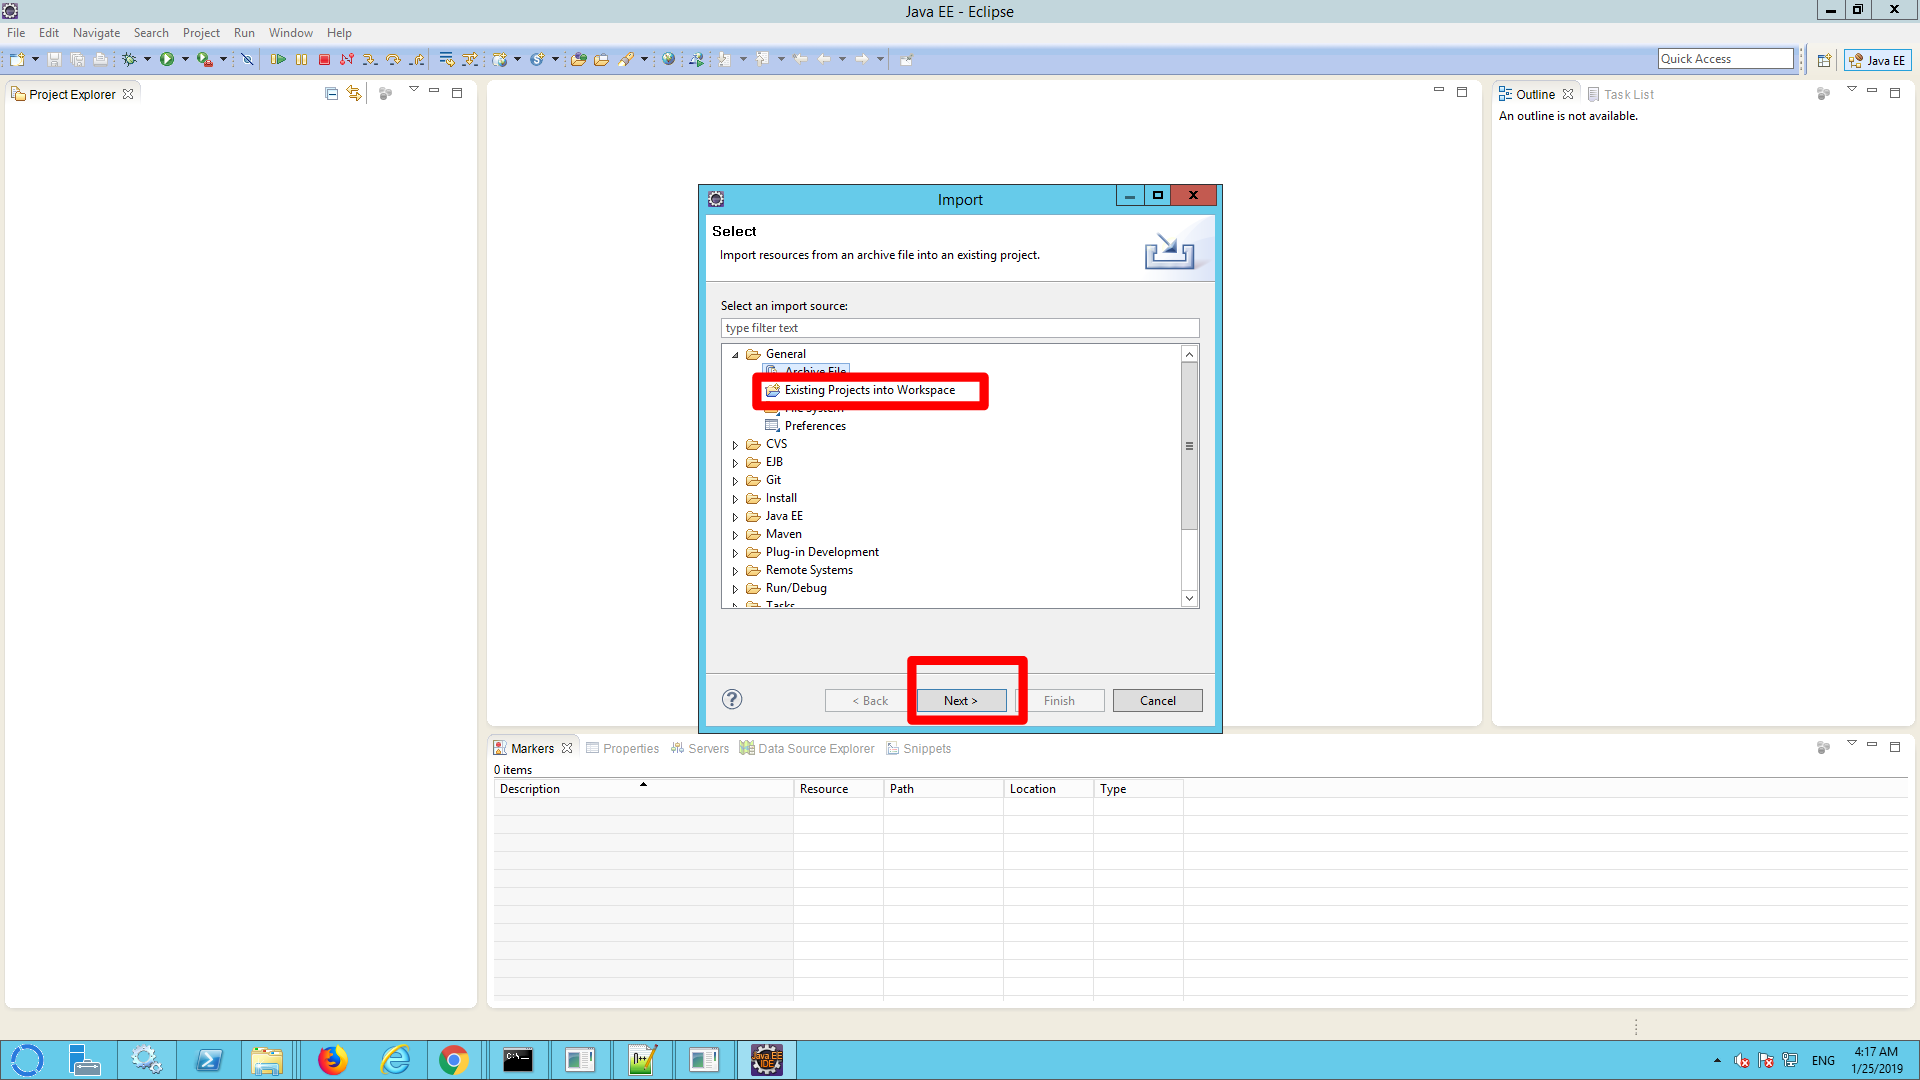
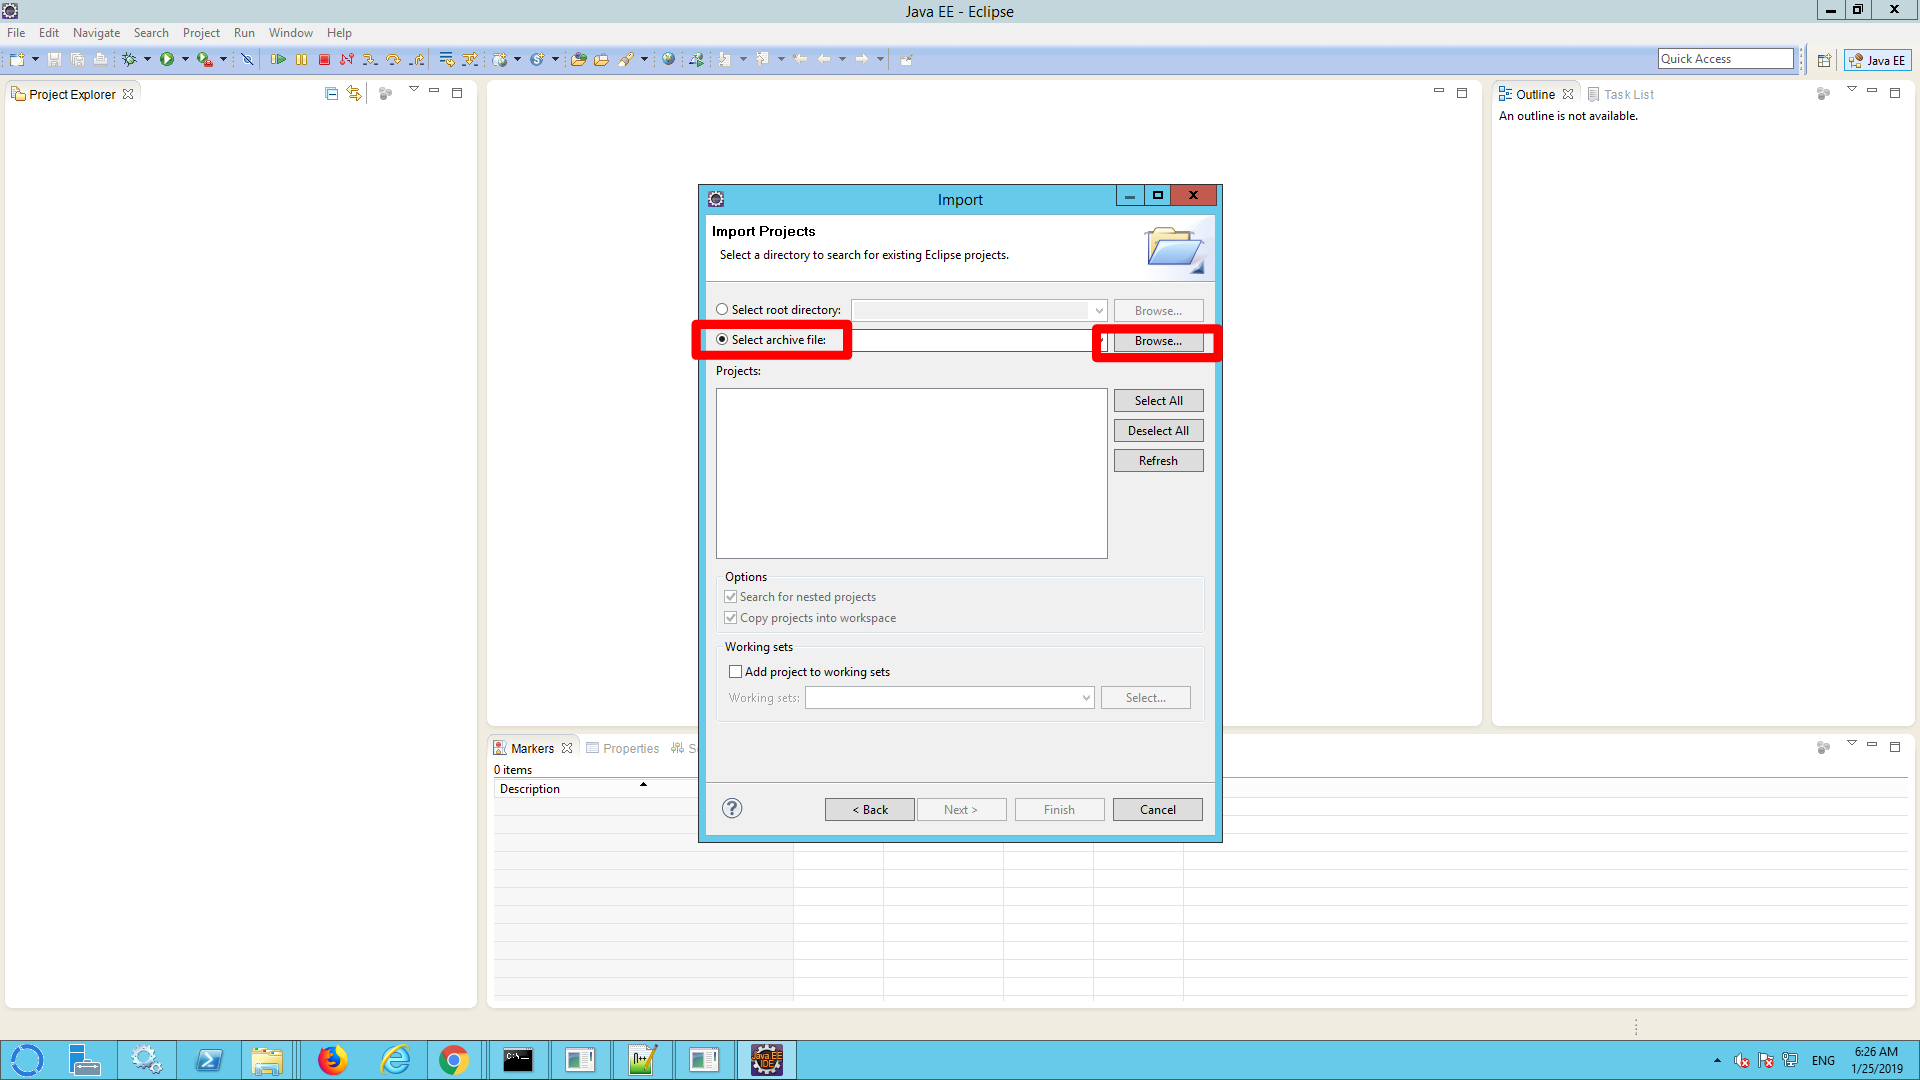
f) Select ‘general’–> ‘existing Projects into workspace’ and click ‘next’
g) Choose ‘Select archive file’ and click ‘browse’
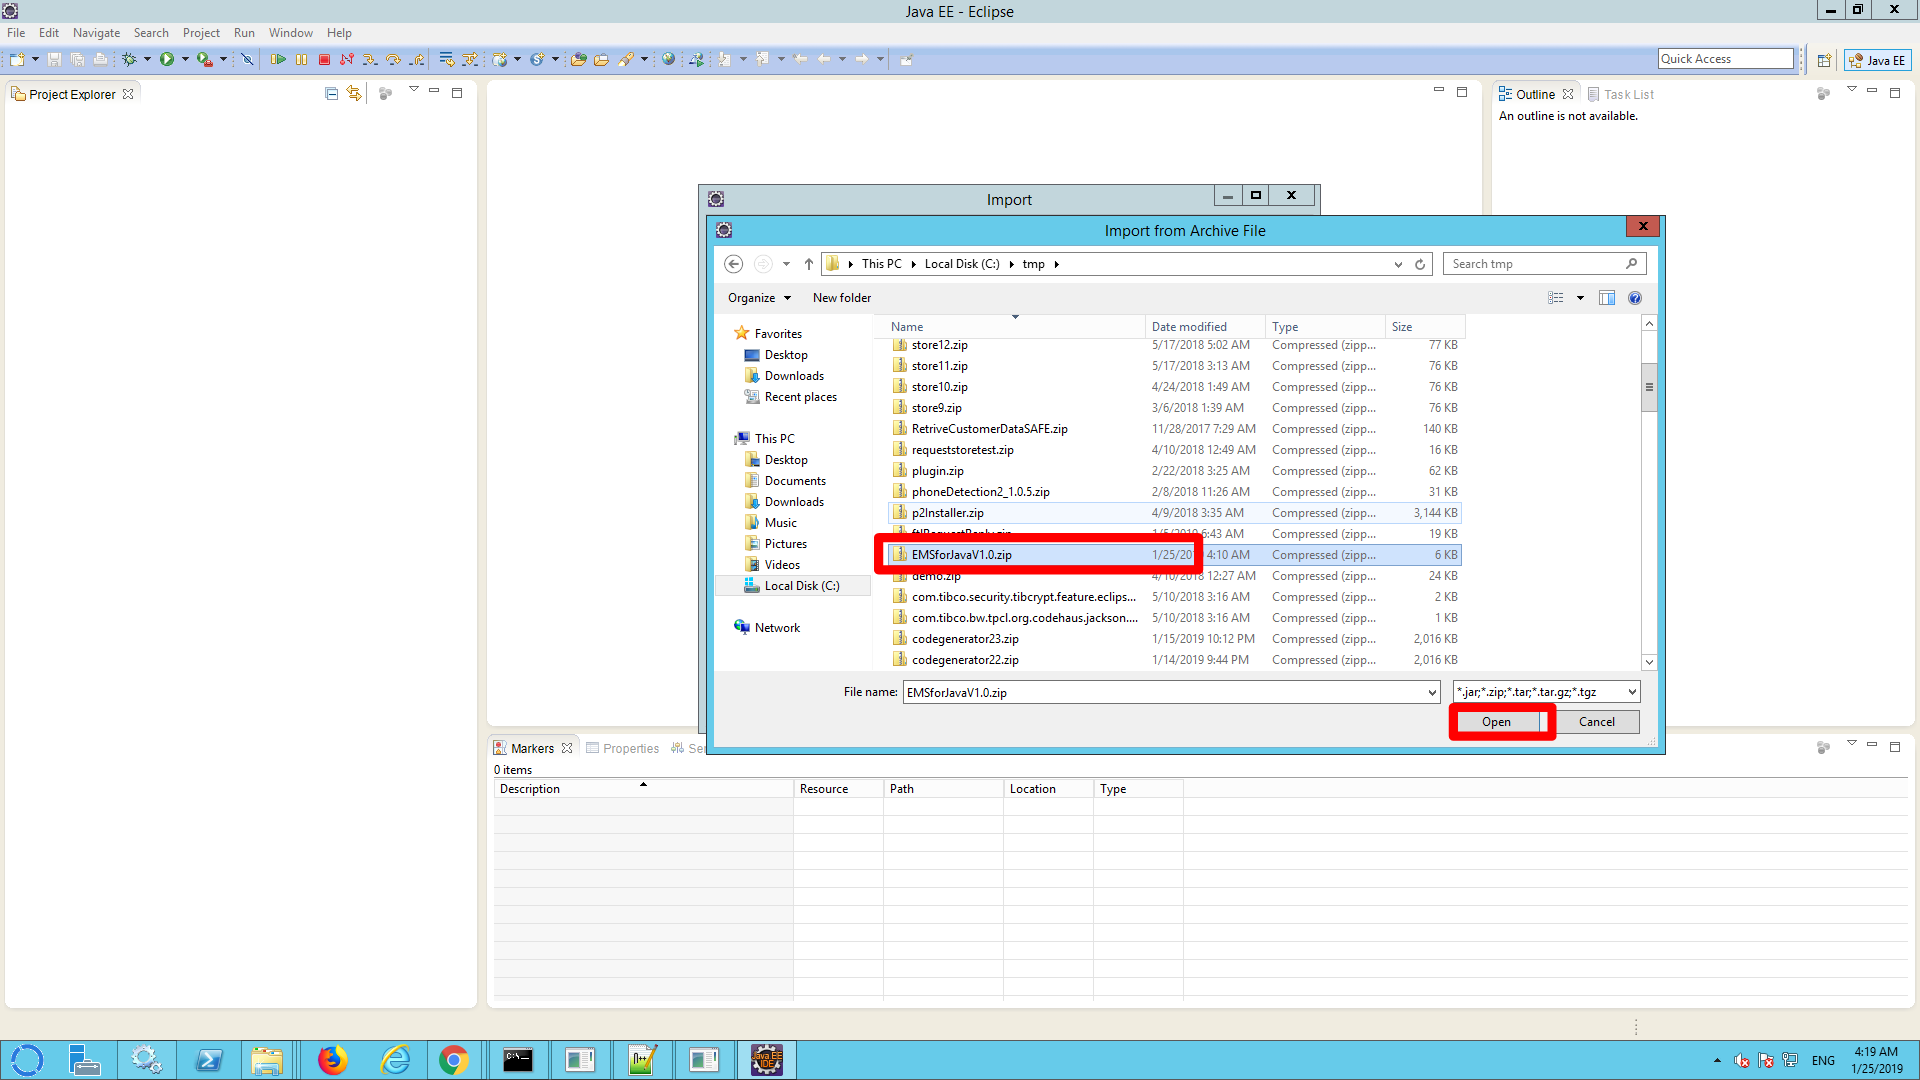
h) Browse to the directory that you used to store the zip (pick the latest version) and select it. Click open.
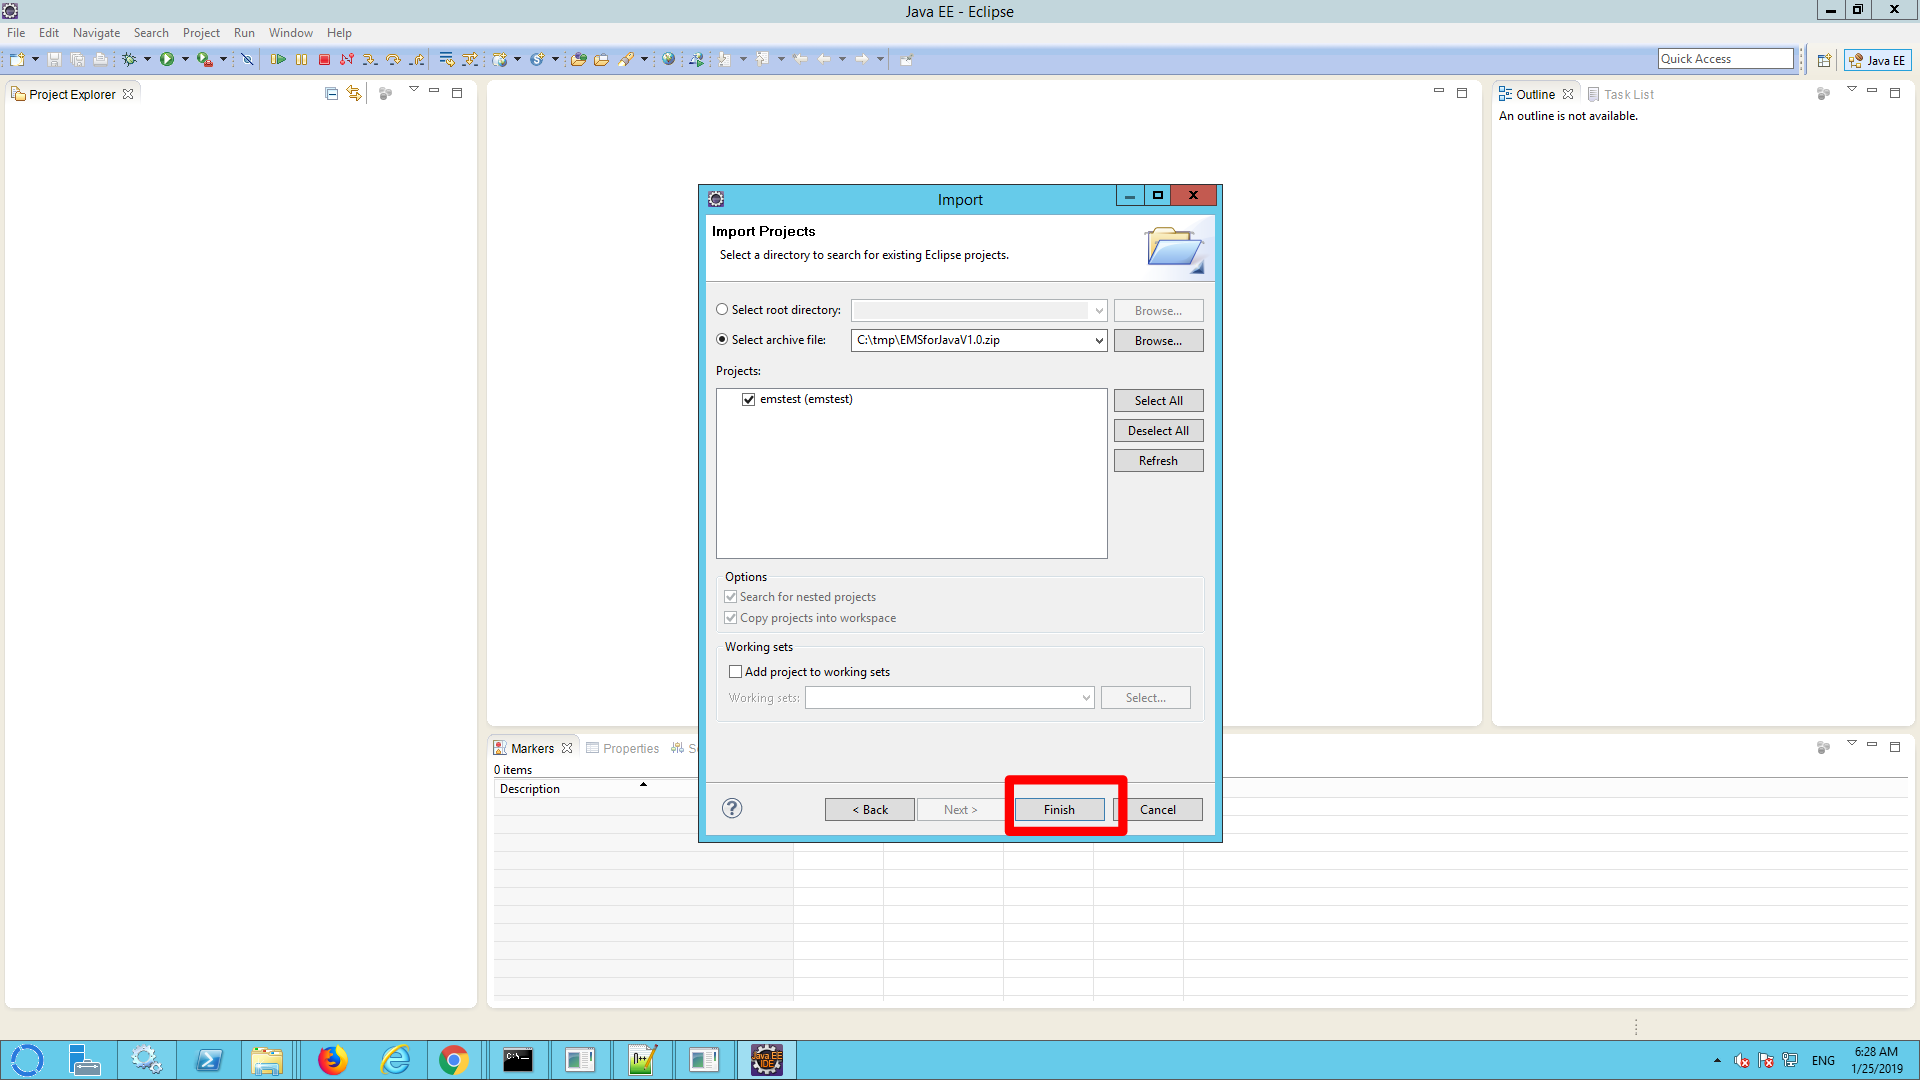
i) Click Finish
Step 6) Check the build path
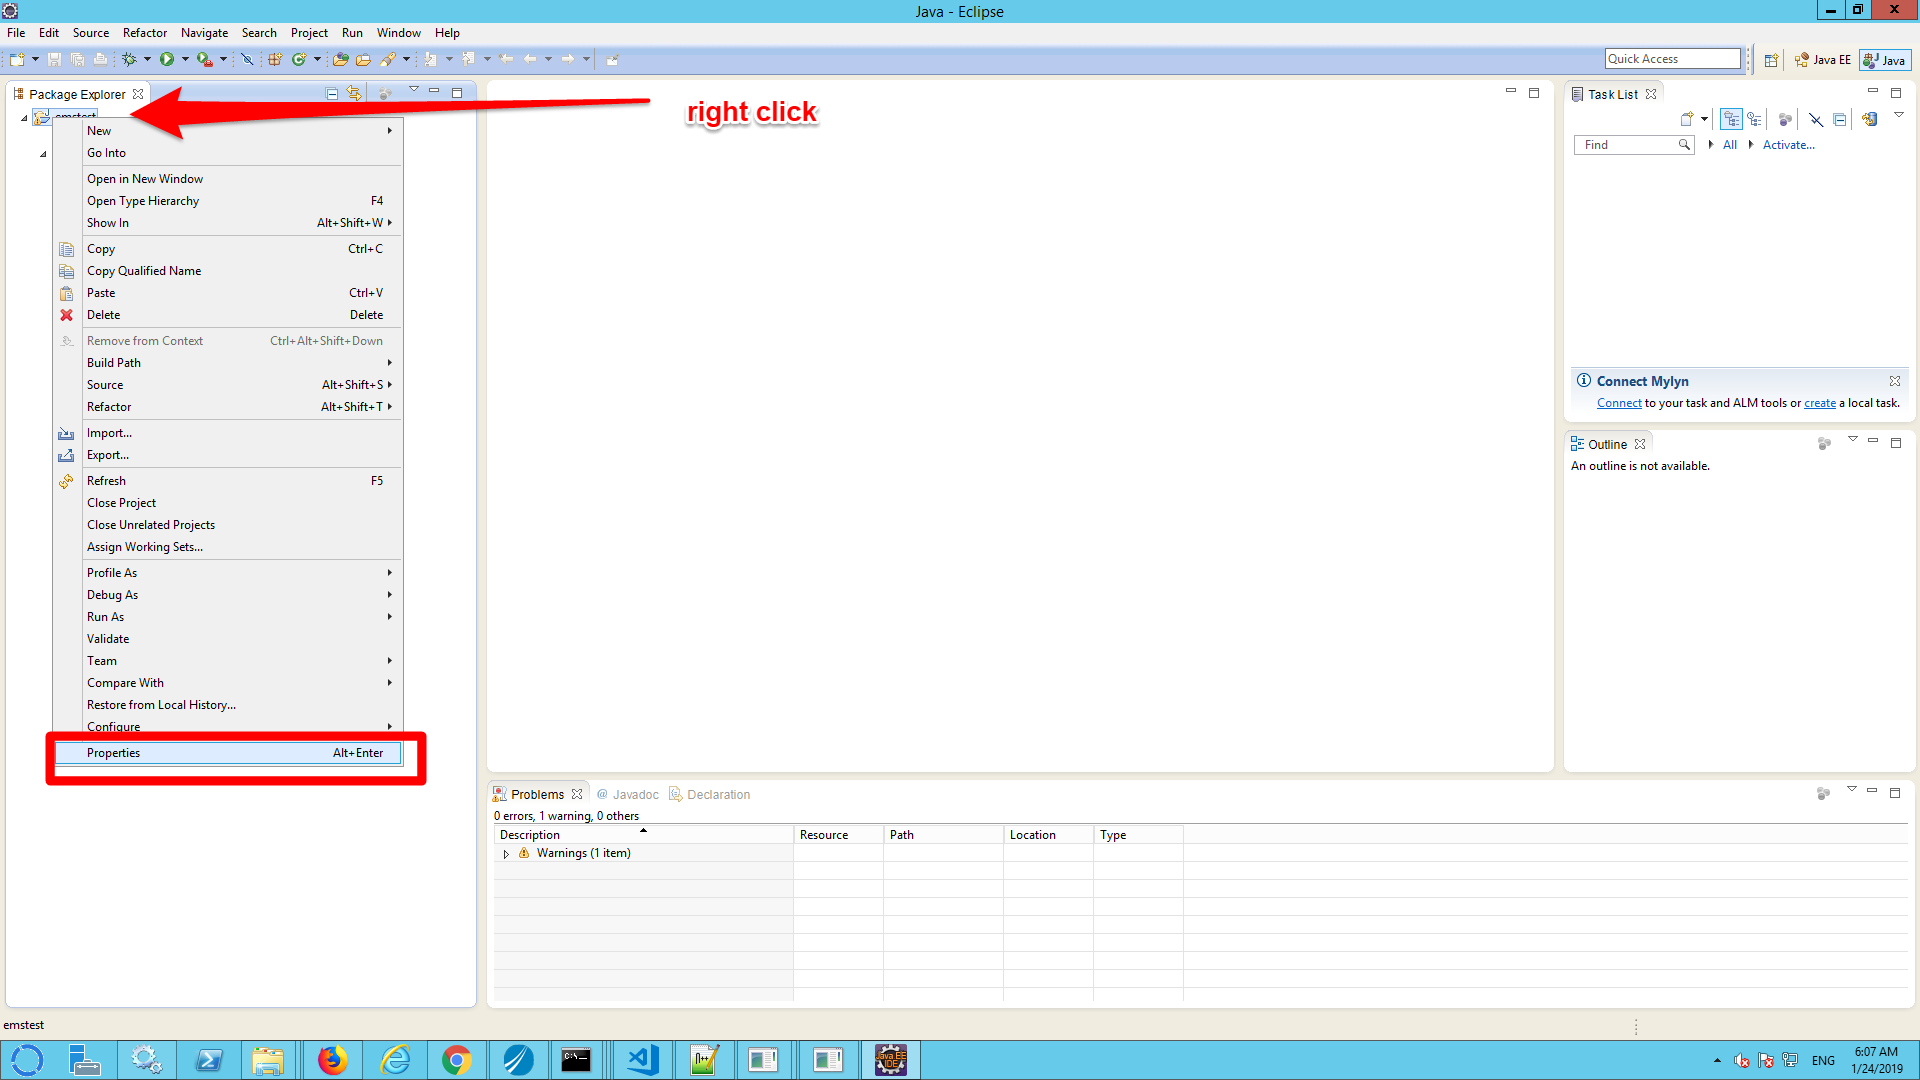
a) Select the project and right click
b) Select properties
c) Select Java Build Path and Libraries
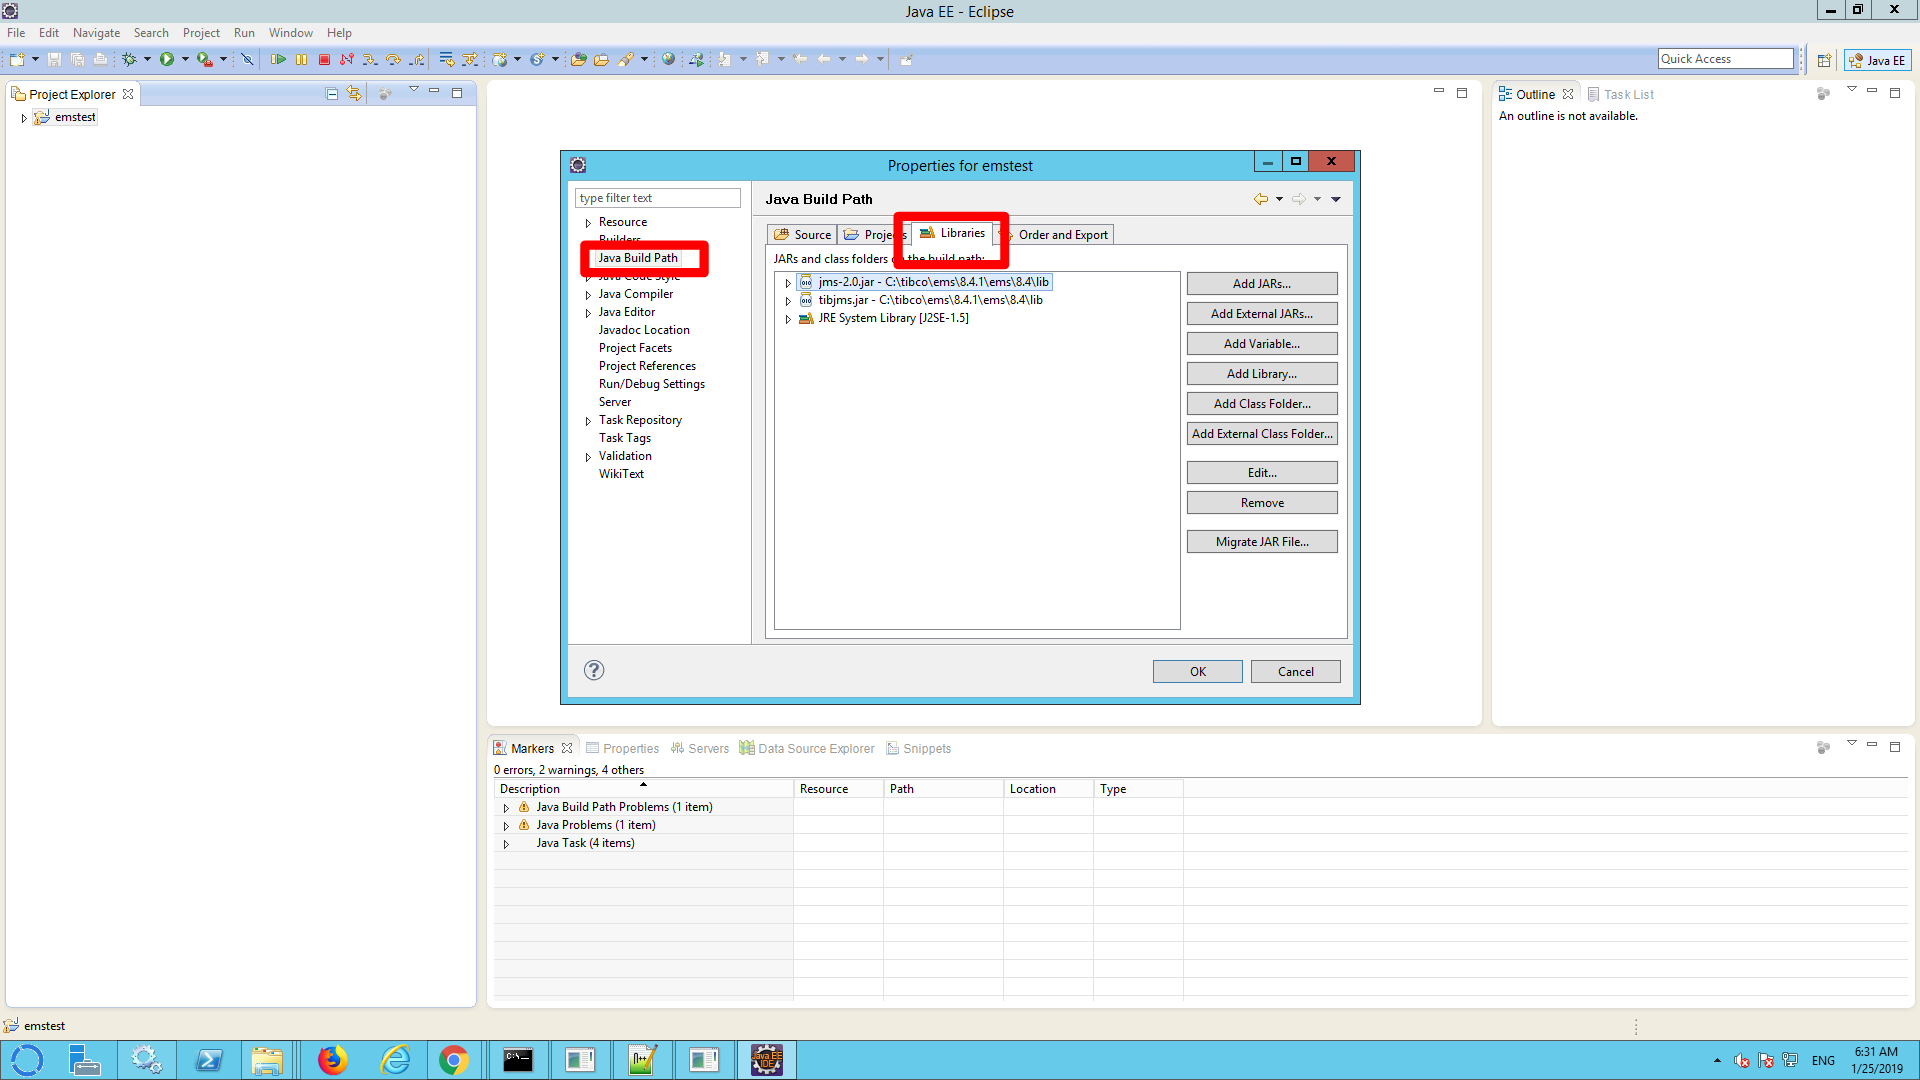
d) Make sure the path to the libraries jms-2.0.jar and tibjms.jar is right. If not, remove the jar entries (use the button remove) and use the ‘Add external JARs’ button to add the jars. These are located in the directory <tibco_home>/ems/<version>/lib.
After you verified the paths, click ‘ok’.

Step 6) Browse the code
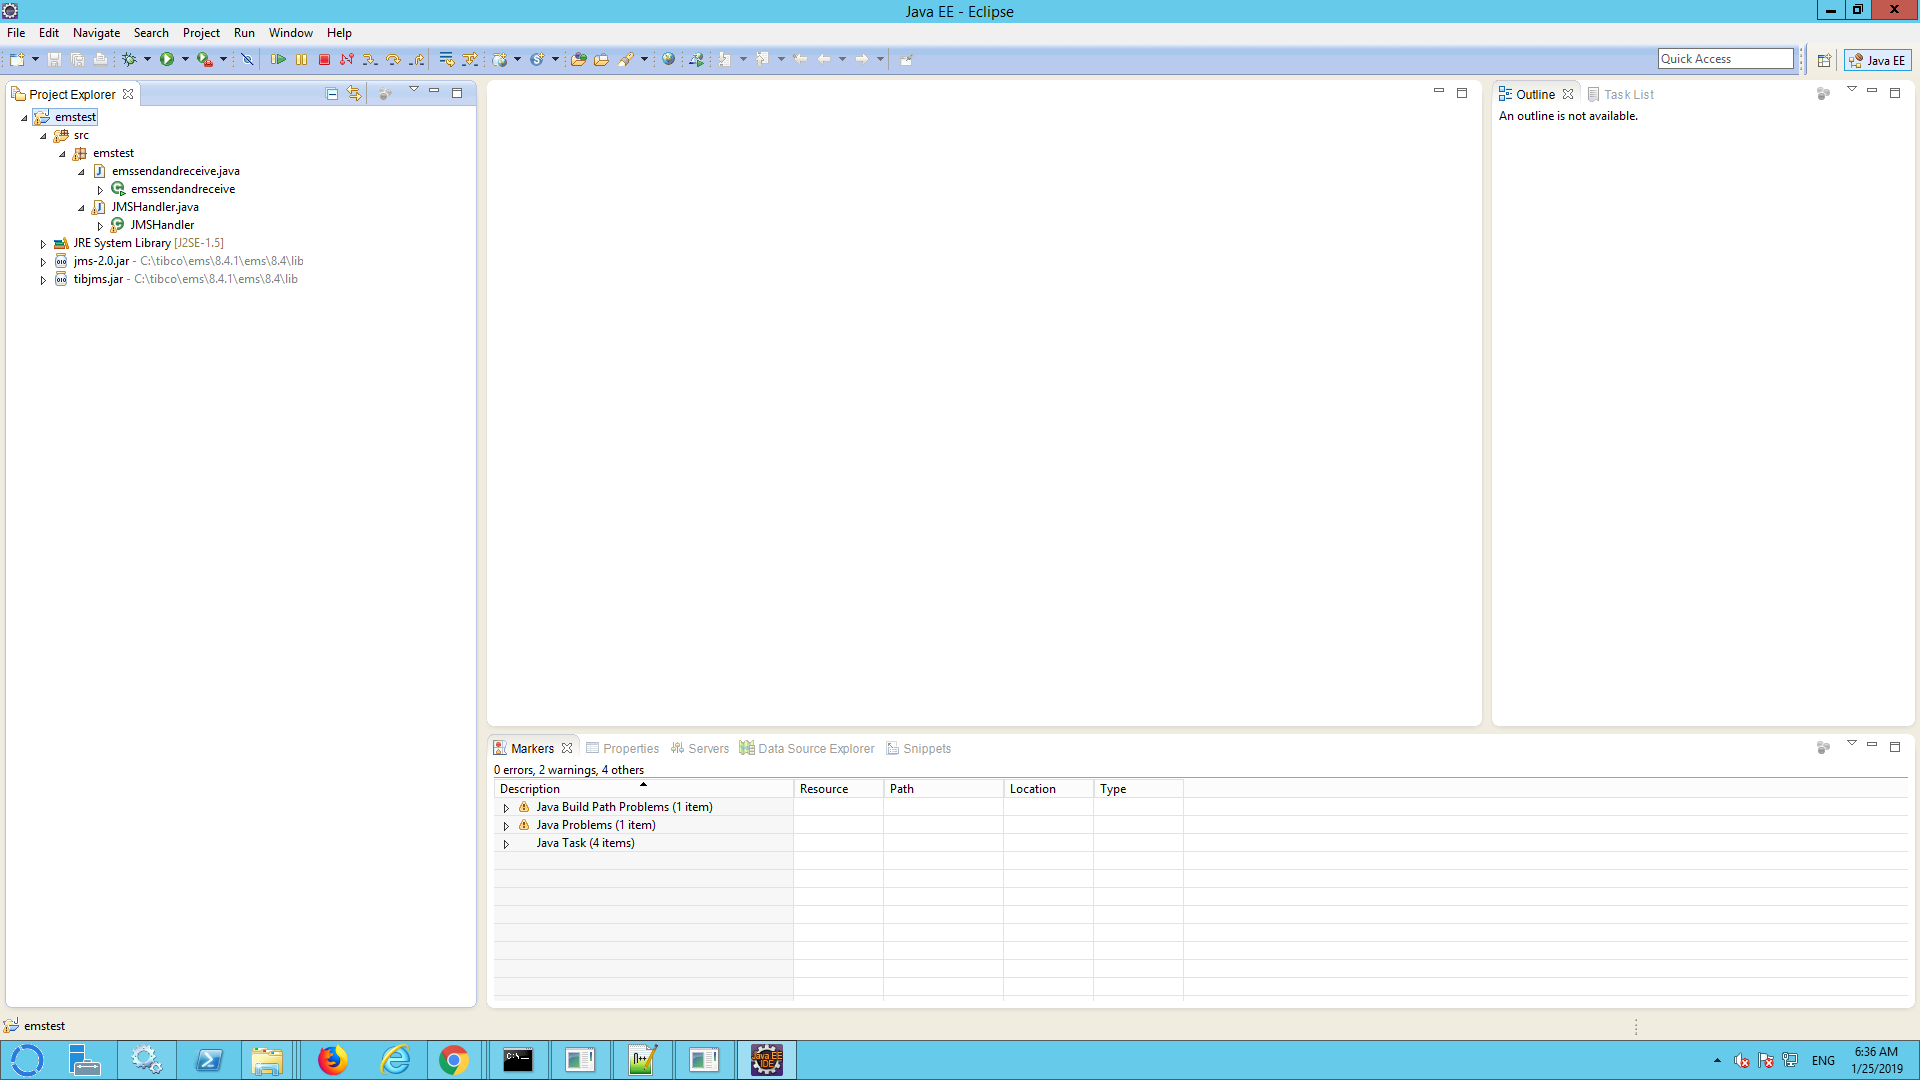
a) Go to emstest/srs/emstest and take a look at the following classes:
- emssendamdreceive. This is the main class, that is used to send a message to an EMS queue. This message is then receive (by polling a queue).
- emssendandeventreceive.java. This the main class, that can be used to send a message that will trigger running a function in JAVA (instead of polling for messages).
- JMSHandler.java. This is a class that contains the actual logic to send and receive messages.
- JMSMessageEventHandler.java. This is class that can be triggered as soon as a message is available.
Explanation of the code:
JMSHandler.sendQueueMessage
This method is used to send one JMS message without waiting for a reply.
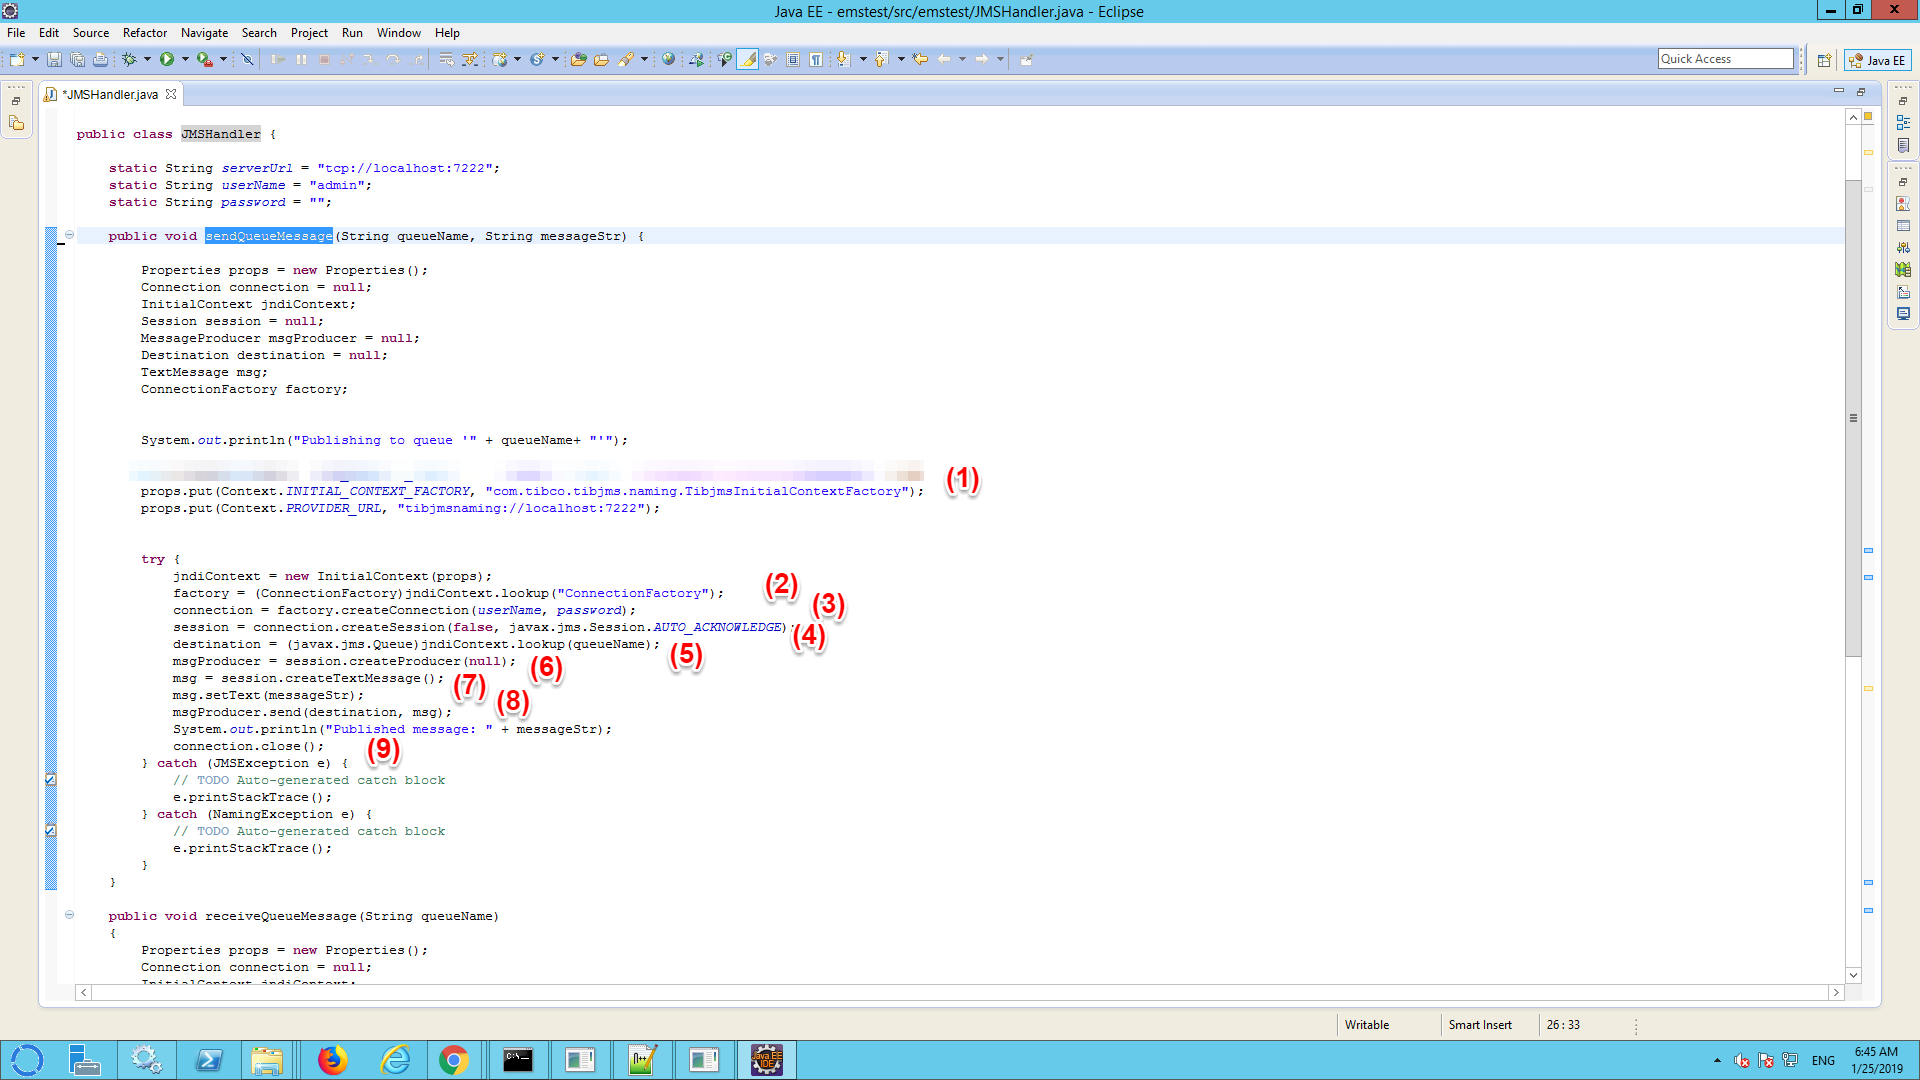
(1) In order to find the server and the queue that we want to use we will use an JDNI lookup. A JNDI lookup is somewhat comparable with a DNS lookup for a hostname. It will provide a pointer to the required resources without having to know on which server a queue is actually implemented. Remark: it is possible to access a queue without a JNDI lookup (if you know the server name). Nevertheless it is not advisable to do this. If a queue is moved from one server to another, you will have to change your code.
A JNDI lookup is done against an ‘initialContext’. The jndiContext requires you to point at a JNDI server. Using the variable properties, we define that a ‘TIBCOJMSInitialContactFactory’ is used and set the EMS server that we just installed (localhost:7222) to be our JNDI lookup server. In this case the queue is also on this server, but that is not necessarily the case. Our EMS server acts as both a JNDI and a JMS (queue) provider simultaneously.
(2) From the JNDI server we fetch a connection factory [factory=(ConnectionFactory)kndiContext.lookup(‘ConnectionFactory’)]. A connection factory is used to create a connection to the desired EMS server (that hosts the queue). ConnectionFactories are used because often EMS servers are setup in a redundant way. The connection factory provides a connection to the best available server and handles an automatic fail over in case of an outage. Please mind that in this case the default ‘ConnectionFactory’ is used. In a production situation a custom connection factory name may be used.
(3) Using ‘Connection=factory.createConnection(userName,password)’ we setup a connection to the EMS server. In this case the admin userID and password are used. This will not be the case in a production environment.
Connections are ‘expensive’ to setup. A connection requires an actual TCP link (from socket to socket) from the client to the server. In order to setup a connection, an authentication handshake is required. In this java class a connection is used to route one message after which the connection is closed. For production purposes it is highly discouraged to frequently open and close connections and/or to provide every thread with its own connection. Threads should share a connection. Every thread will get its own session.
(4) A session is created using the command ‘session = connection.createSession(false, javax.jms.Session.AUTO_ACKNOWLEDGE);’. A session is supposed to be remain open as long as messages that are part of a one interaction are being exchanged.
(5) A lookup is done to find the target queue. In JMS queues and topics are named ‘destinations’: destination = (javax.jms.Queue)jndiContext.lookup(queueName);
(6) msgProducer = session.createProducer(null); ==> a message producer is created in the session.
(7) The message is created using the command: ‘msg = session.createTextMessage();’. In this case a text message is created. Other type of messages are available.
The command ‘msg.setText(messageStr);’ is used to set the payload.
(8) The command ‘msgProducer.send(destination, msg);’ to actually send the message.
(9) The command ‘connection.close();’ is used to close the connection thereby closing all open sessions. As mentioned before, it is highly recommended to reuse connections. Not doing so, can have a big impact on performance.
JMSHandler.receiveQueueMessage
This method is used to receive one JMS message, without replying.

(1) See text regarding JMSHandler.sendQueueMessage
(2) MessageConsumer consumer = session.createConsumer(destination); ==> A message consumer is created.
(3) connection.start(); ==> the connection is stared.
(4) msg = (TextMessage) consumer.receive(); ==> wait until a message is available.
(5) The command ‘connection.close();’ is used to close the connection thereby closing all open sessions.
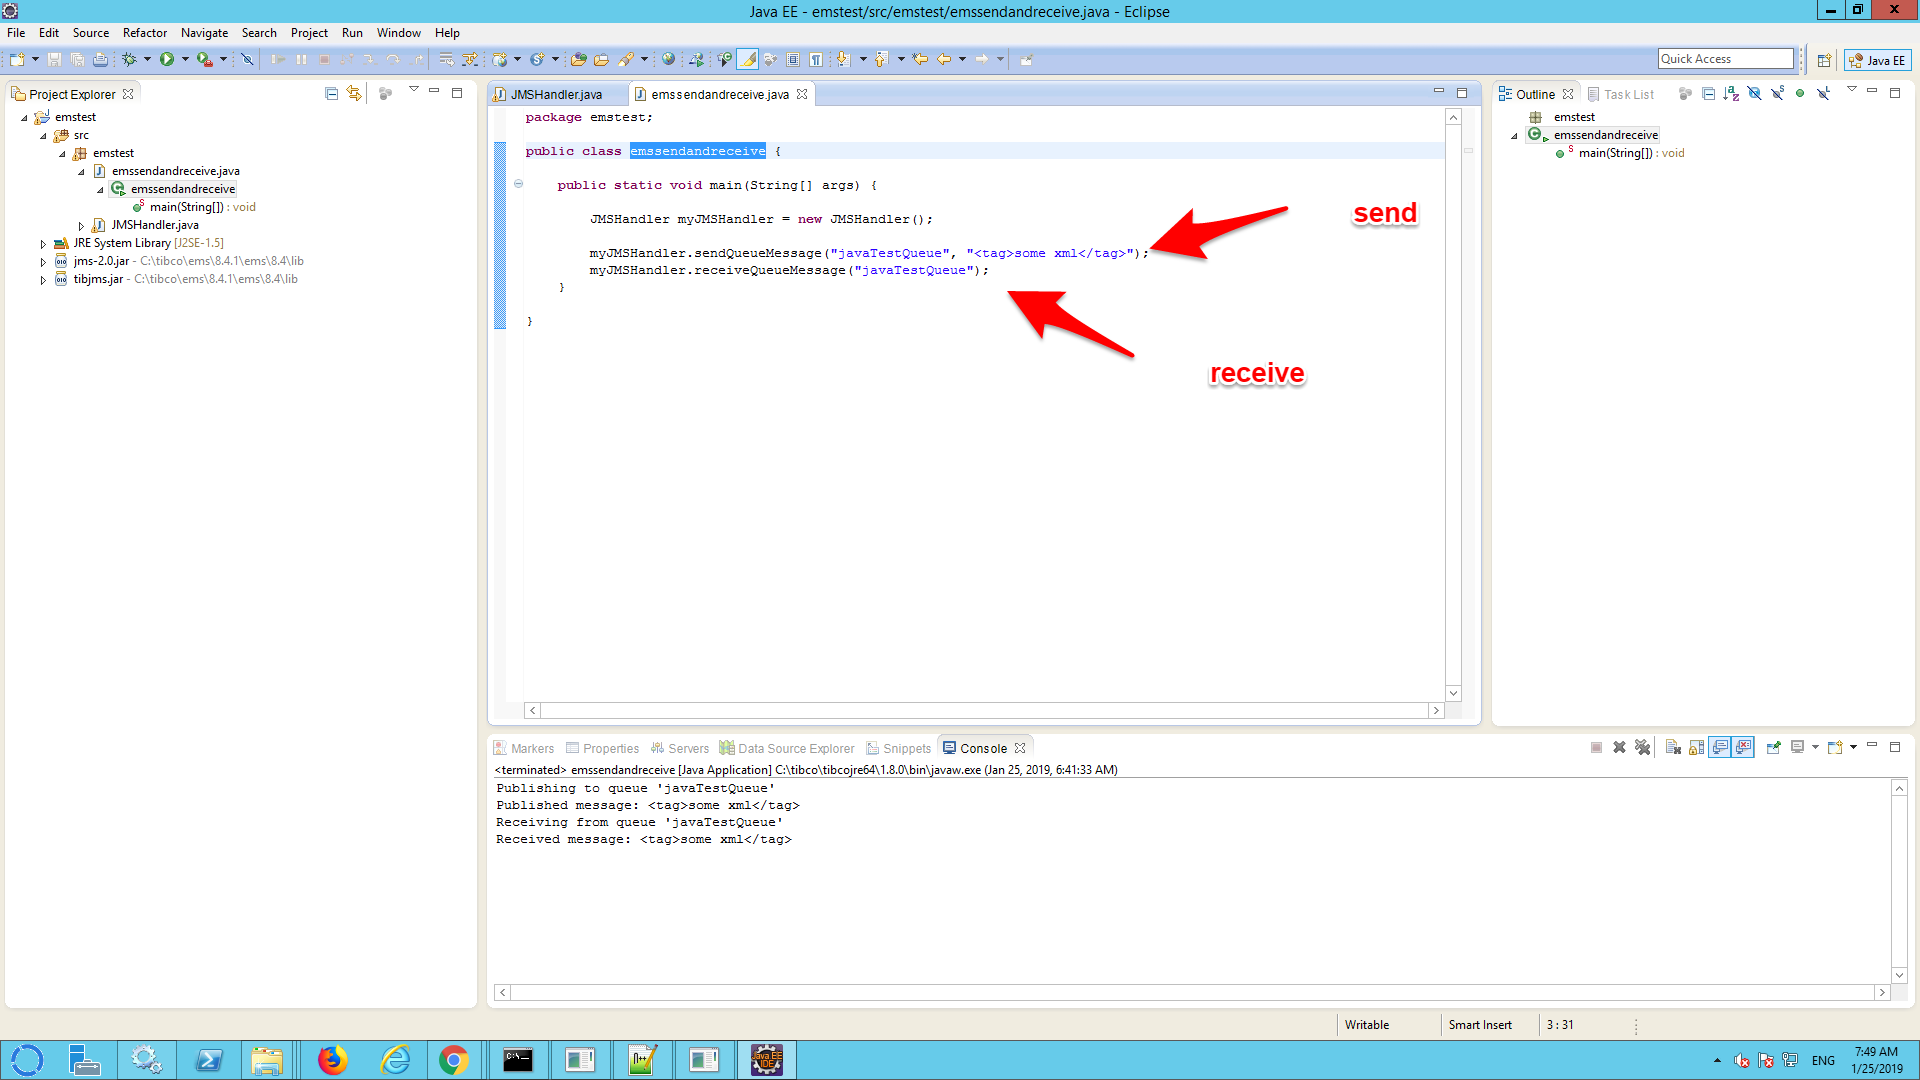
emssendandreceive
This main class will send and receive a message
JMSMessageEventHandler.java
The JMS protocol allows you to specify a method that is called whenever a message arrives in a queue.
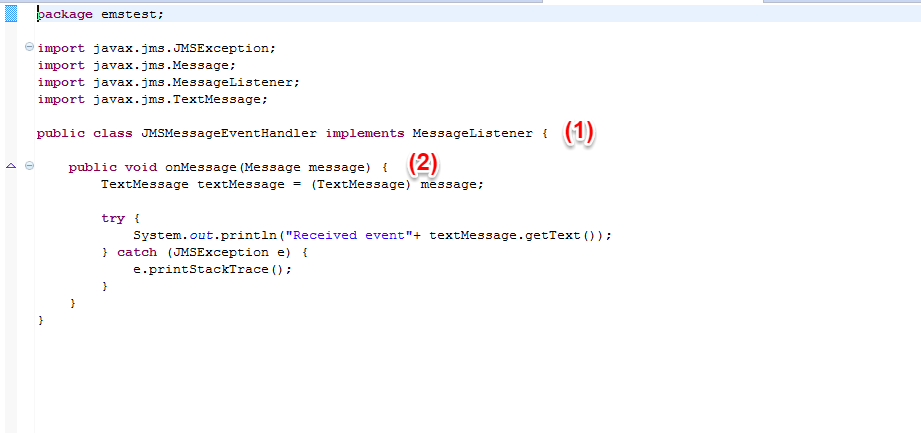
(1) The JMSMessageEventHandler is an implementation of the class MessageListener
(2) It must implement the the method onMessage that takes the received ‘Message’ as an input.
emssendandeventreceive.java
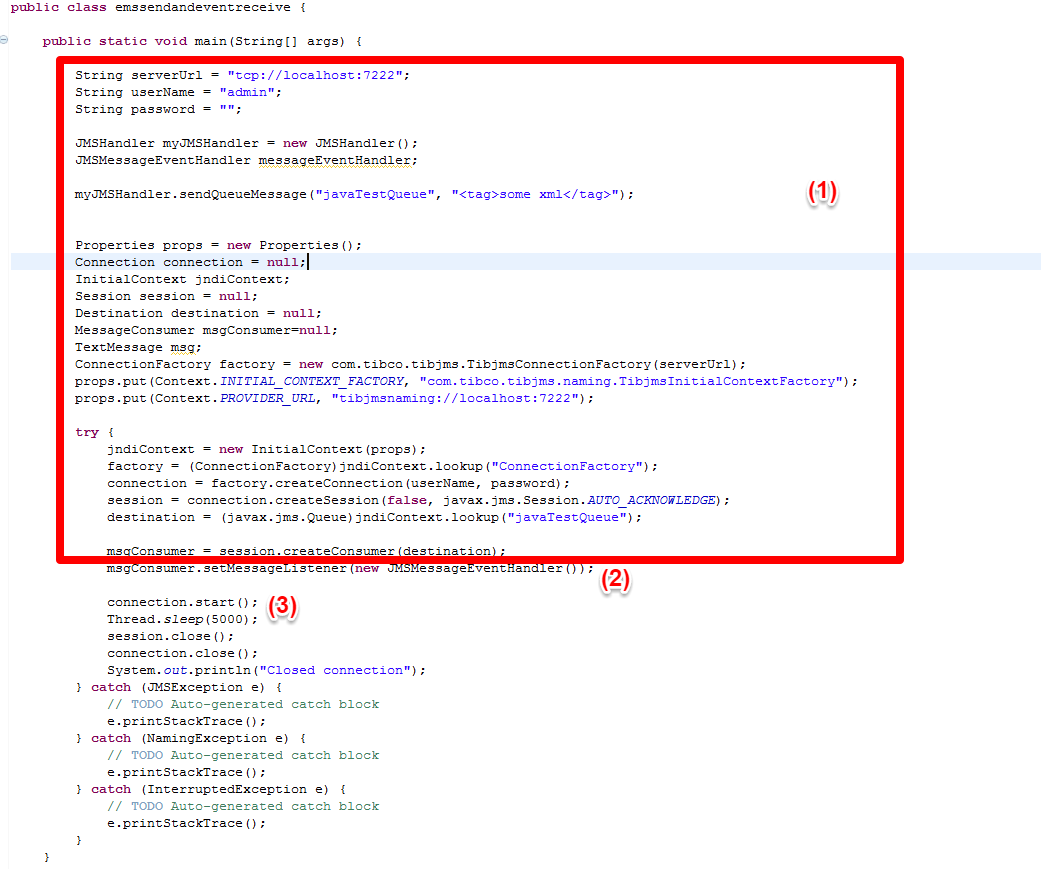
(1) A message is sent to a queue. See for more information the explanation of JMSHandler.sendQueueMessage above.
(2) The new instance of the class JMSMessageEventHandler is registered as an event listerner for the message consumer.
(3) The connection is started and the thread is configured to wait for 5 seconds for new messages.
Step 7) Run the code
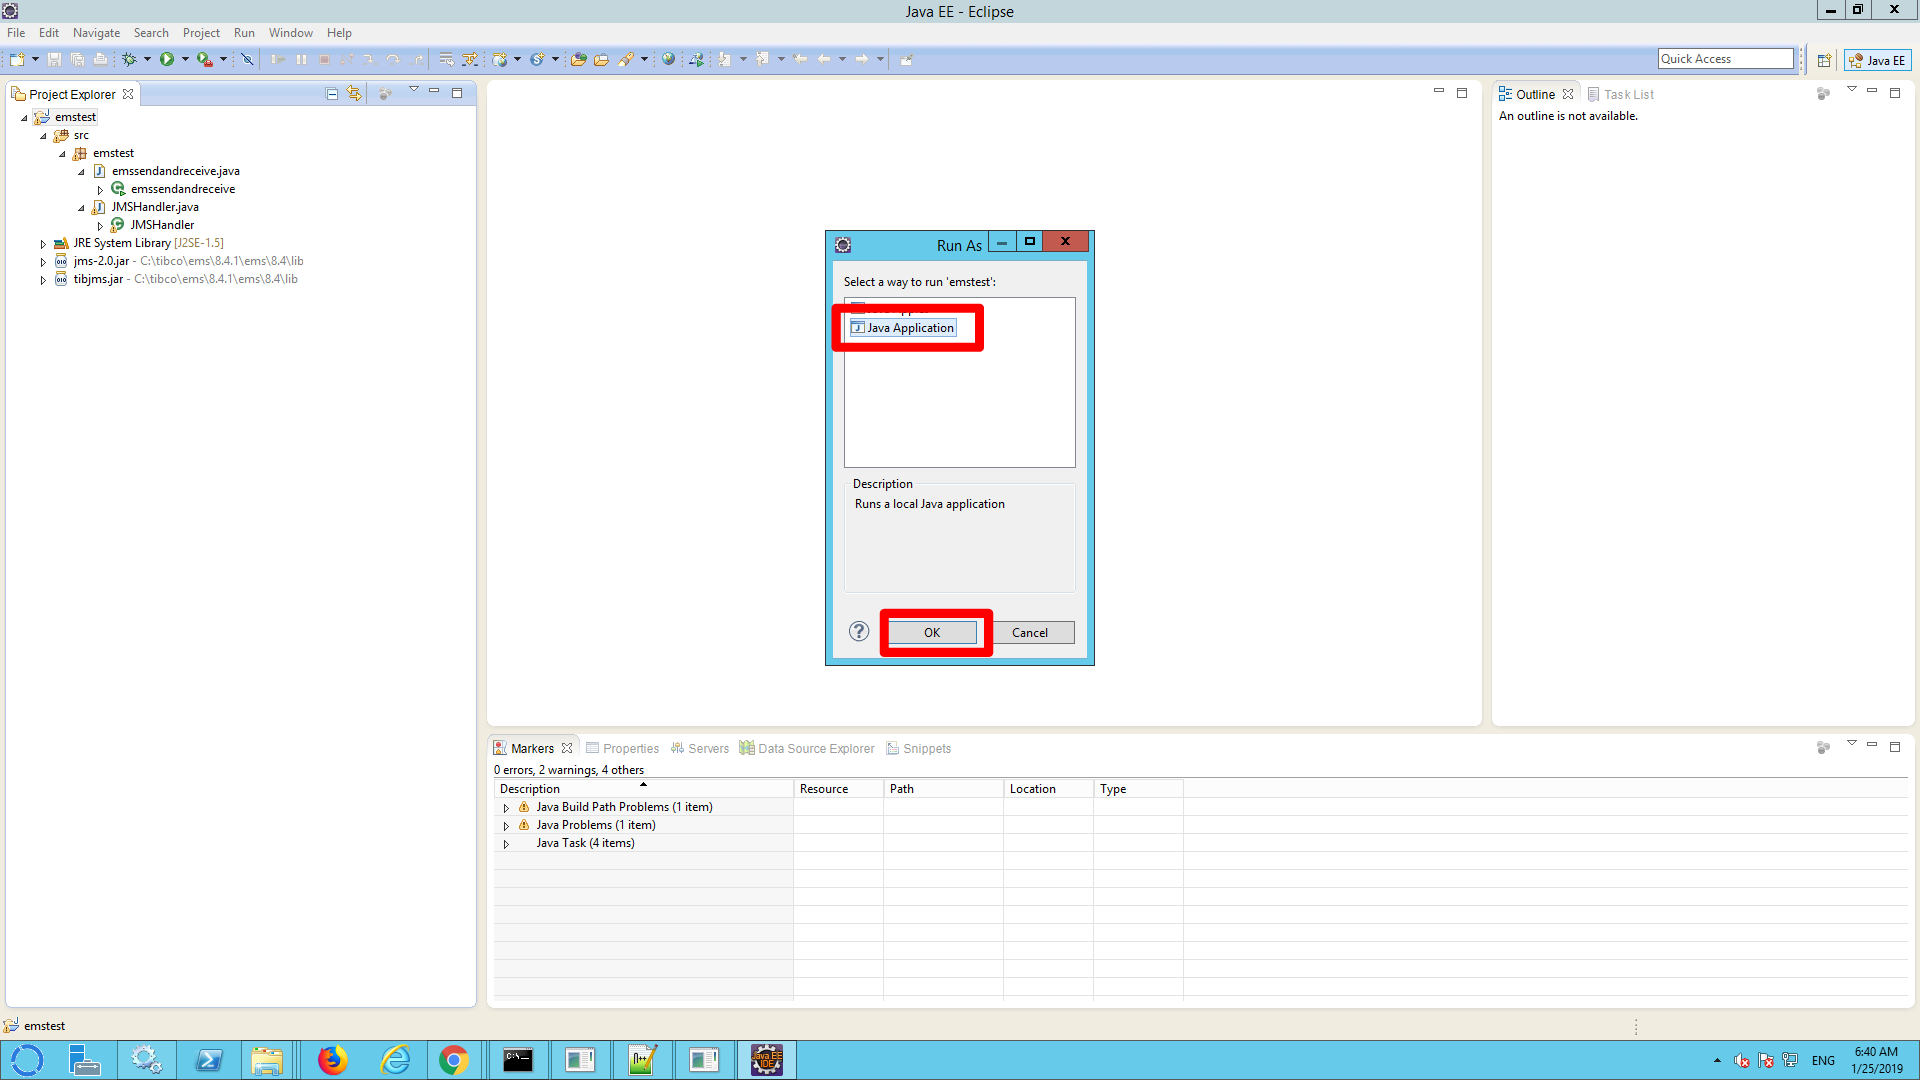
a) Click Run->Run

b) Select ‘java application’ and click ok
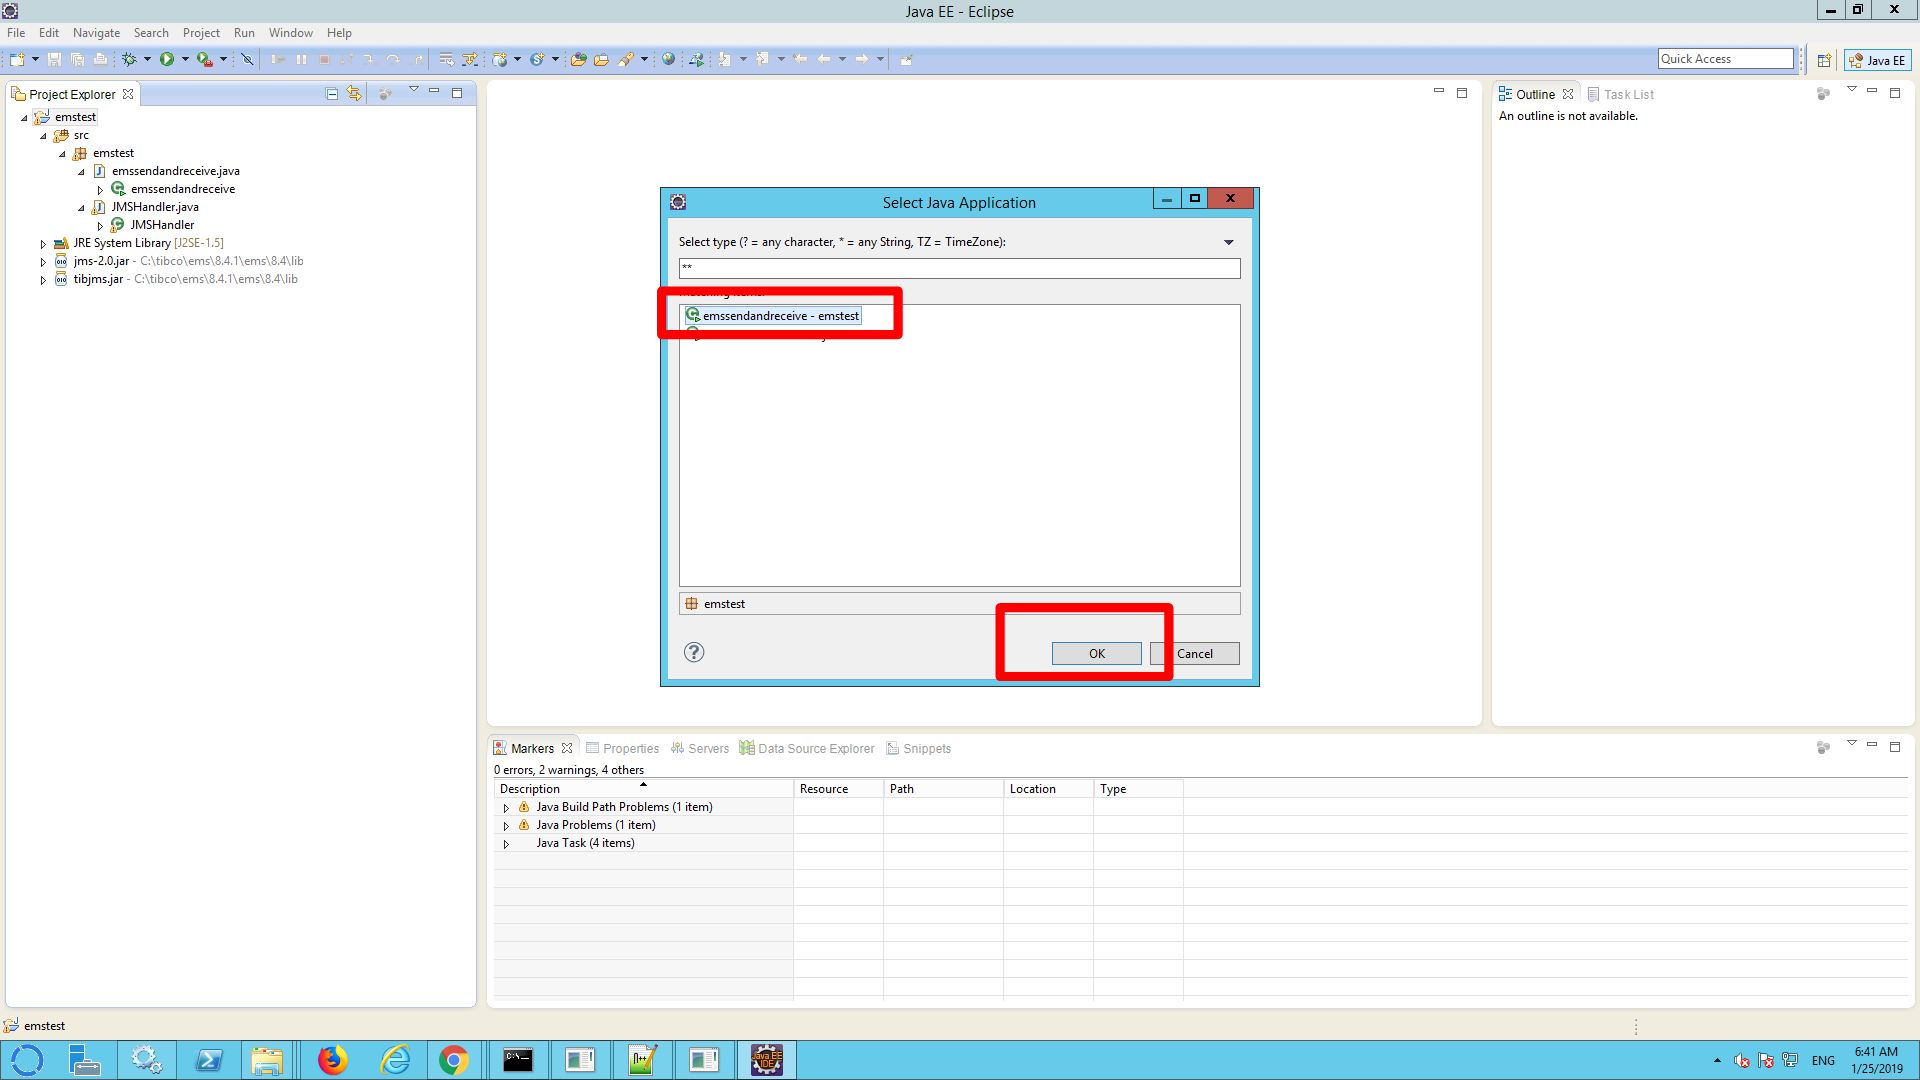
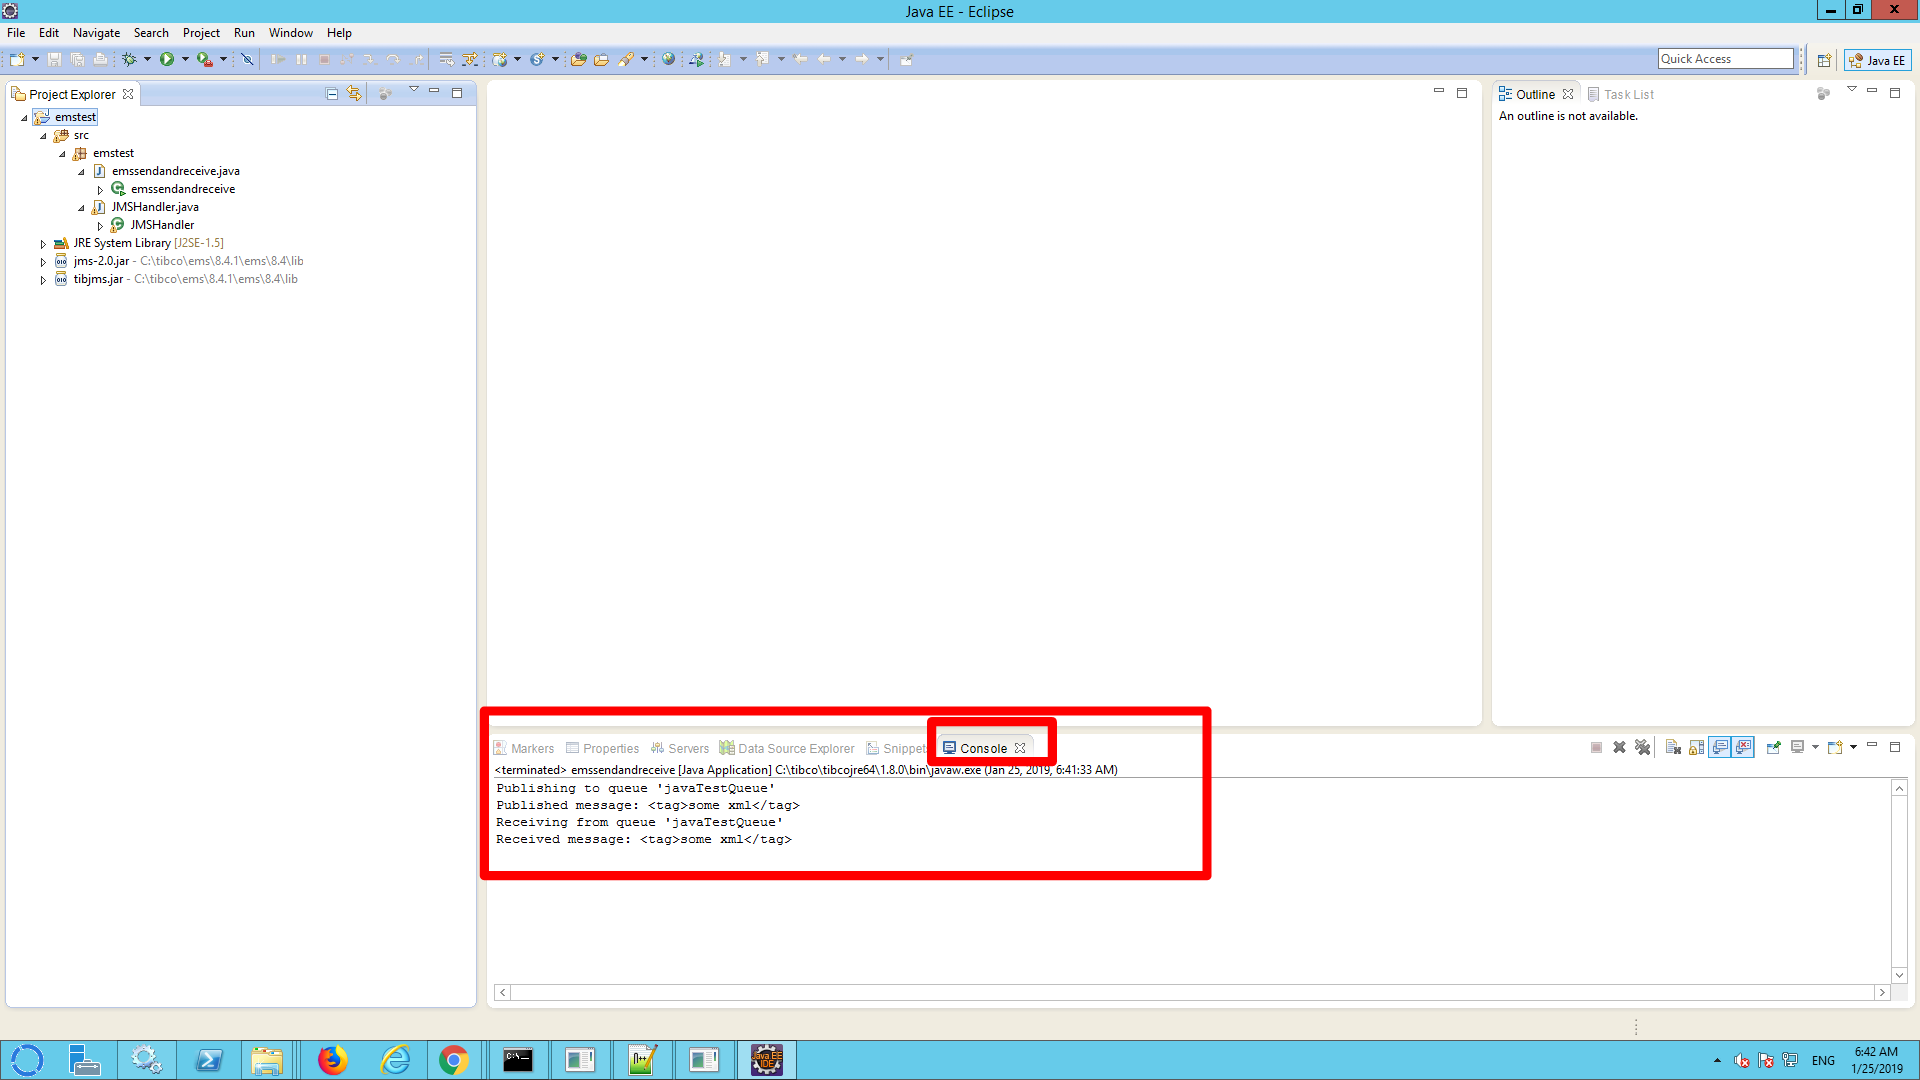
c) Select ’emssendamdreceive’ or ’emssendandeventreceive’ (depending on the test you want to run) and click ‘ok’.
d) Check the console window.
For emssendamdreceive it should show something like this:
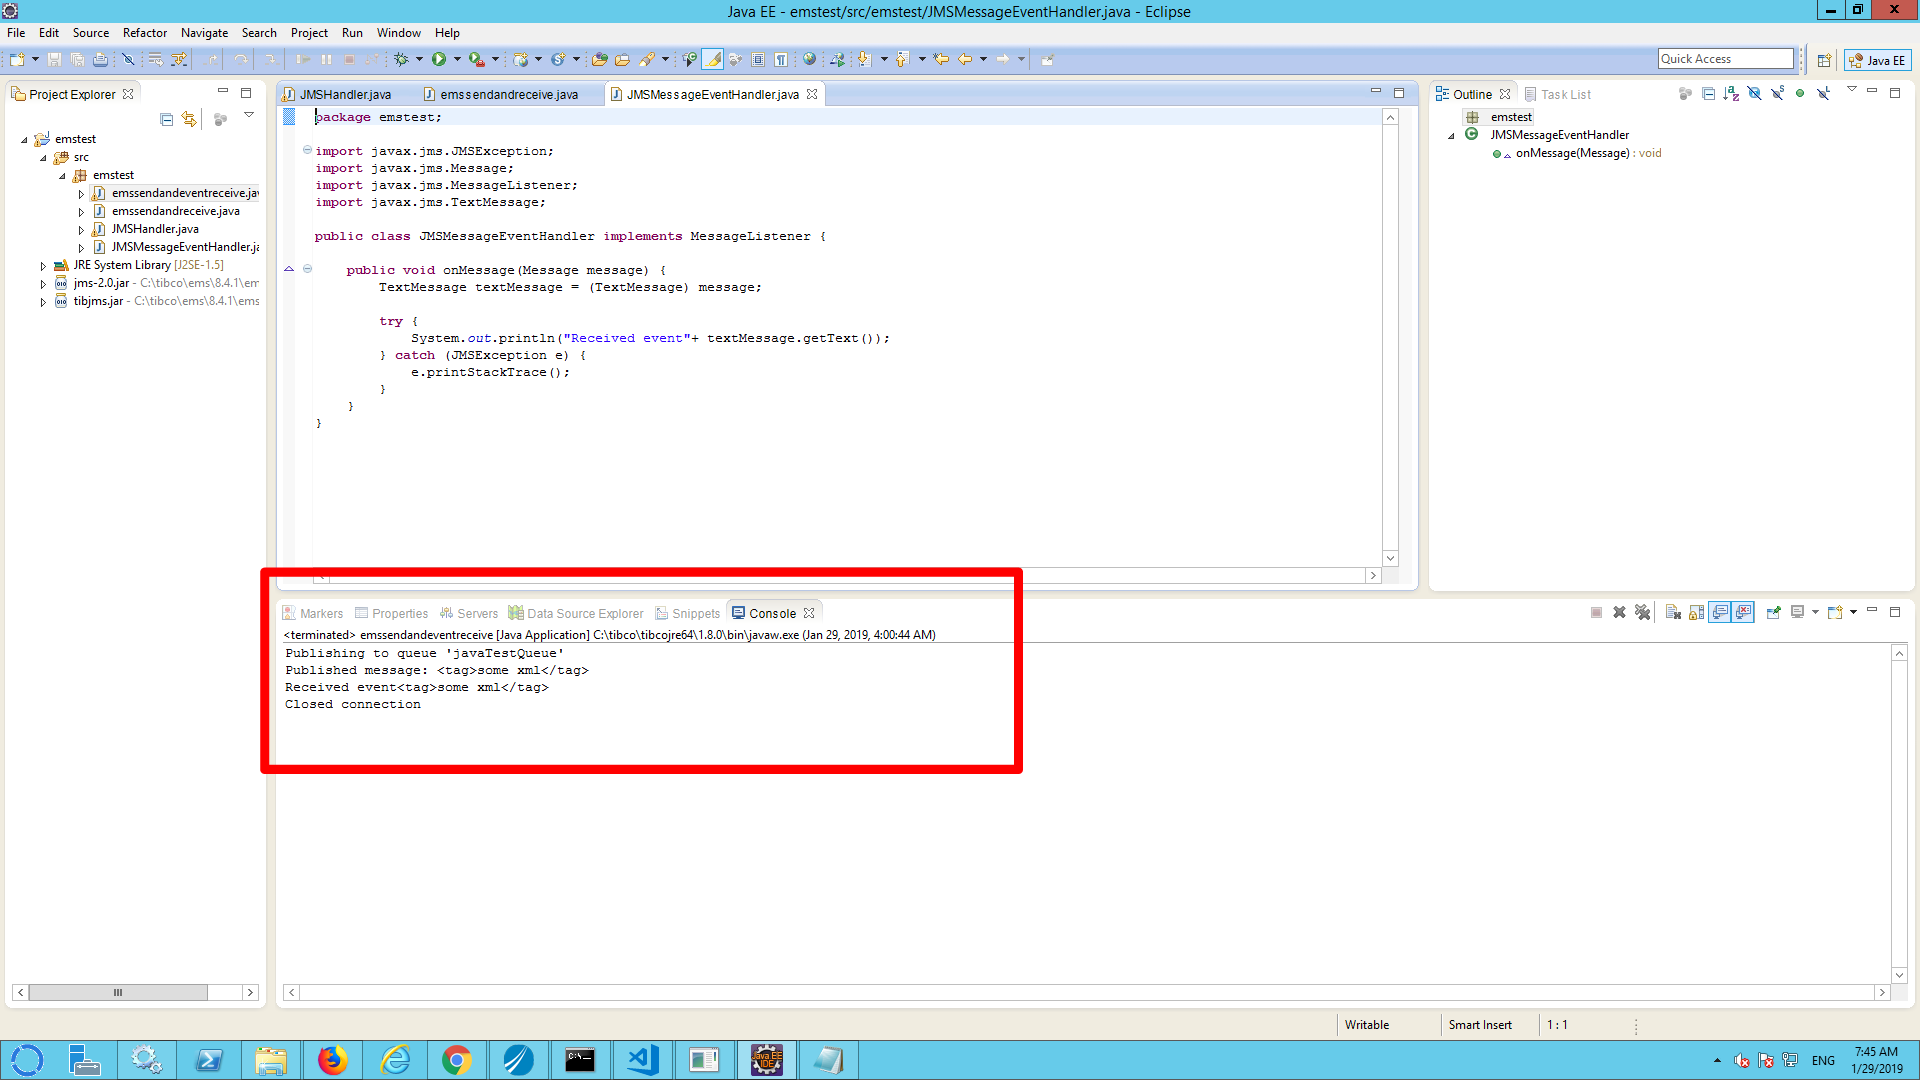
For emssendandeventreceive it should show something like this:
Background information:
Background information on the use of JMS: https://examples.javacodegeeks.com/enterprise-java/jms/jms-queue-example/
TIBCO EMS API: here.
The TIBCO documentation contains a Java tutorial.