An howto on installing CloudFoundry using the Stackato VM….
Introduction
CloudFoundry is one of most promising ‘Platform as a Service’ (PaaS) environments. Unfortunately nevertheless, it is not easy to setup a CloudFoundry environment from scratch. You may try to use Bosh-Lite provisioning process on windows to setup your own CloudFoundry implementation. The provisioning process requires a heavy machine….. and it takes some time. Alternatively you may use ‘almost ready to use Virtual Machine’ from Stackato to get your mini CloudFoundry environment up and running. This document contains a description how to do this.
Step 1: Preparation
Download the following software:
- Virtual Box. I used version 5.0.10. Alternatively you may also use VMWare player or VMWare workstation.
- The Stackato VM. I used version 3.6.1. Please keep in mind, the VM is large (2,7 GB). The VMWare version is also suitable for virtual box.
- The CloudFoundry Command Line Interface (CLI). This is the CLI we will use to manage CloudFoundry. Download it from here. Make sure your download the CLI for the operating system of your computer (host).
Step 2: Install the software and the VM
Step 2.1: Install Virtual box. Make sure you associate all VM types with Virtual Box.
Step 2.2: Unzip the Stackato VM at location (I used C:\$User\portable\cf).
Step 2.3: Run the stachato VM. I ran the file ‘stackato-v361-vmware’. This will install the VM into virtual box.
Step 2.4: Unzip the CloudFoundry CLI installer and install it.
Step 3: Setup the VM and configure CloudFoundry
During this step we will configure the Stackato VM.
Step 3.1: Change network settings.
By default the Stackato VM is setup in NAT mode. This needs to be changed to bridged. In this case the VM get’s it’s own IP address on the network that the host is using as well.
To make the necessary network changes:
a) Open Virtual Box.
b) Right click the stackato VM and select settings and select networking. You will see a menu as shown below.
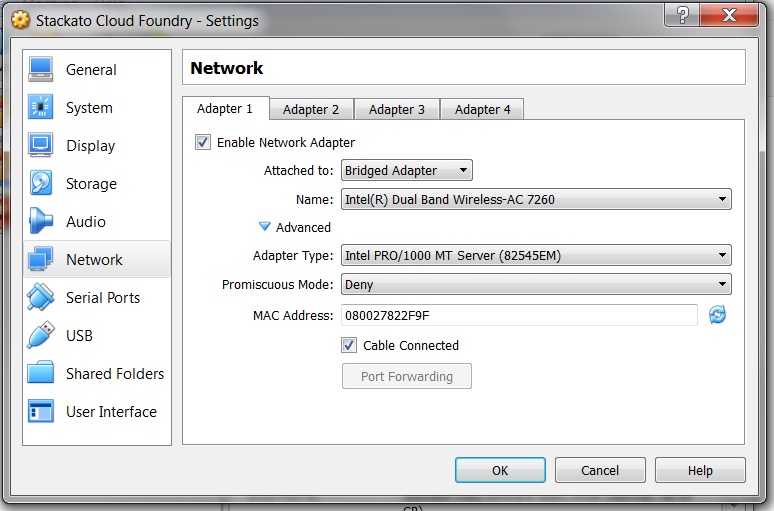
c) Set ‘adapter 1’ to ‘bridged’. Use the setting as shown above.
d) Click ok.
e) By default the a VM gets 2 GB of ram. Increase this to 4 GB. It is not useful to increase the RAM further. The free version of Stackato supports a maximum of 4 GB.
Step 3.2: Startup the VM by right clicking the vm and selecting start –> normal start.
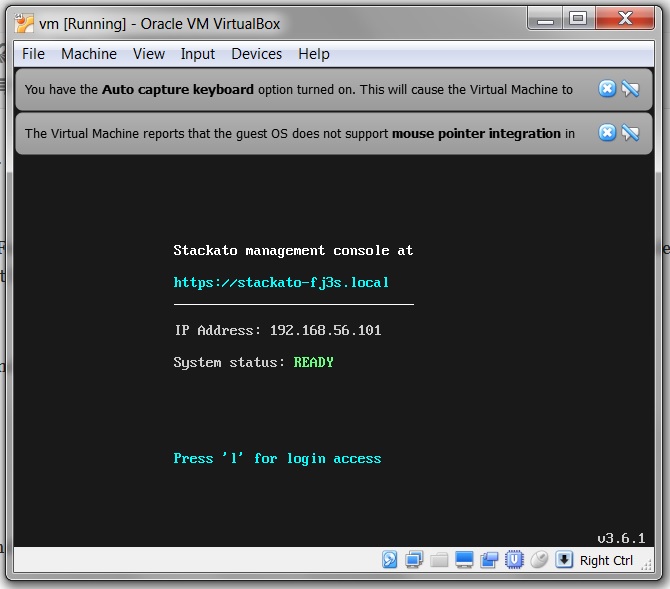
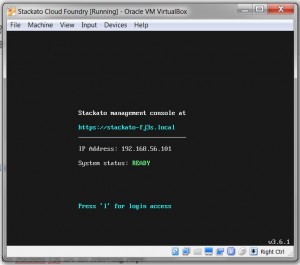
The VM will boot. Wait until the System Status changes to ‘ready’!!! (This may take several minutes).
Step 3.3: Configure your host name.
The stackato VM will create a number of hostnames with the format ‘stackato-<xxxx>.local’. Virtual Box will assign an IP address to the VM. The hostname and IP address are listed in the virtual box console (seen above). In my case the hostname is stackato-fj3s.local and the IP address is 192.168.56.101. We need to register the following hostnames to the assigned IP address:
api.stackato-<xxxx>.local
aok.stackato-<xxxx>.local
logs.stackato-<xxxx>.local
myapp.stackato-<xxxx>.local
How to do that depends on your operating system.
- In windows edit the file C:\Windows\System32\drivers\etc\hosts. Do so with Administrative rights! For details see here.
- For Linux…. Google is your friend….. or look here.
I added the following line to my host file:
192.168.56.101 api.stackato-fj3s.local aok.stackato-fj3s.local logs.stackato-fj3s.local myapp.stackato-fj3s.local
Step 3.4: Configure CloudFoundry
Before using mini CloudFoundry environment we need to create an administrator an organisation and space.
a) Open your browser and open the following URL: https://api.stackato-<xxxx>.local. Handle the SSL security warnings.
b) Fill out the form as shown below:
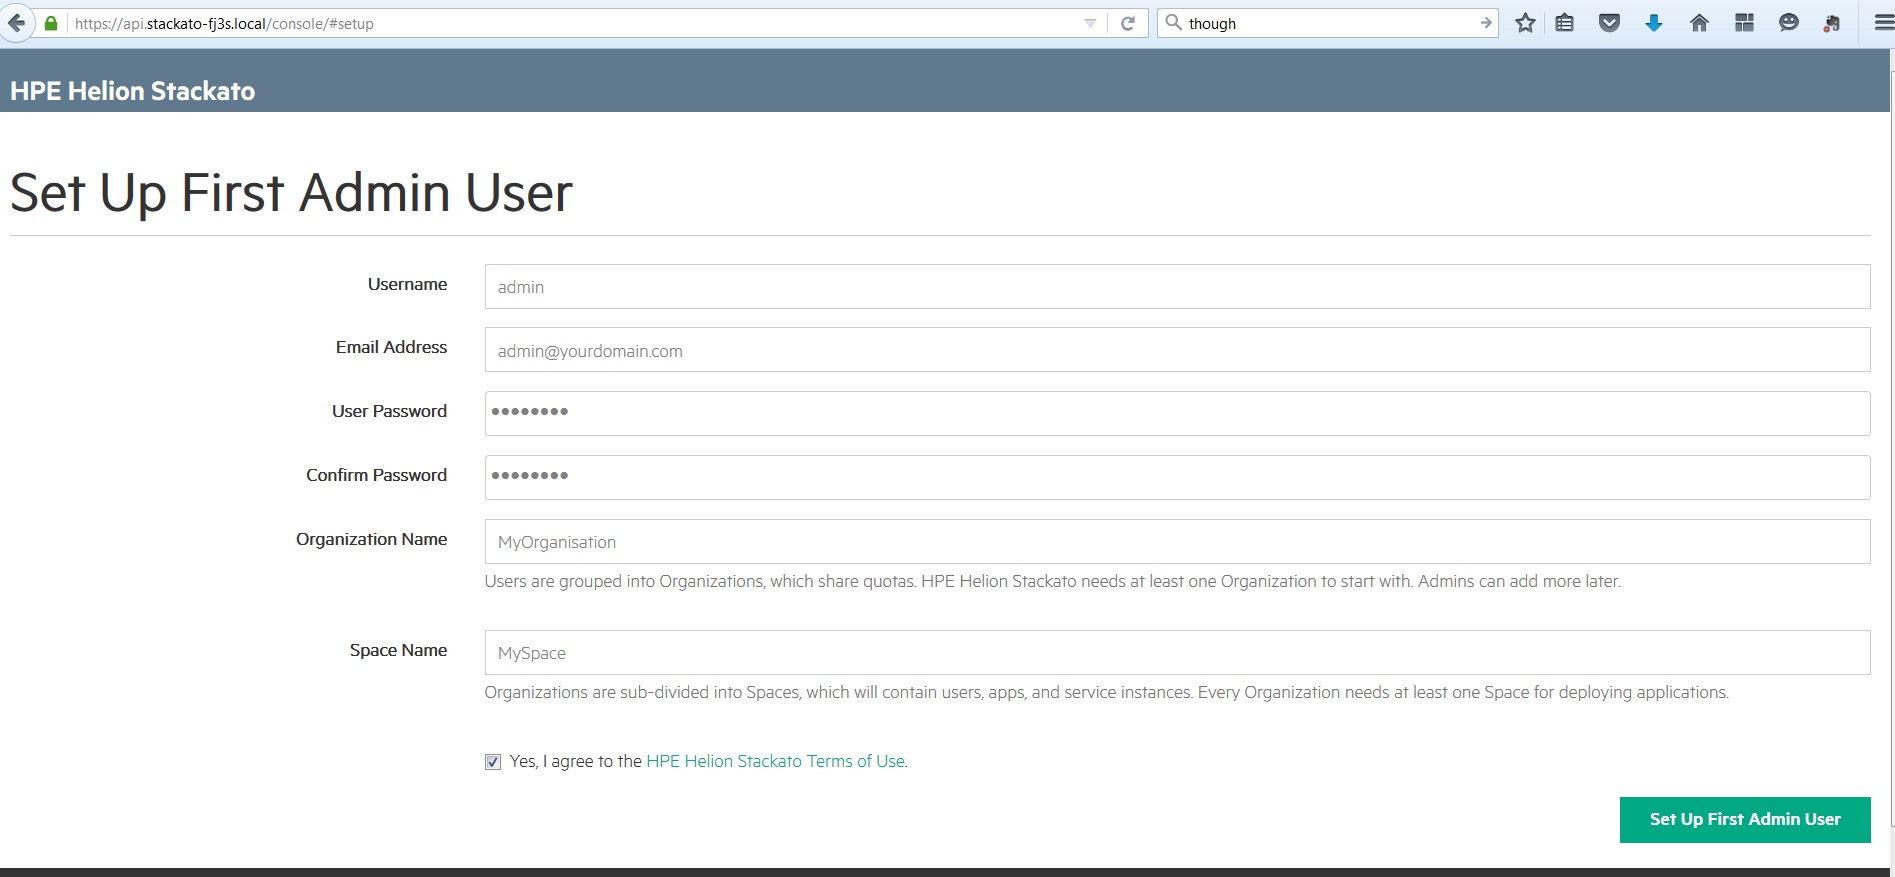
c) Login to the stackato Cloud Foundry environment using the userID and password that you just created.
Step 4: test the CLI
During this step we will use the CLI to access the CloudFoundry environment.
Step 4.1: Open a command prompt.
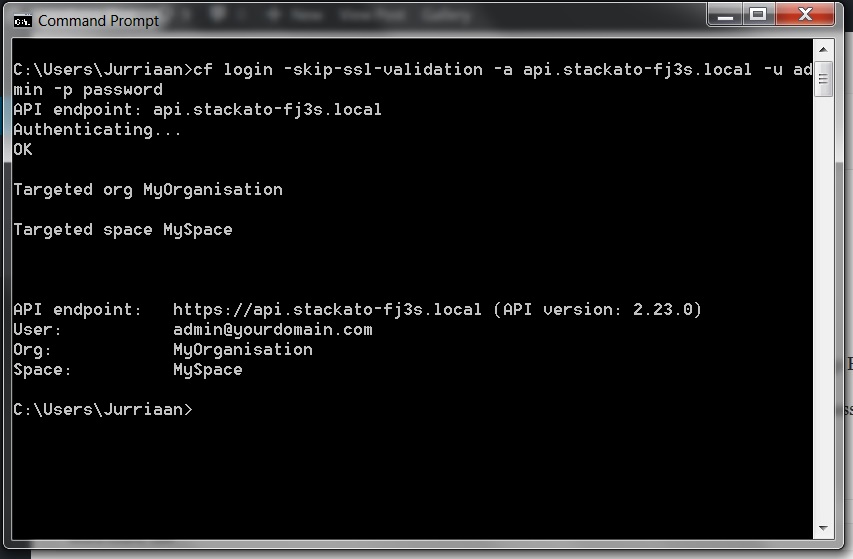
Step 4.2: Login to you CloudFoundry environment
The following command us used: cf login -skip-ssl-validation [-a API_URL] [-u USERNAME] [-p PASSWORD] [-o ORG] [-s SPACE]
In my case I had to use: cf login -skip-ssl-validation -a api.stackato-fj3s.local -u admin -p <my password>
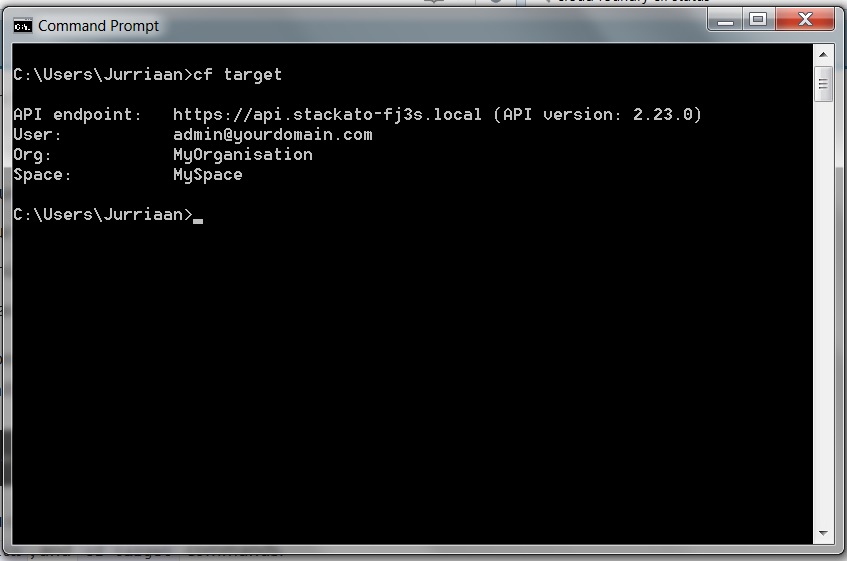
Step 4.3: Show the current organisation, space and Cloud Foundry endpoint by entering: cf target. This will show the following output:
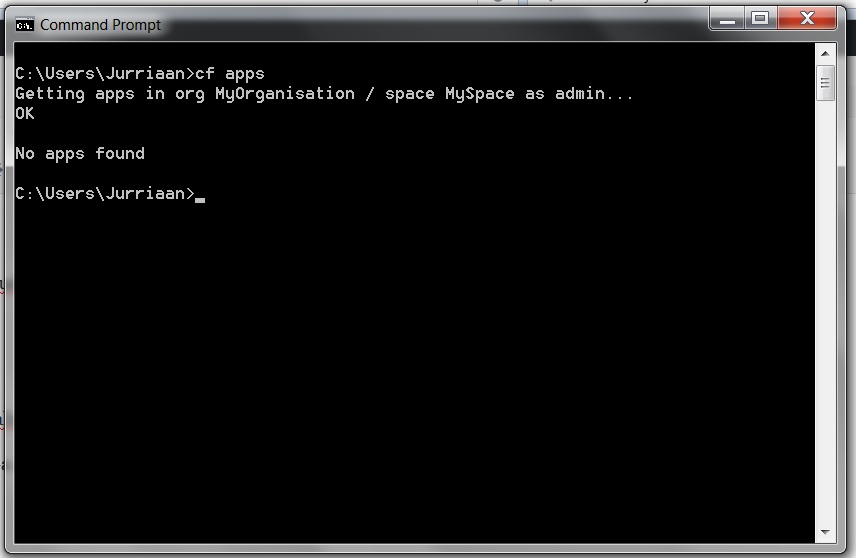
Step 4.4: Show the apps in the current organsation and space by entering the command: cf apps. This will show the following output: (there are no apps just yet :-))
More information on using the CF CLI can be found in the Cloud Foundry CLI documentation.
Remarks:
Login to Stackato
If you need to login to the linux operating system of the Stackato VM use the following steps:
Step 1: Go to the VM console (of virtual box) and type ‘l’.
Step 2: Type ‘l’.
Step 3: Login with
- ID: stackato
- PW: the password you entered during registration (the same you used with CF in step 4).