An howto on installing CloudFoundy on Windows using Bosh-lite….
Introduction
CloudFoundry is one of the most promising PaaS platforms. In order to play around with CloudFoundry on your own machine, you need to install a ‘mini’ test environment. The CloudFoundry organization made available a so called Bosh-lite implementation. This implementation can be used to install CloudFoundry using a Vagrant box (VM). Please find the description on the provisioning process for Linux and iOS here. Unfortunately nevertheless this only works on Linux and iOS. This post contains a step-by-step description on how to install the platform in Windows using.
Important notice: in order to provision your CloudFoundry environment you need to be able to assign at least 8 GB of RAM to the VM running CloudFoundry.
If you want a more easy way to get started, please use the posting ‘Getting up and running with CloudFoundry and the Stackato VM‘.
Step 1: download the required software
In order to install out mini CloudFountry environment we need to download the following software:
- Vagrant. I used version 1.74.
- Virtual Box. I used version 5.0.10.
- Git. I used version 2.6.4. Make sure you have an ID on github.
- Putty. I used putty 0.66.
- The CloudFoundry Command Line Interface (CLI). This is the CLI we will use to manage CloudFoundry. Download it from here. Make sure your download the windows installer.
Step 2: Install the software
Install the downloaded software (in any sequence that you prefer).
When installing Git, preferably allow for it be used from a windows prompt.
Step 3: Get the bosh-lite CloudFoundry box
The Cloud Foundry environment will run on a VM via Vagrant. We will refer to this VM as the Vagrant ‘CF box’. The CF Box contains one Warden container. In this container a BOSH director is installed. BOSH is the provisioning engine of CloudFoundry.
The CF box that we are about to deploy is named ‘bosh-lite’. Is is stored on github.
Step 3.1: Create a new directory called c:\GitHub.
Step 3.2: Open a command prompt and go to c:\GitHub
Step 3.3: Type: git clone https://github.com/cloudfoundry/bosh-lite.
This will create the directory c:\GitHub\bosh-lite. The directory contains a file named ‘VagrantFile’. This configuration file is used by Vagrant to provision the CF Box.
Step 4: Startup the CF Box and install the Bosh CLI
During this step we will startup the VM that is to run the mini CloudFoundry environment (eventually). Furthermore we will install the Bosh Command Line Interface (CLI). Unfortunately this CLI is not available for windows. We will install it on the BOSH director container.
Step 4.1: Statup the CF Box (VM)
Go to the directory c:\Github\bosh-lite and run the command vagrant up --provider=virtualbox
Step 4.2: Login to the newly created CF box.
a) Startup putty.
b) Open a connection to 127.0.0.1:2222 and login with ID: vagrant, password: vagrant.
Step 4.3: Download the BOSH CLI and upload it to the BOSH director container.
c) Download the CLI with the command: bosh download public stemcell bosh-stemcell-389-warden-boshlite-ubuntu-trusty-go_agent.tgz
d) Upload it to the BOSH container with the command: bosh upload stemcell bosh-stemcell-389-warden-boshlite-ubuntu-trusty-go_agent.tgz
Step 5: Download and install the Cloud Foundry stemcells
We need to download the latest version of Cloud Foundry (referred to as ‘cf-release’). Cloud foundry consists of number of so called stemcells. These are lightweight VMs that each run in a container inside the CF Box. Before being able to deploy the stemcells these need to be uploaded to the BOSH container. Finally we will use BOSH to installed the semcells.
Step 5.1: Download the Cloud Foundry release from github using the command: git clone https://github.com/cloudfoundry/cf-release
Step 5.2: Update the release, by running the following commands:
cd cf-release
./scripts/update
Step 5.3: Find out what is the latest version of cf-release.
Goto https://github.com/cloudfoundry/cf-release in your browser and check what is the latest version of cf-release. We will use 2.26.
Step 5.4: Check out the latest version of cf-release using the following command:
git checkout tags/v<latest version>. In our case: git checkout tags/v226.
Step 5.5: Upload the CF release to the BOSH Director container using the command: bosh upload release releases/cf-226.yml (it may take while for this step to be finished).
Remark: You may face the error: “Blobstore error: SHA1 mismatch…”. I have the impression this error is caused by ‘network problems’.
Alternatively you may decide to use the following command to download the latest release
- bosh upload release https://bosh.io/d/github.com/cloudfoundry/cf-release
or
- bosh upload release https://bosh.io/d/github.com/cloudfoundry/cf-release?v=<version> (for example: bosh upload release https://bosh.io/d/github.com/cloudfoundry/cf-release?v=226
Step 5.6: Install spiff.
Spiff is used to create BOSH manifest file. The deployment manifest is a YAML file that defines the components and properties of the deployment. In order to be able to install spiff we need a ‘go’ environment.
a) run the following command:
wget https://storage.googleapis.com/golang/go1.4.2.linux-amd64.tar.gztar -C /usr/local -xzf go1.4.2.linux-amd64.tar.gzexport PATH=$PATH:/usr/local/go/binexport GO_PATH=$HOME/gomkdir $HOME/go
b) Install ‘spiff’ using the following command: go get -v github.com/cloudfoundry-incubator/spiff
Step 5.7: install and deploy Cloud Foundry
a) Build the manifest file. Run the following command bosh-lite folder: sudo ./bin/make_manifest_spiff
b) Prepare the deployment, using the following command: bosh deployment manifests/cf-manifest.yml
c) Start the deployment of CloudFoundry by running the following command: bosh deploy
Step 6: Suspend en resume the CF Box.
Make sure you do not quit the CF Box (otherwise everything is lost). If you want to stop your CF box:
Step 6.1: open a windows command prompt.
Step 6.2: goto the directory c:\GitHub\bosh-lite
Step 6.3: type ‘vagrant suspend’. This will ‘hibernate’ the CFBox.
Step 6.4: In order to resume the CF Box, type: vagrant resume.
Step 7: test the CLI
During this step we will use the CLI to access the CloudFoundry environment.
Step 7.1: Open a command prompt.
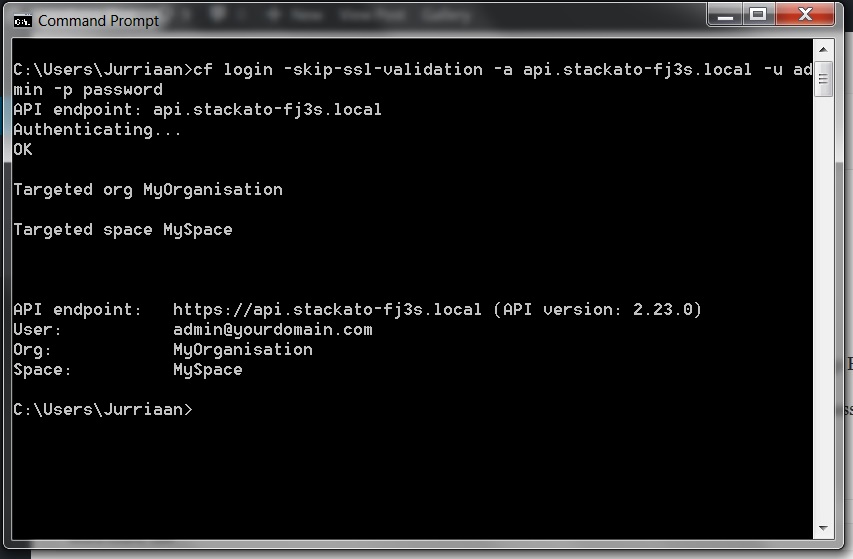
Step 7.2: Login to you CloudFoundry environment
The following command us used: cf login -skip-ssl-validation [-a API_URL] [-u USERNAME] [-p PASSWORD] [-o ORG] [-s SPACE]
In my case I had to use: cf login -skip-ssl-validation -a api.stackato-fj3s.local -u admin -p <my password>
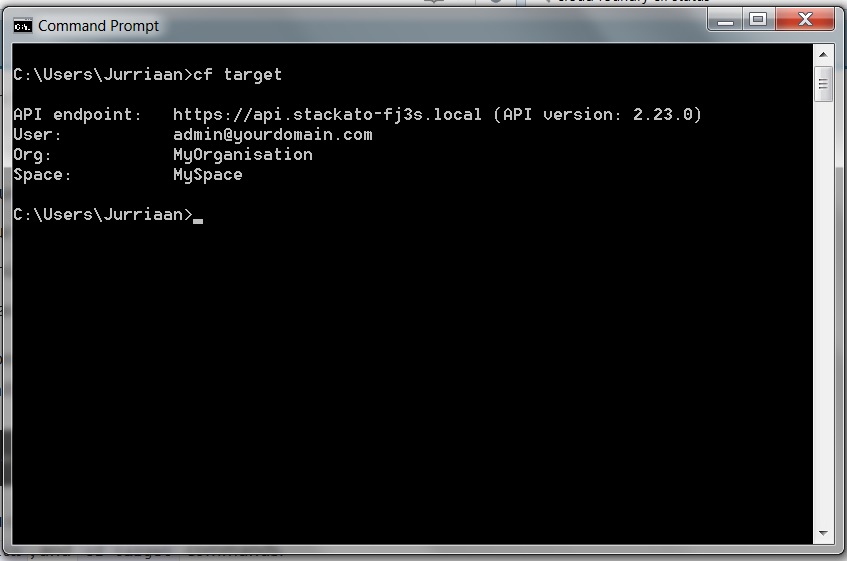
Step 7.3: Show the current organisation, space and Cloud Foundry endpoint by entering: cf target. This will show the following output:
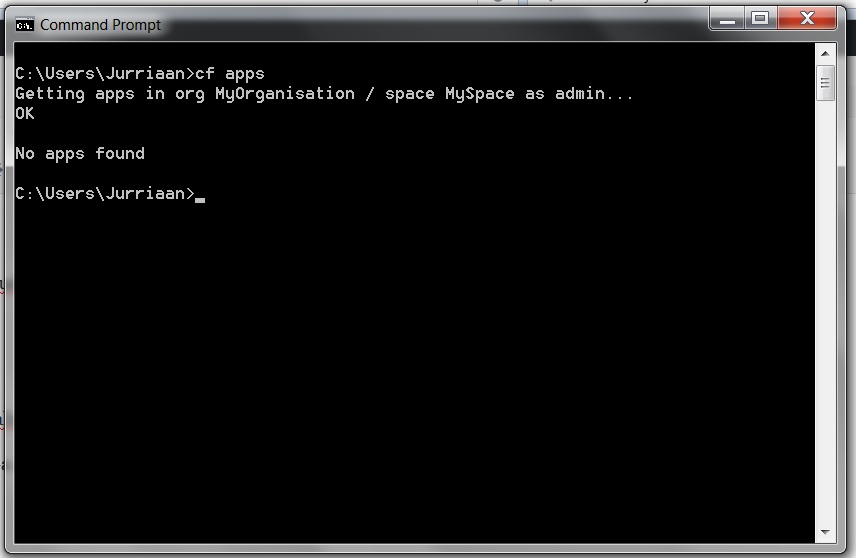
Step 7.4: Show the apps in the current organsation and space by entering the command: cf apps. This will show the following output: (there are no apps just yet :-))
More information on using the CF CLI can be found in the Cloud Foundry CLI documentation.