Tibco offers the opportunity to create custom BusinessWorks 6 pallets. In order to simplify the development of pallets a BW Development Kit (BWDK) is available here. This document contains a detailed description on how to generate a installer for a plugin once it is finished.
Remark: The content of this document is based on this document.
Assumptions:
- Is is assumed the BW6 plug-in development kit is downloaded and installed. See for more information on the installation here.
- It is assumed you created a designtime and a runtime for your pallet.
Step 1) Open Tibco Designer and load the workspace that contains your design time of the plugin.
Step 2) Click File –> New –> Create a new of modify a BusinessWorks Plug-in project
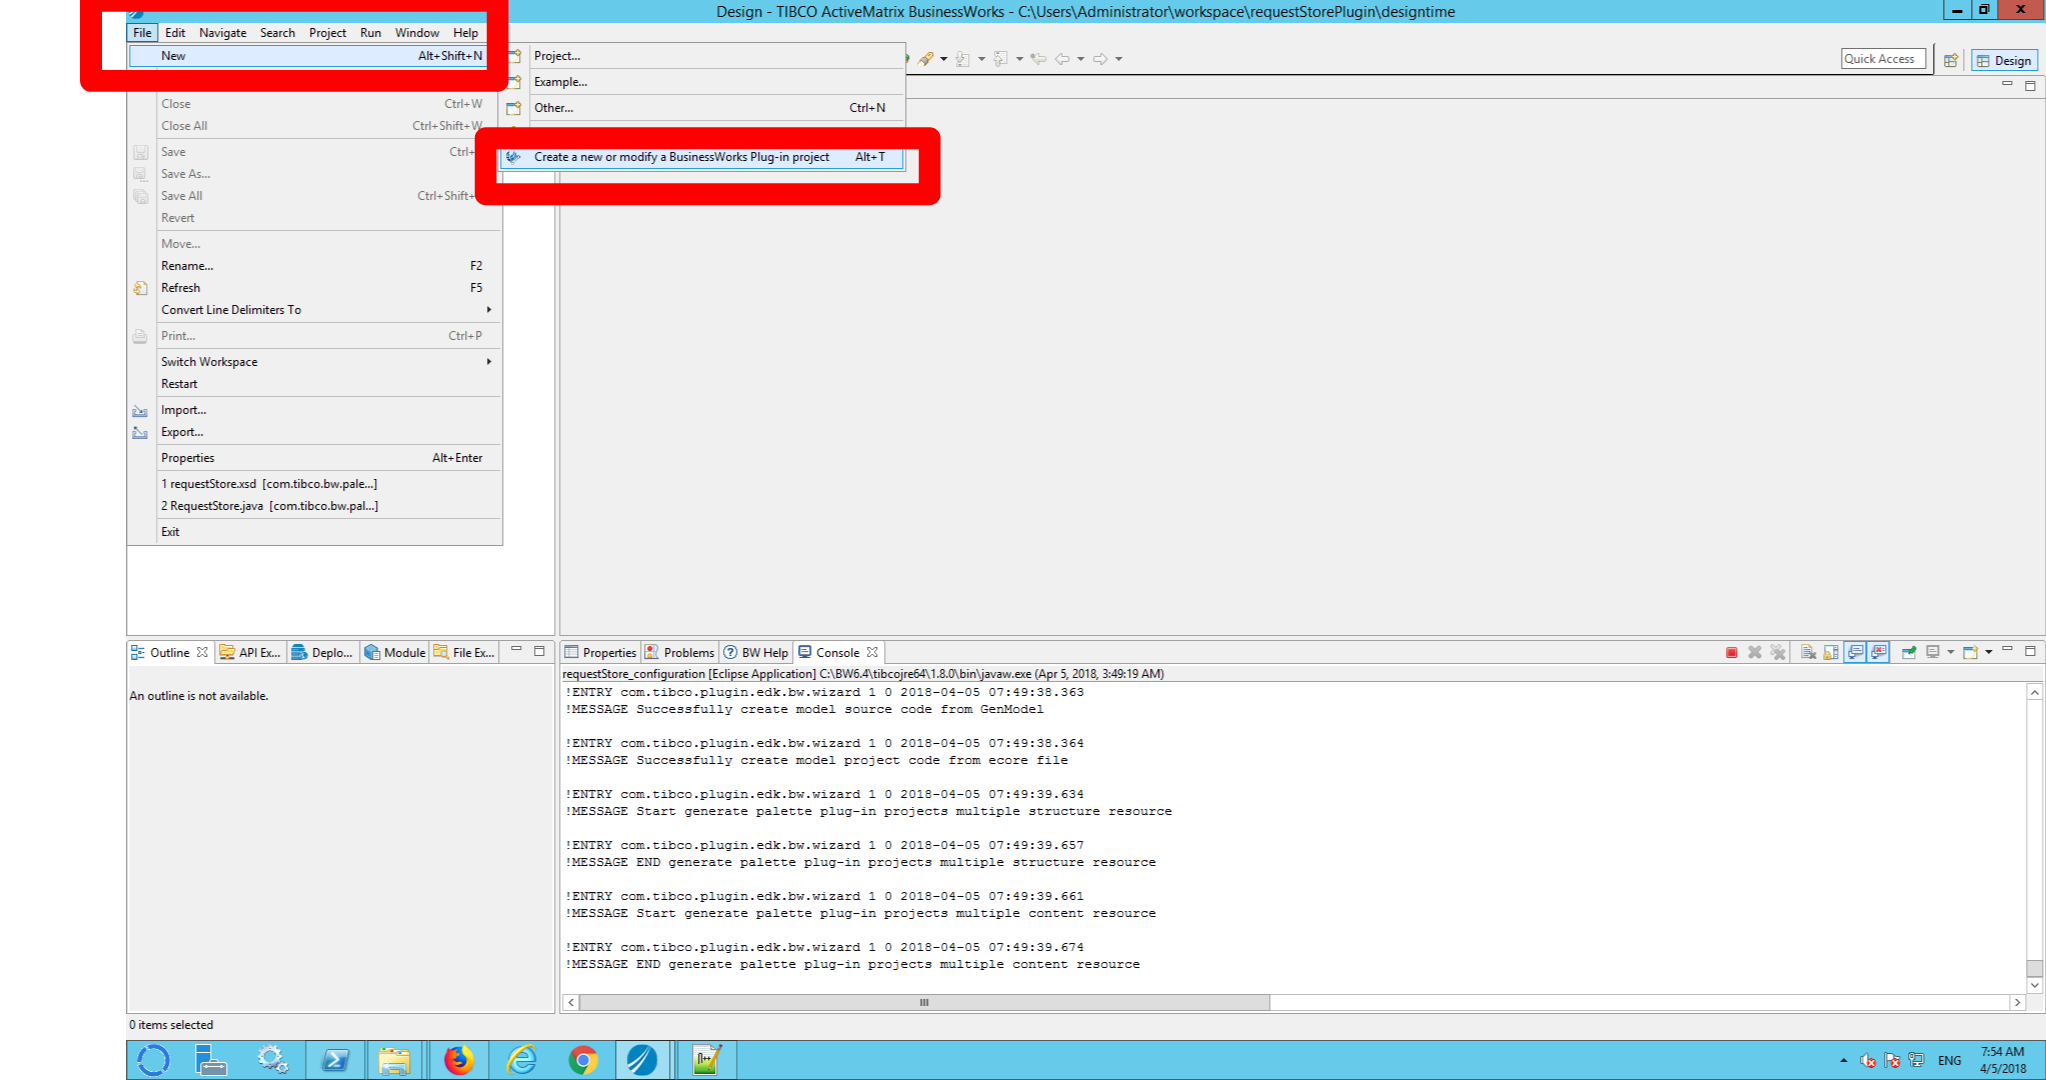
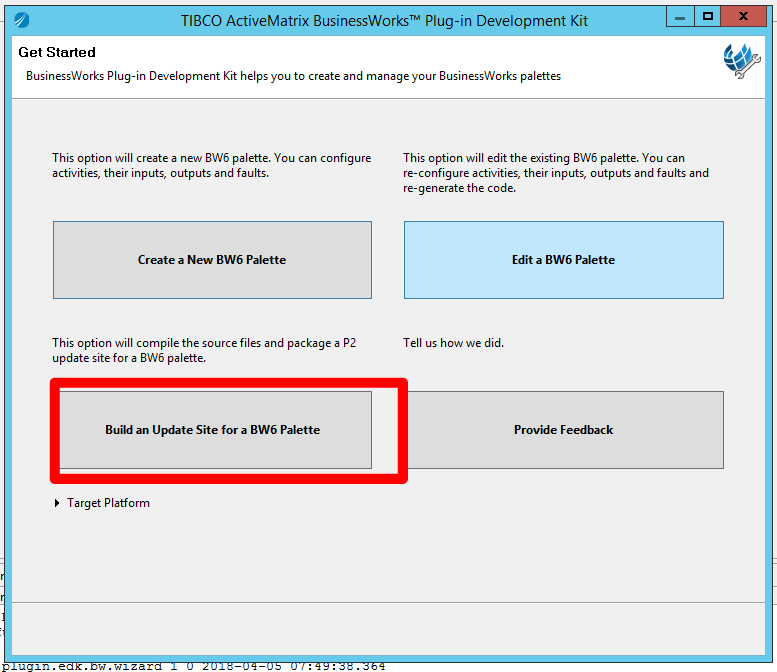
Step 3) Select ‘Build an Update Site for a BW6 Palette’
Step 4) Click the browse button next the the ‘plug-in Properties File’ and select the bw6_devkit_configuration.properties. This file is located in the directory <workspace for design time>/<palletName>.
Based on this choice the fields Model project Path, Design Project Path, Runtime Project Path and Output Location are filled out.
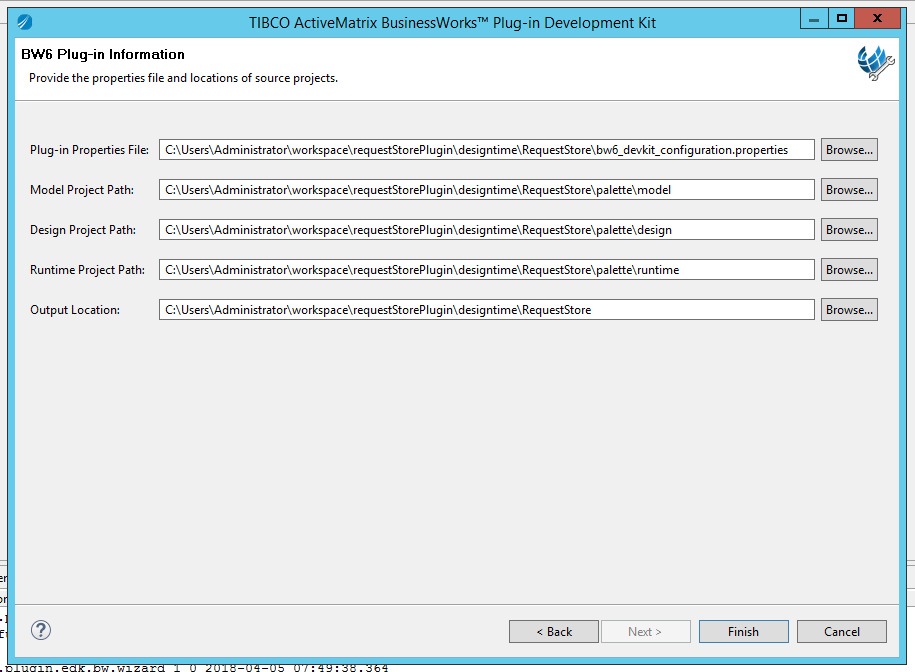
Step 5) Make a note of the path ‘Output Location’.
Step 6) Click Finished. The following artifacts will be generated:
- The <Output Location>/doc folder contains a documentation template generated according to the created palette and activity. You can update this template and use it as the online help for the created activities. See Creating Documentation for more details.
- The <Output Location>/ePass folder contains the BusinessWorks Container Edition runtime zip file for the plug-in which you have created.
- The <Output Location>/exportedFeatures folder contains the bundles that the newly added source build produces.
- The <Output Location>/p2Installer folder contains a P2 update site.
You can use this installer to install the created palette in TIBCO Business Studio by using Eclipse Update Manager (see next steps).
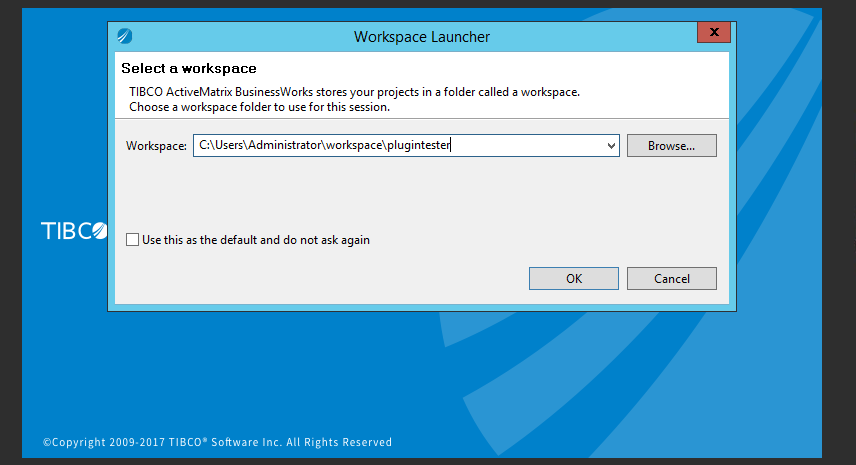
Step 7) Open a new instance of designer (you may choice to close the instance used for the plugin design time). Open a new workspace.
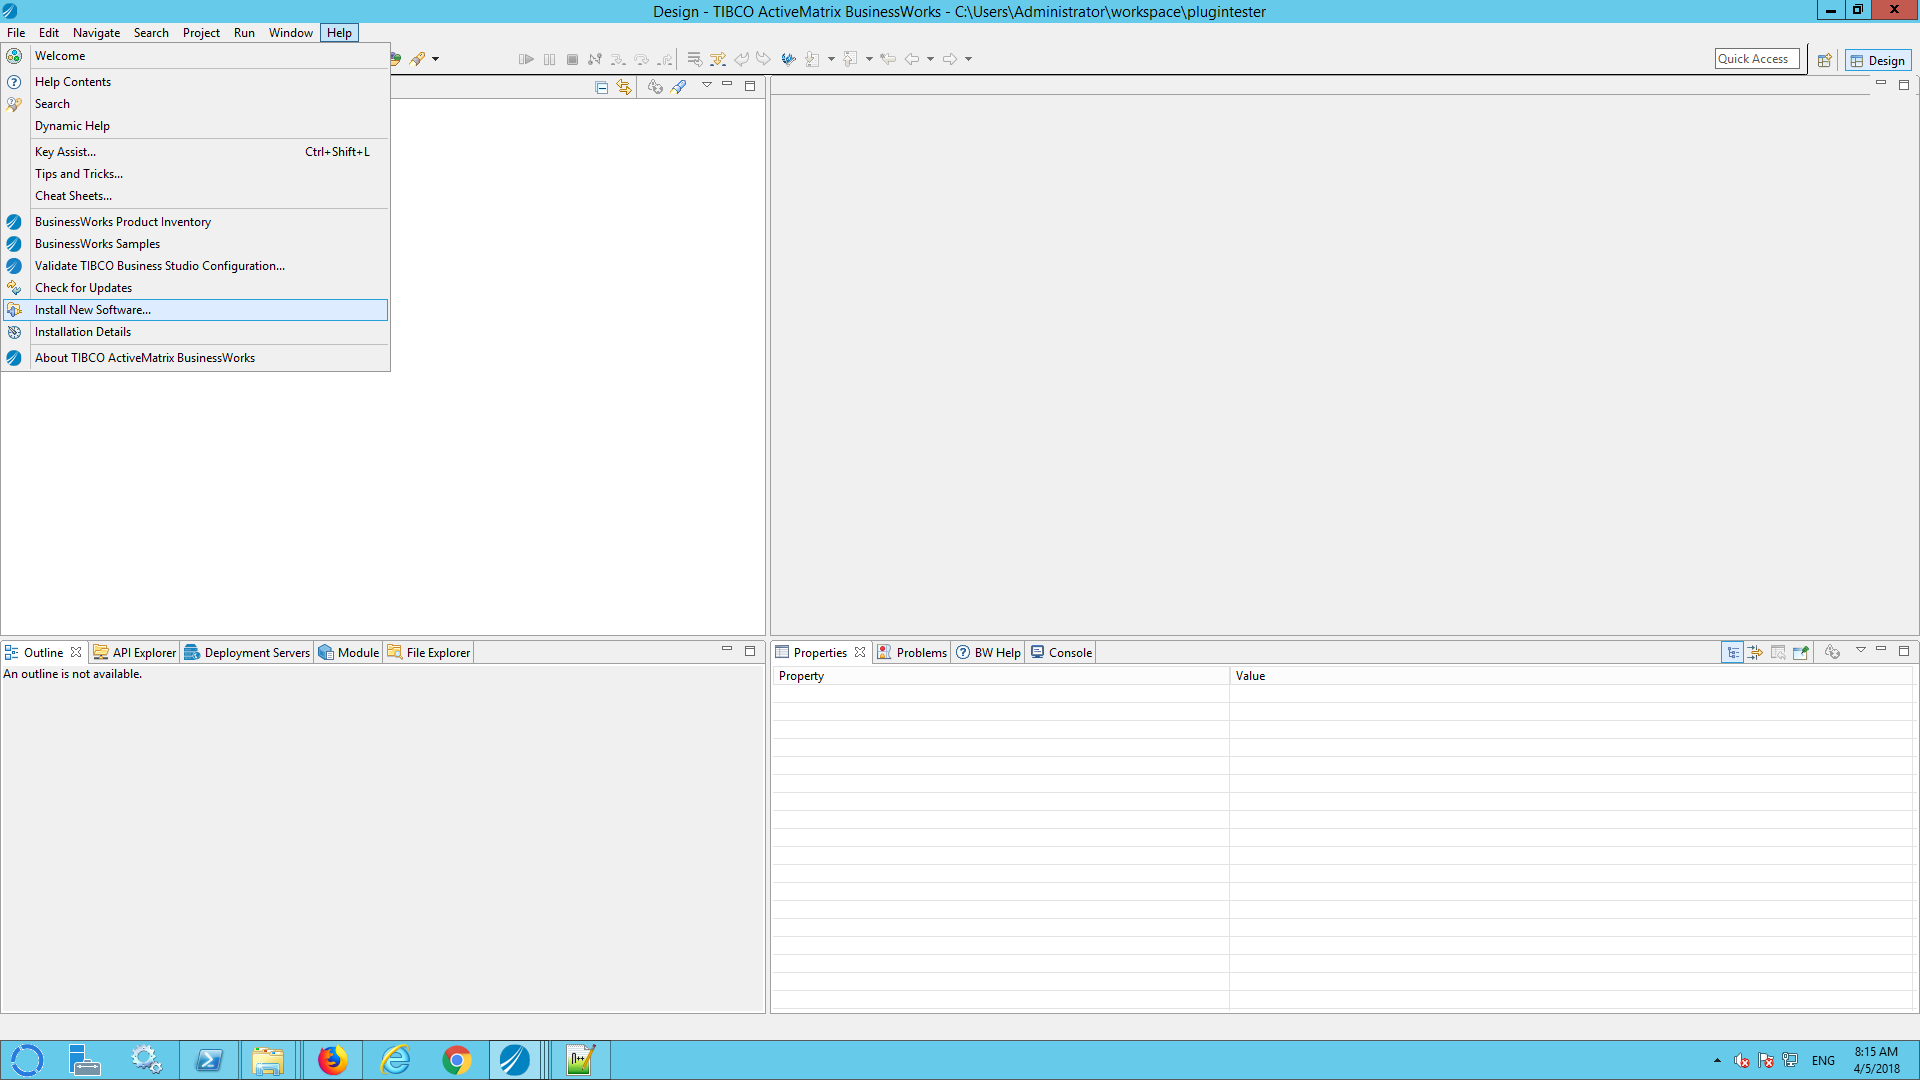
Step 8) Click Help –> Install New Software
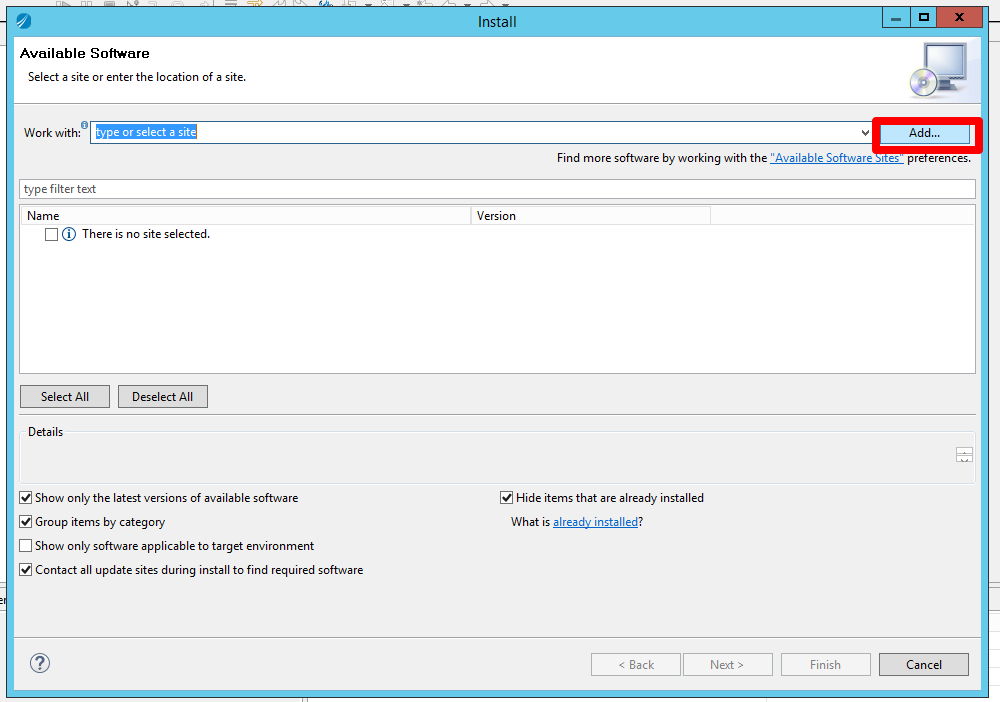
Step 9) Click the ‘Add’ button.
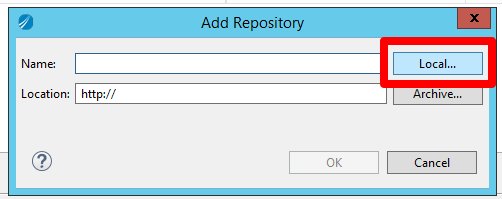
Step 10) Click the ‘local’ button and select the folder <Output Location>/p2Installer.
Step 11) Click ‘OK’

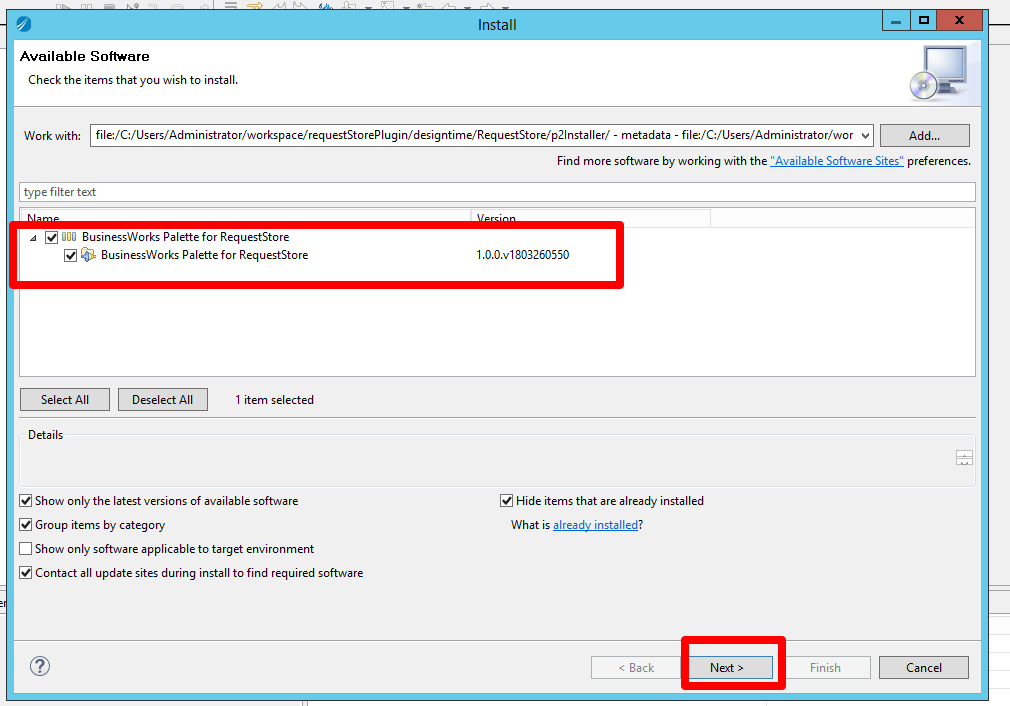
Step 12) Select the Pallet you created and click ‘next’
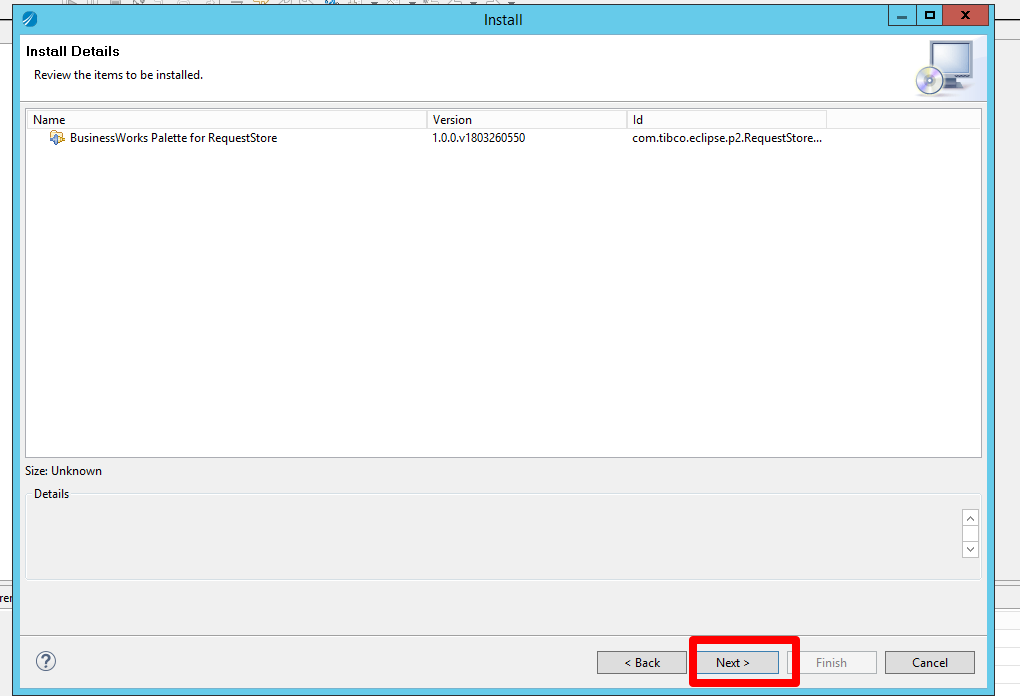
Step 13) Click ‘Next’ again.
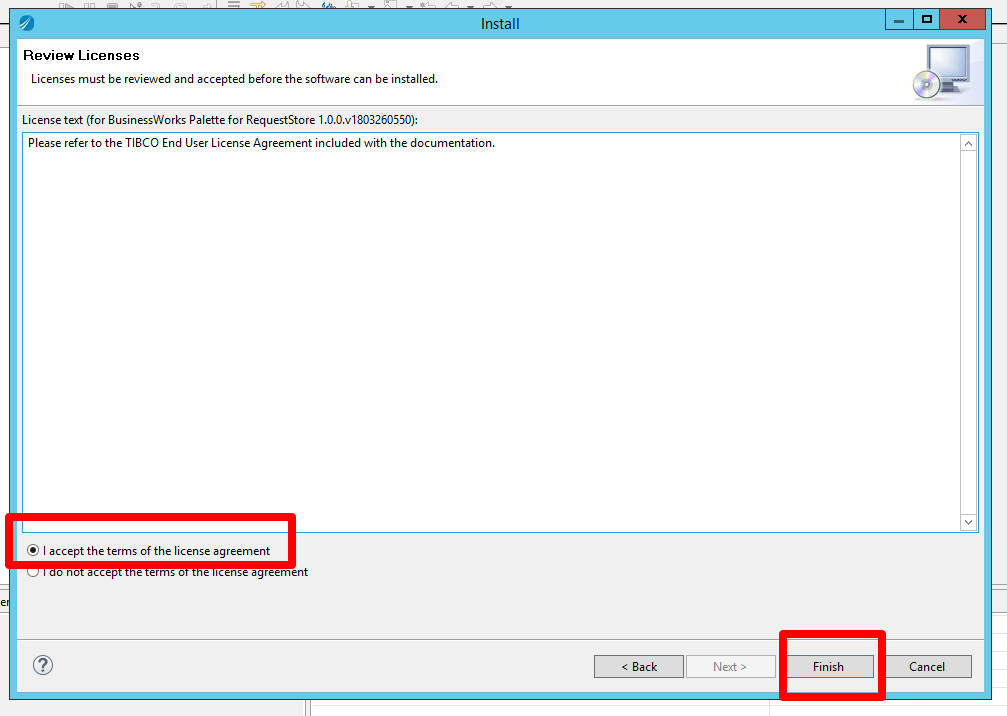
Step 14) Accept the license agreement and click ‘Finish’
Step 15) Ignore the warning about unsigned content.
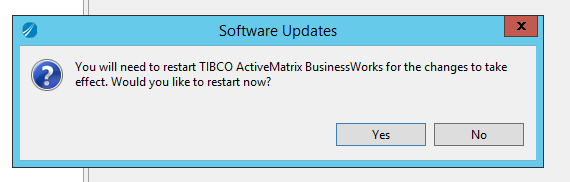
Step 16) Restart designer if requested to do so.
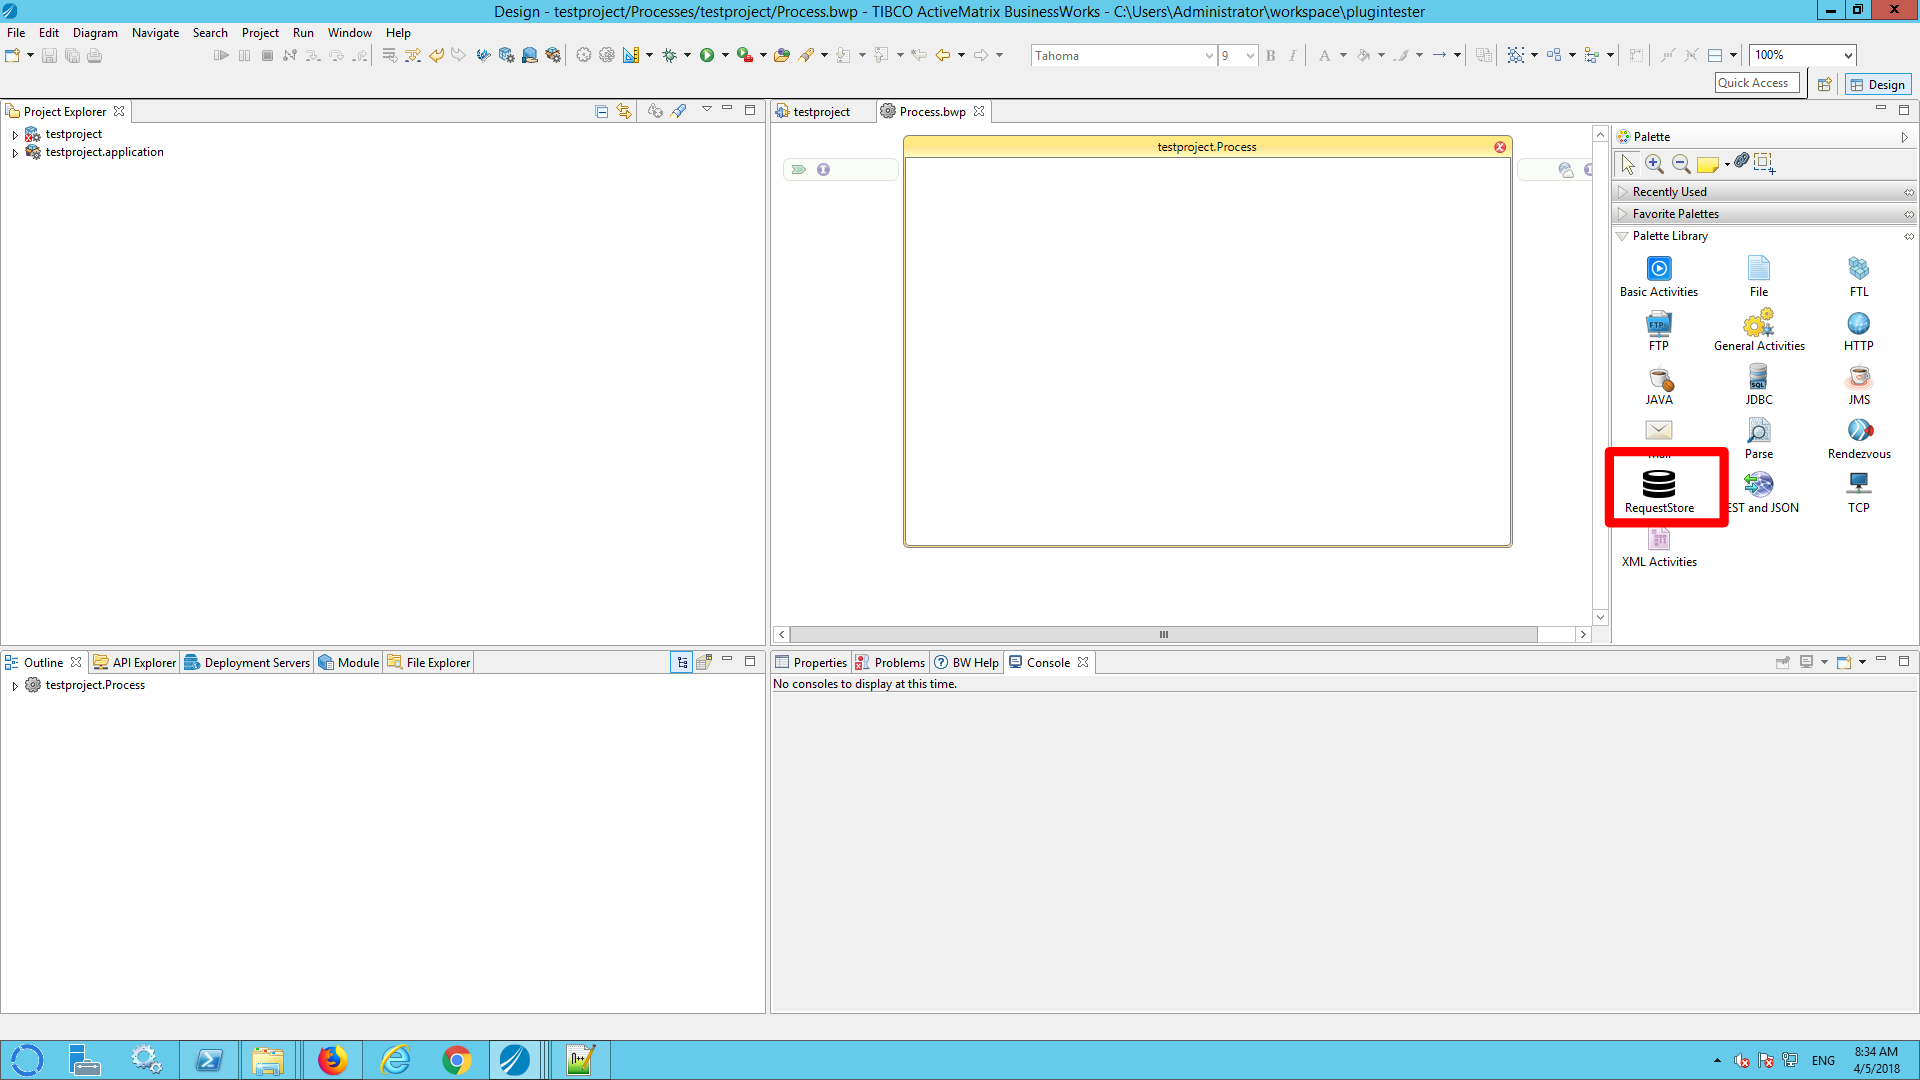
Step 17) Create a new BW project and notice that the imported plugin is available: