SonarQube is a tool that can be used to carry out quality checks on code. A Businessworks 6 plugin is available for SonarQube. Once installed, the sonar scanner can be used to carry out a scan on BW6 code. This document contains a description on how to install and use sonar scanner in conjunction with BW6. The sonar scanner allows you to scan a BW6 project from the command line. The SonarQube Scanner is recommended as the default launcher to analyze a project with SonarQube.
Prerequisites
It is assumed that:
- SonarQube is installed
- The BW6 plugin is installed (see the SonarQube BusinessWorks6 guide).
- A BW6 project (the target of the quality test) is available.
- A quality profile is created in SonarQube (see the administrative guide in the SonarQube BusinessWorks6 guide)
SonarQube BusinessWorks6 guide:
Sonar_BusinessWorks6_Plugin_1.0.0.pdf
Step 1) Install SonarQube scanner
a) Download the SonarQube scanner here.
b) Use the installation description on same web page to install the scanner.
c) Add the directory in which the SonarQube scanner is installed the the PATH.
Step 2) Export the BW6 application
a) Start designer and load the application to be analyses
b) Click File –> Export
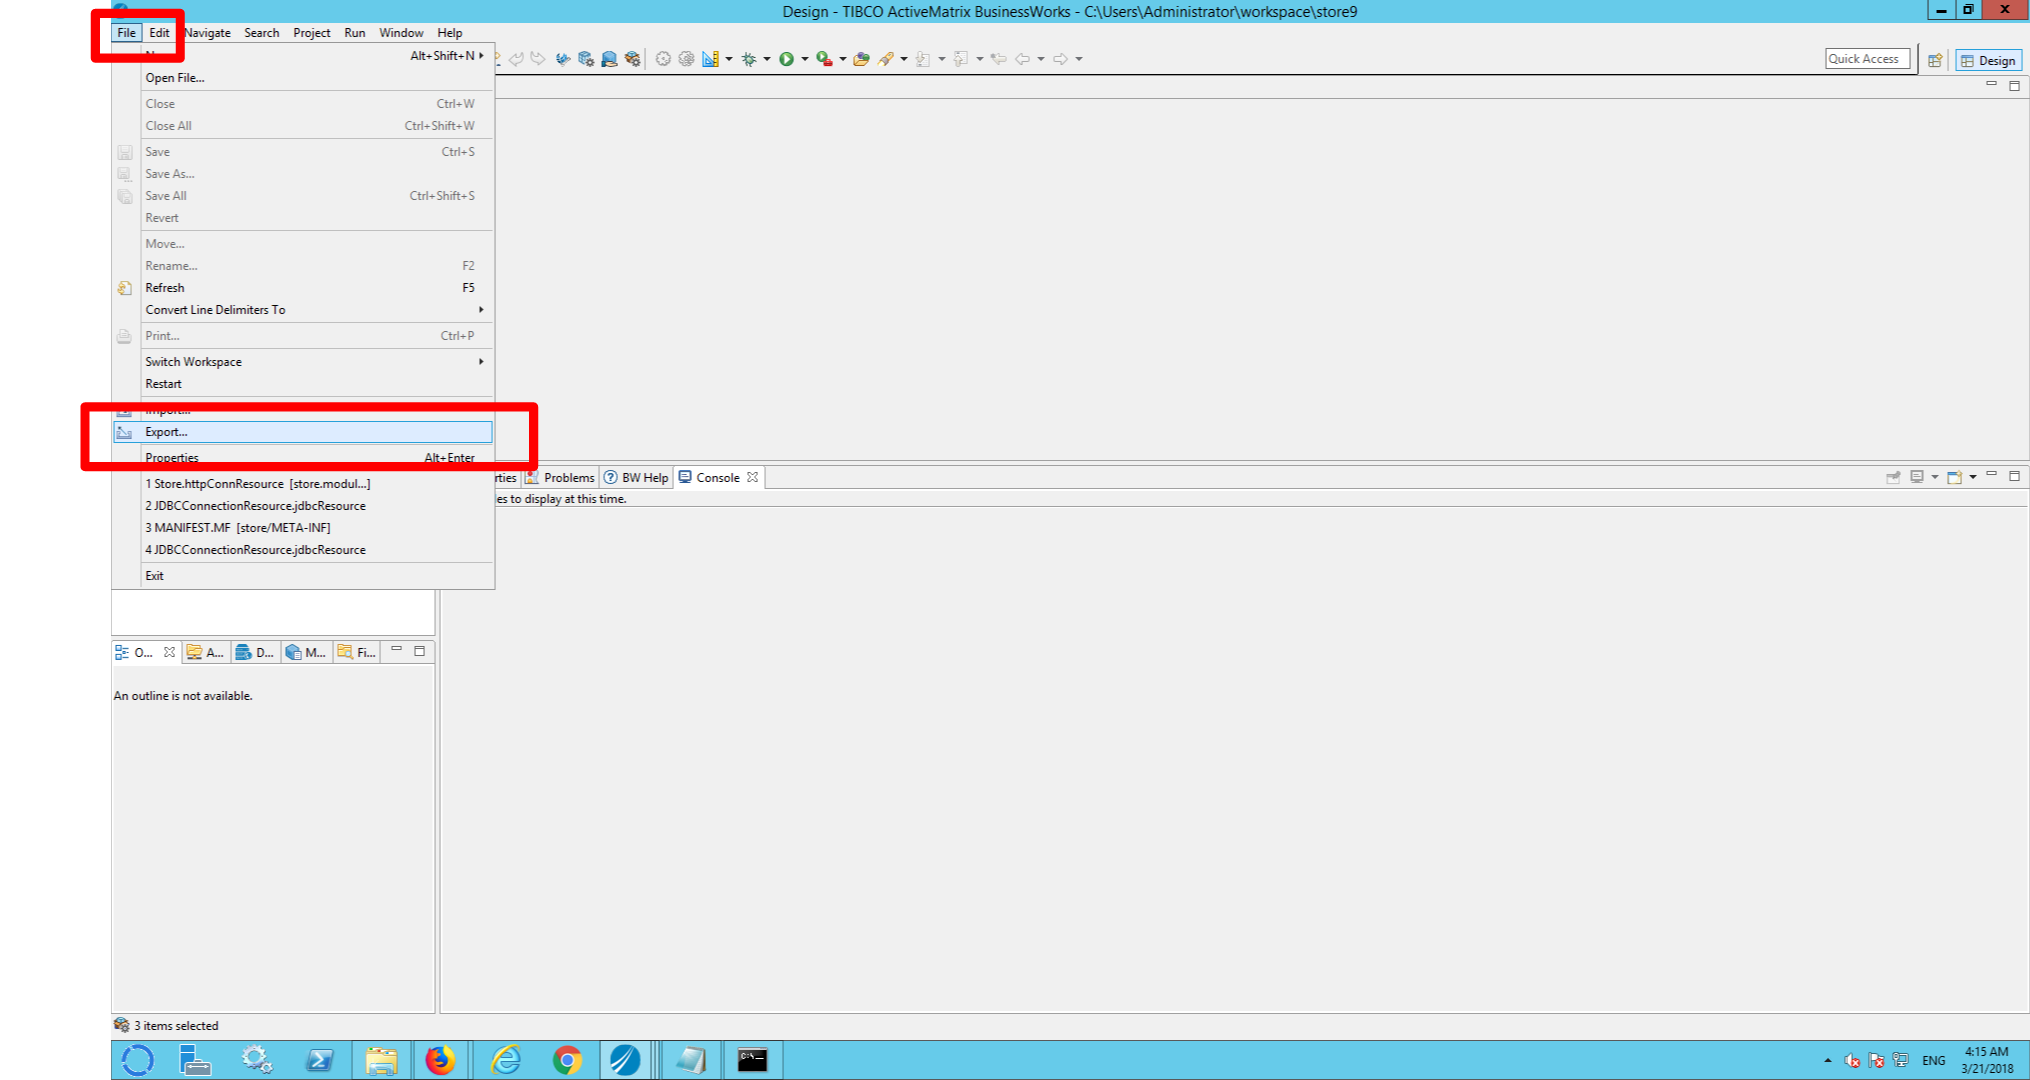
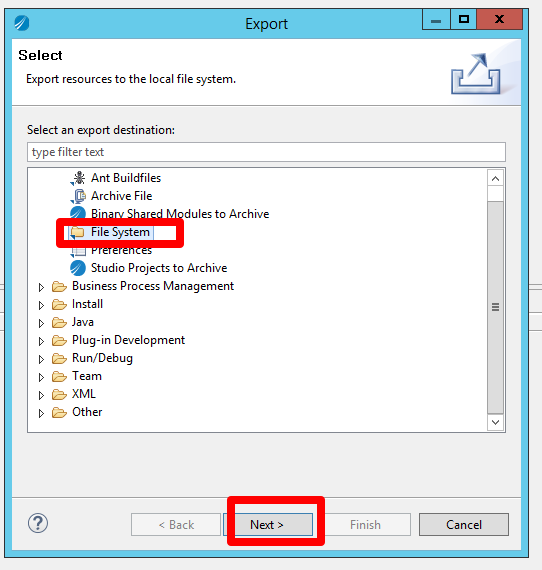
c) Select general –> file system and click next
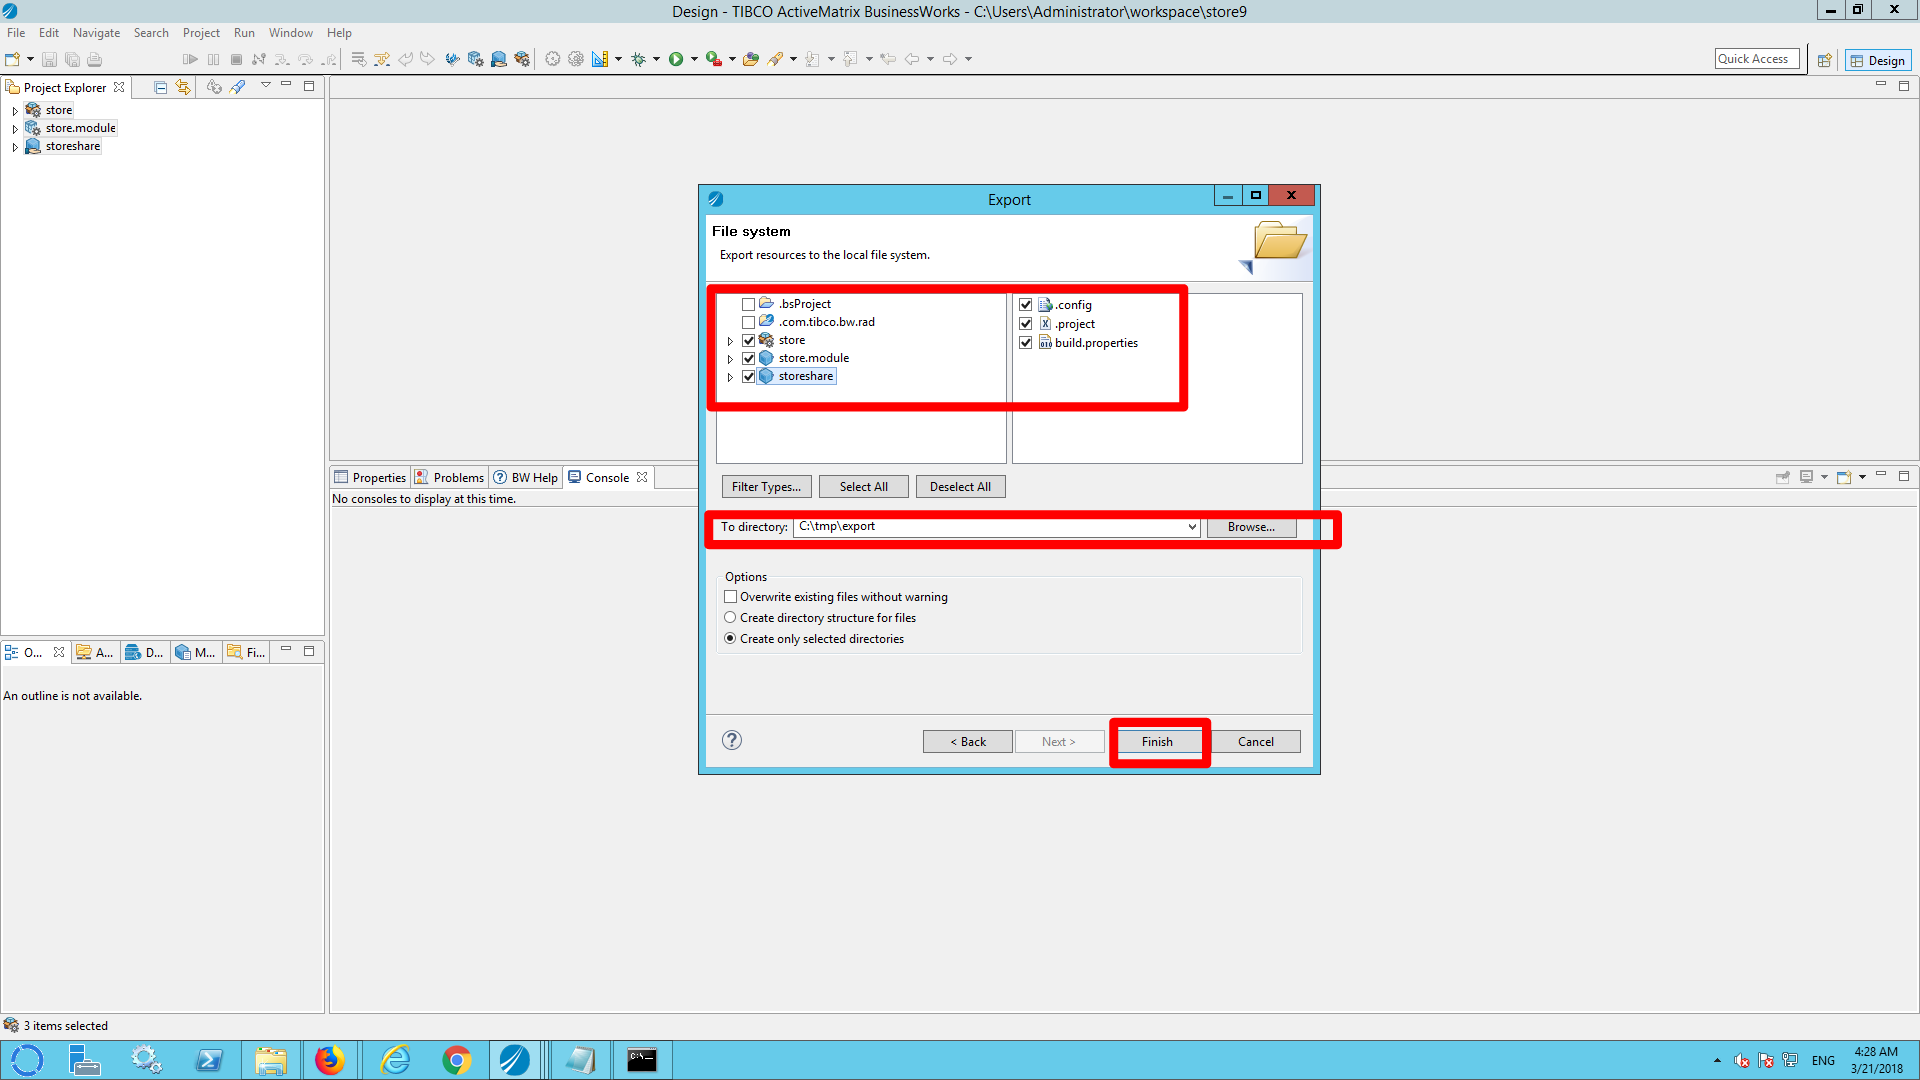
d)
i) Select the BW modules and the application
ii) Choose an (empty) export directory
iii) Click finish
Step 3) Create a SonarQube properties file
Every module (and shared module) must be scanned separately. In order to be able to scan a module you need to create a file named sonar-project.properties in the directory that contains the module.
a) Open a terminal window and go to the directory that contains the exported project (created in step 2).
b) cd to the module that you want to scan (named <modulename>.module
c) create a new file named sonar-project.properties and paste the following content listed in section ‘use’ here.
Example:
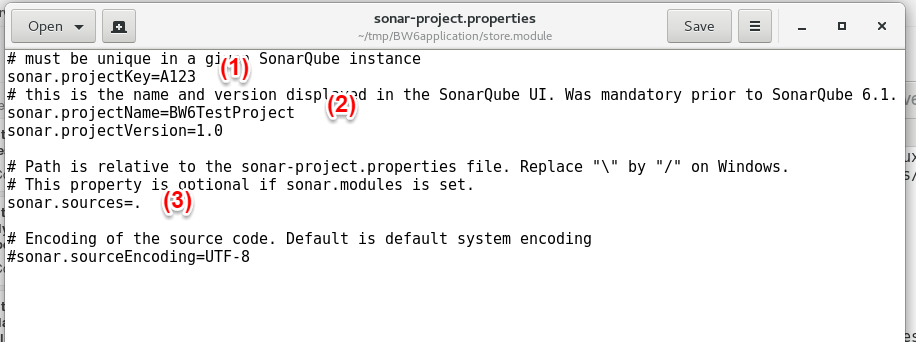
(1) Use the project key defined when you setup SonarQube.
(2) Use the project name and version in SonarQube you setup.
(3) use the current directory (.).
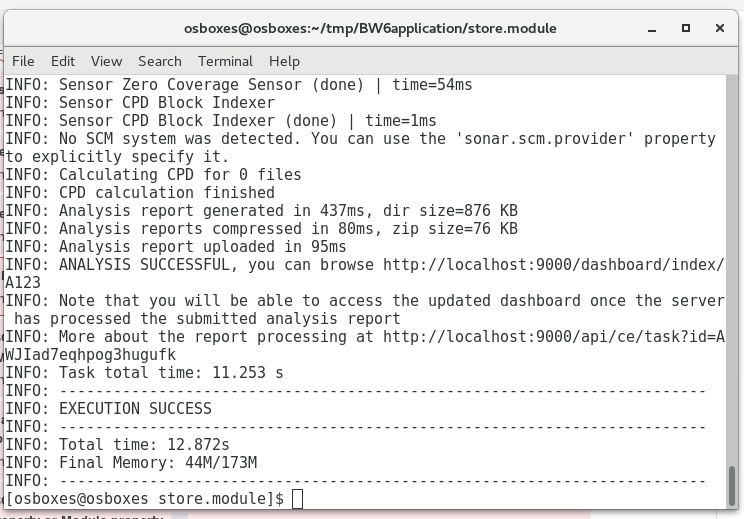
Step 4) Run the scanner
a) From the directory in which you created the file sonar-project.properties run the command ‘sonar-scanner’. After a few seconds you should see something like the following output:
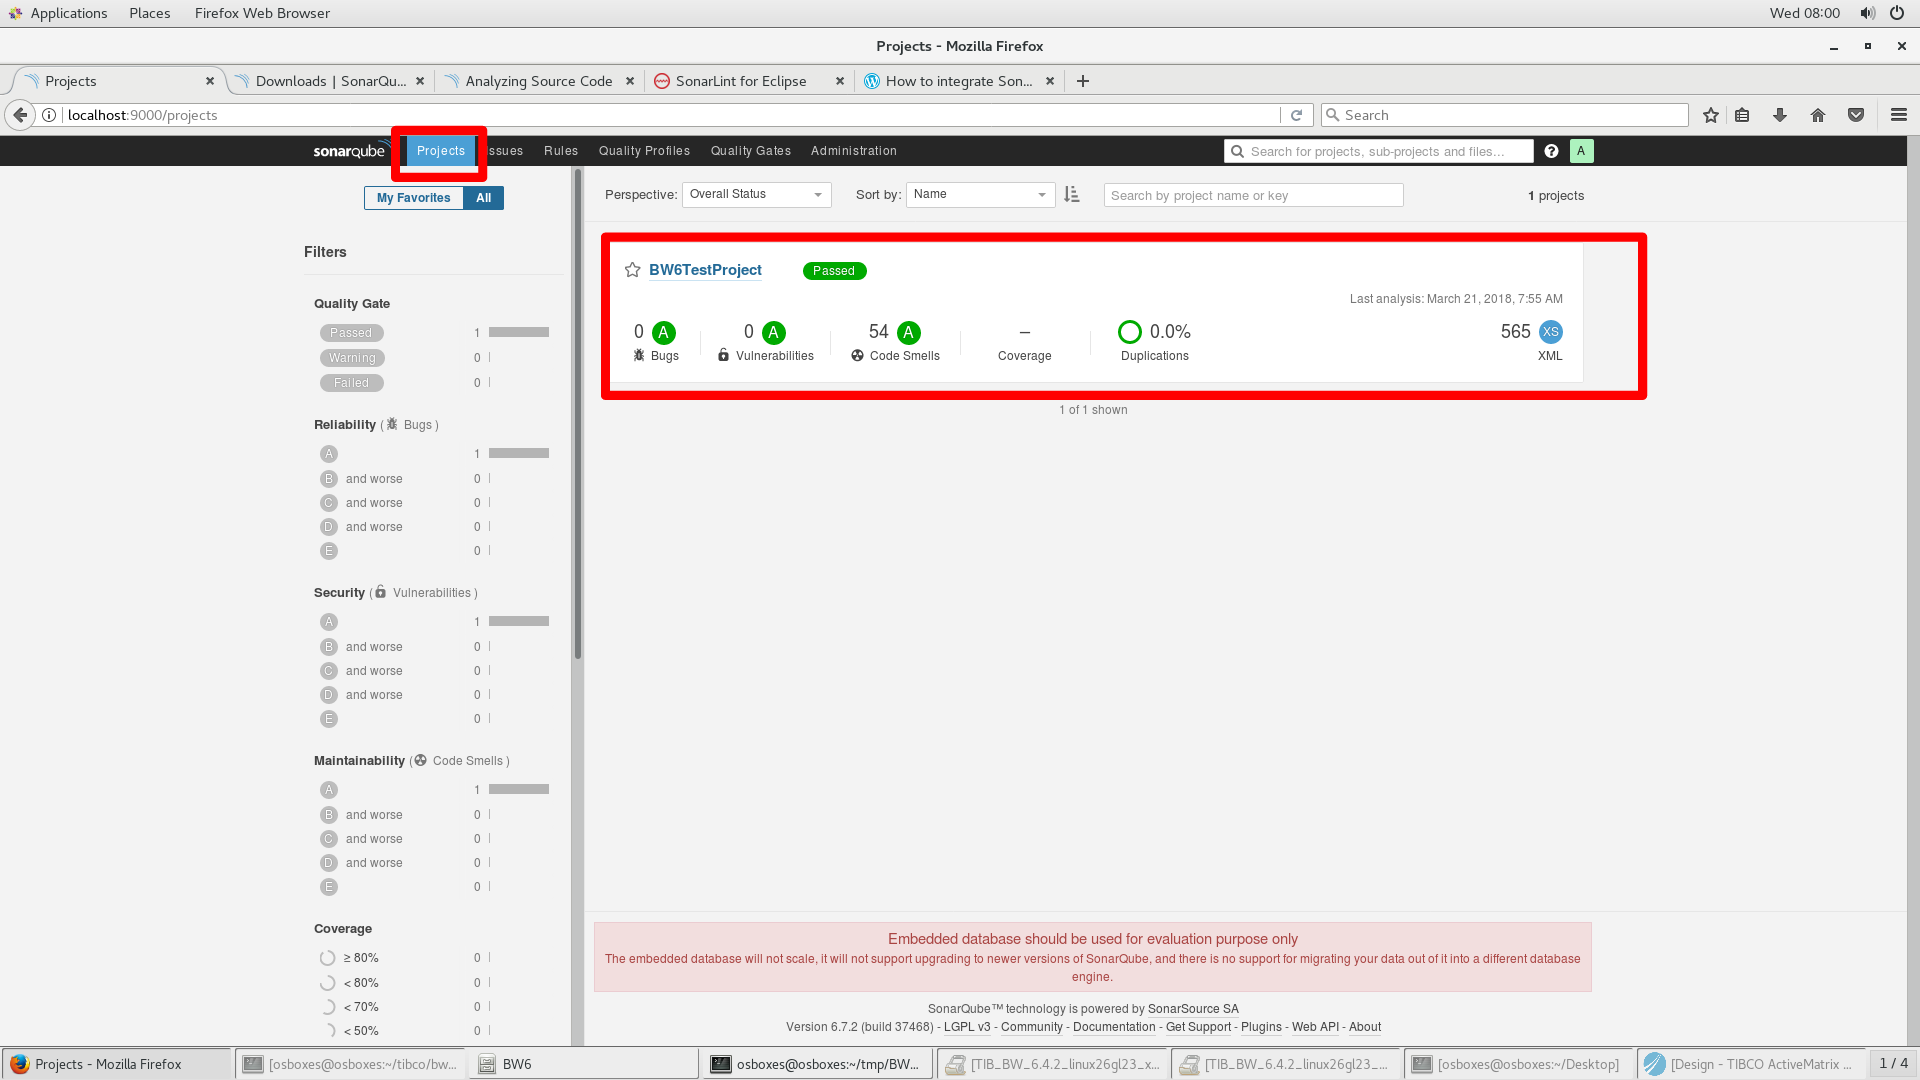
b) Open a browser and go to http://<sonarqubeserver>:9000/ (for example: http://localhost:9000/)
c) Click the ‘login’ button and login. The default login is admin/admin.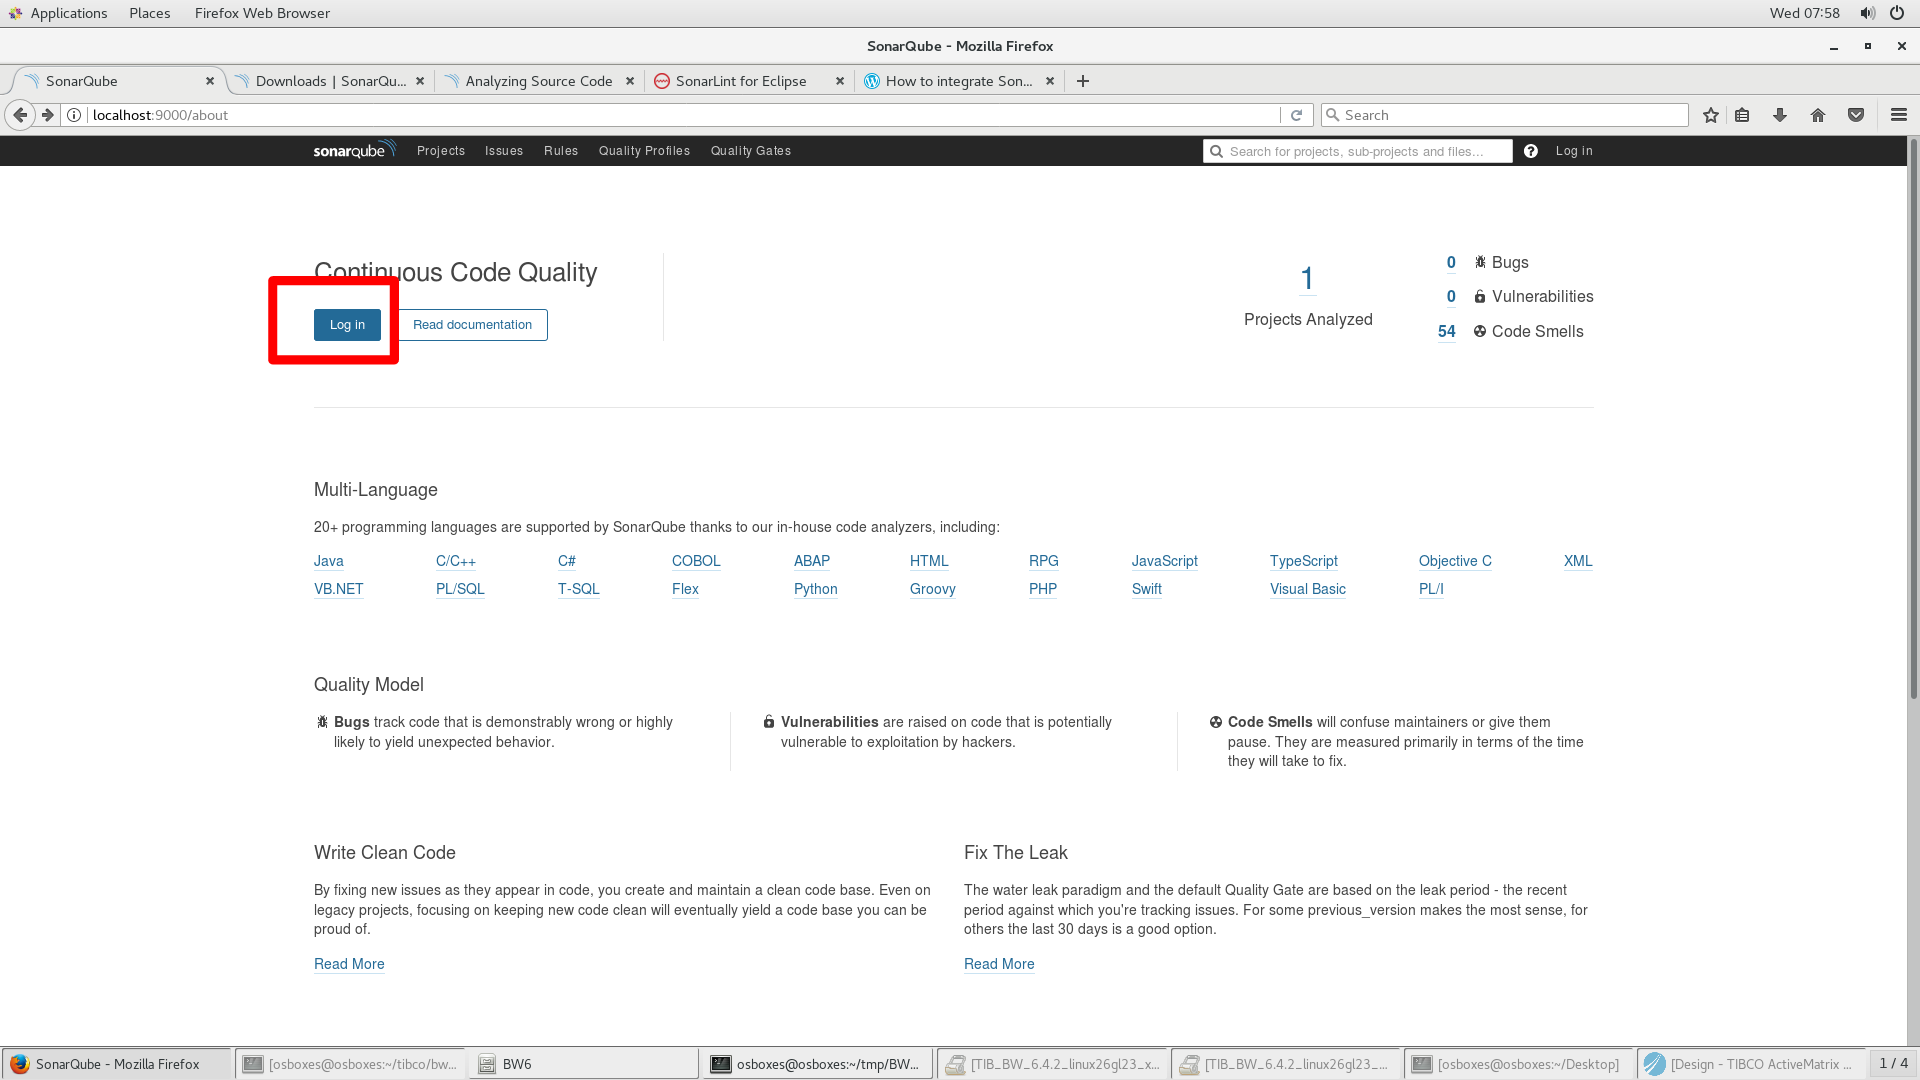
d) At the project tab, you will find your predefined BW6 project. This project will contain the results of the last scan. Click the project name to see the details.