Tibco offers the opportunity to create custom BusinessWorks 6 pallets. In order to simplify the development of pallets a BW Development Kit (BWDK) is available here. This document contains a detailed description on how to create a first ‘hello world’ plugin.
Preparation:
Make sure you have BW6 design time installed and that you installed the BW6 plug-in development kit. See for more information here.
Create and test an hello world plug-in:
Step 1: Create a new workspace
a) Open Designer
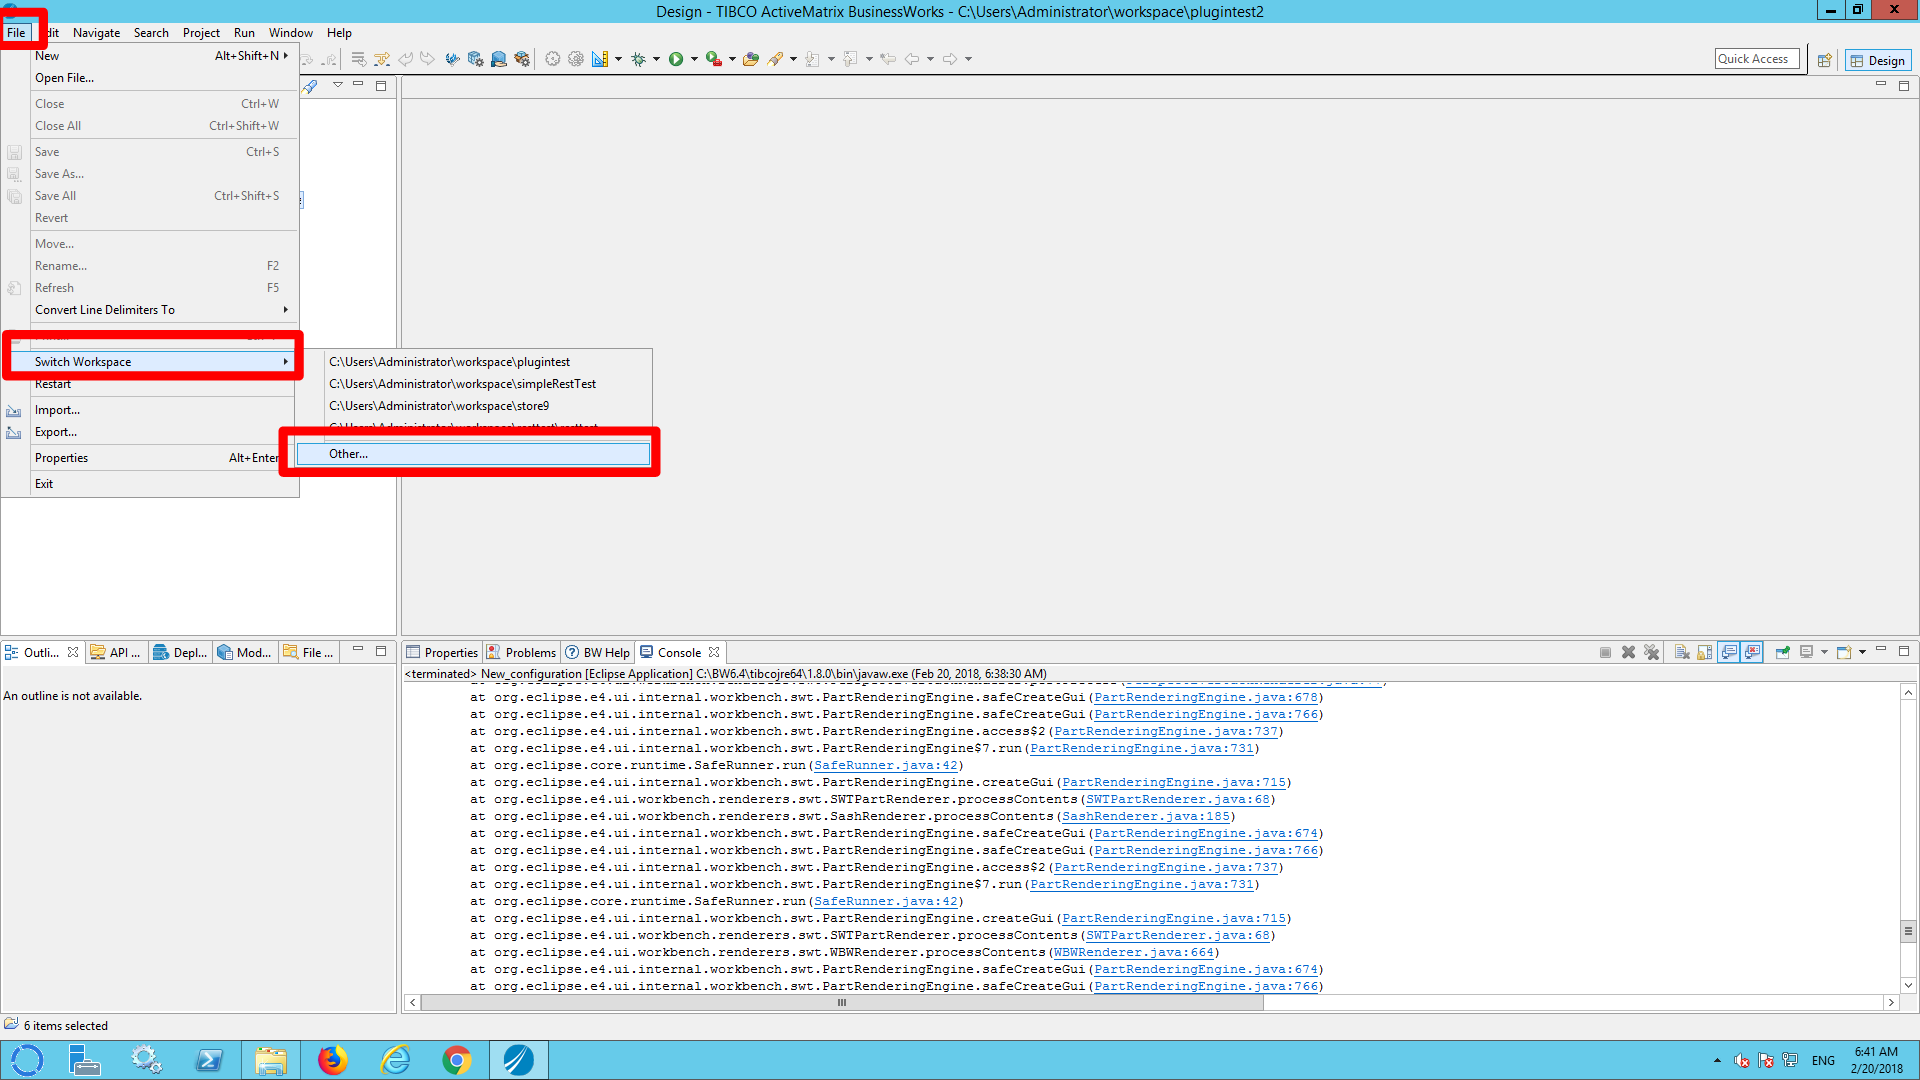
b) Click file –> Switch Workspace –> other
c) Create a new workspace named helloworldplugin
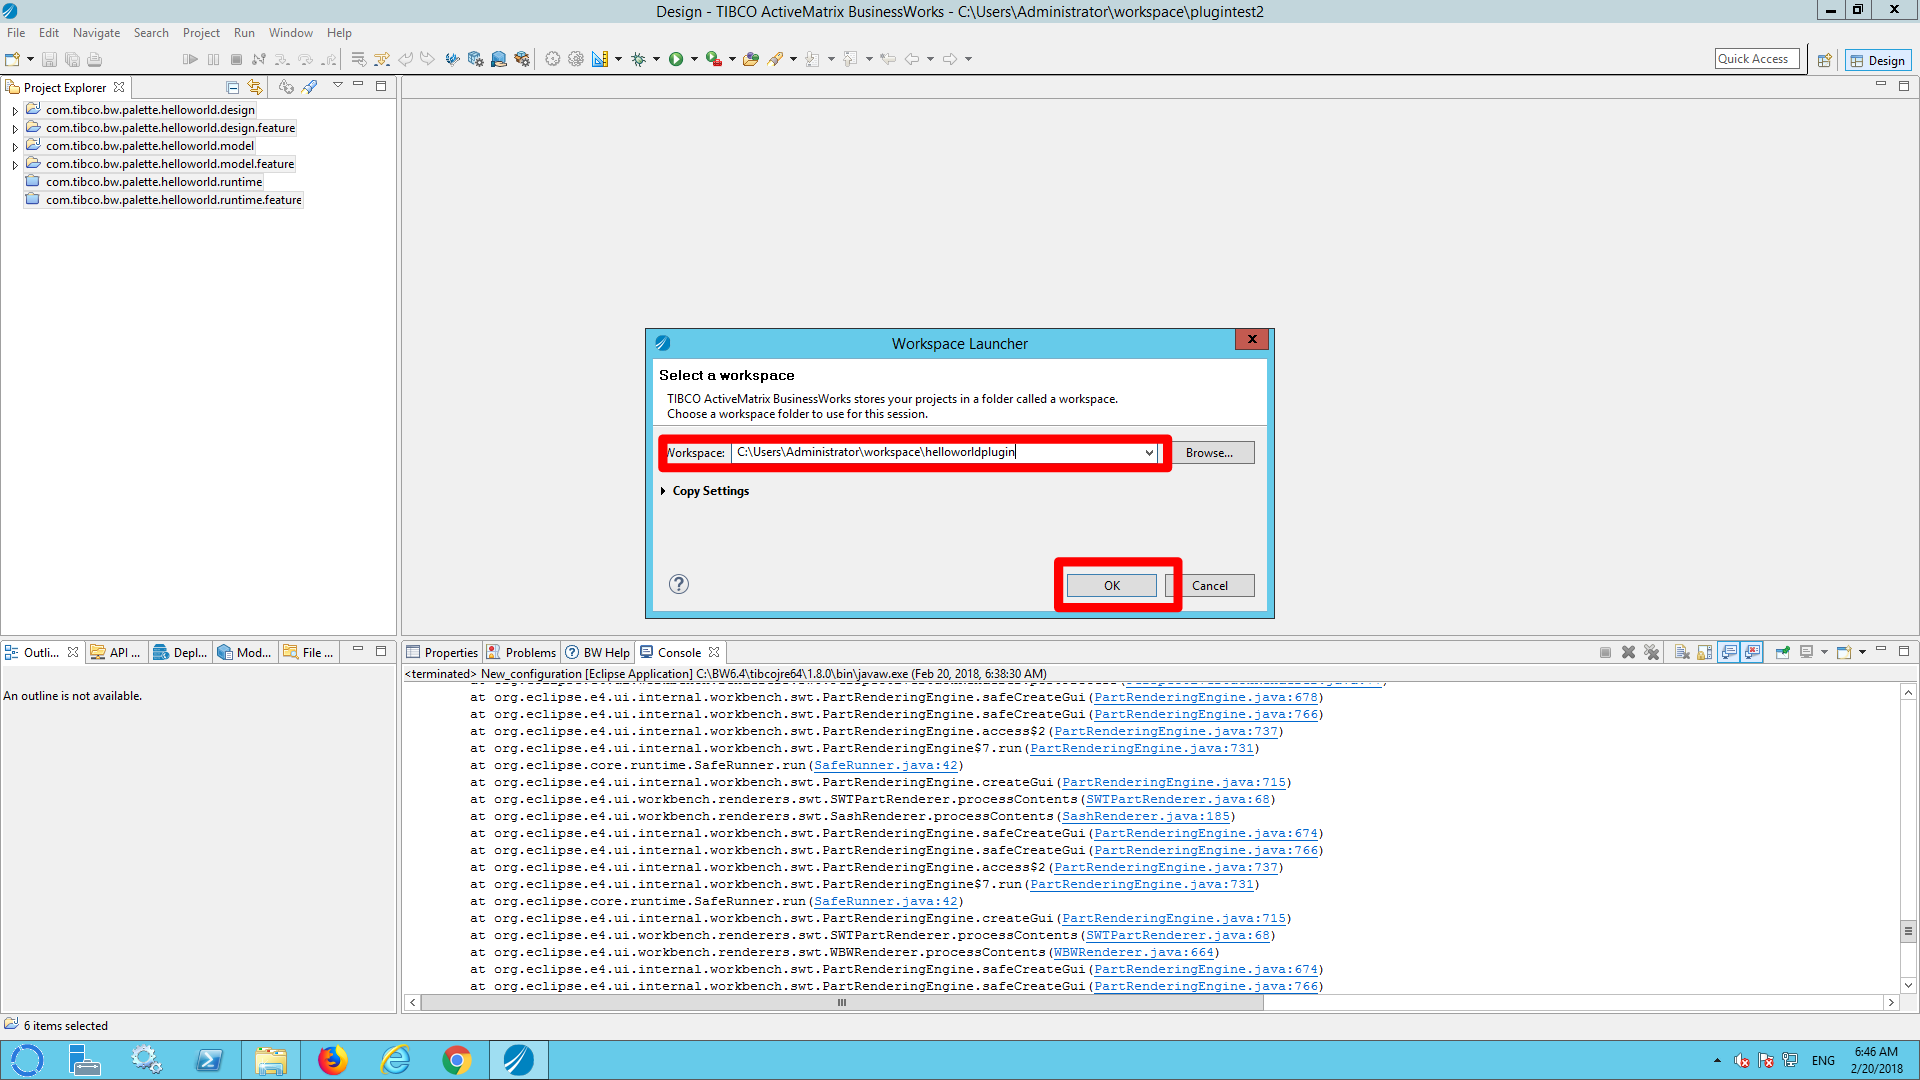
d) Click ok
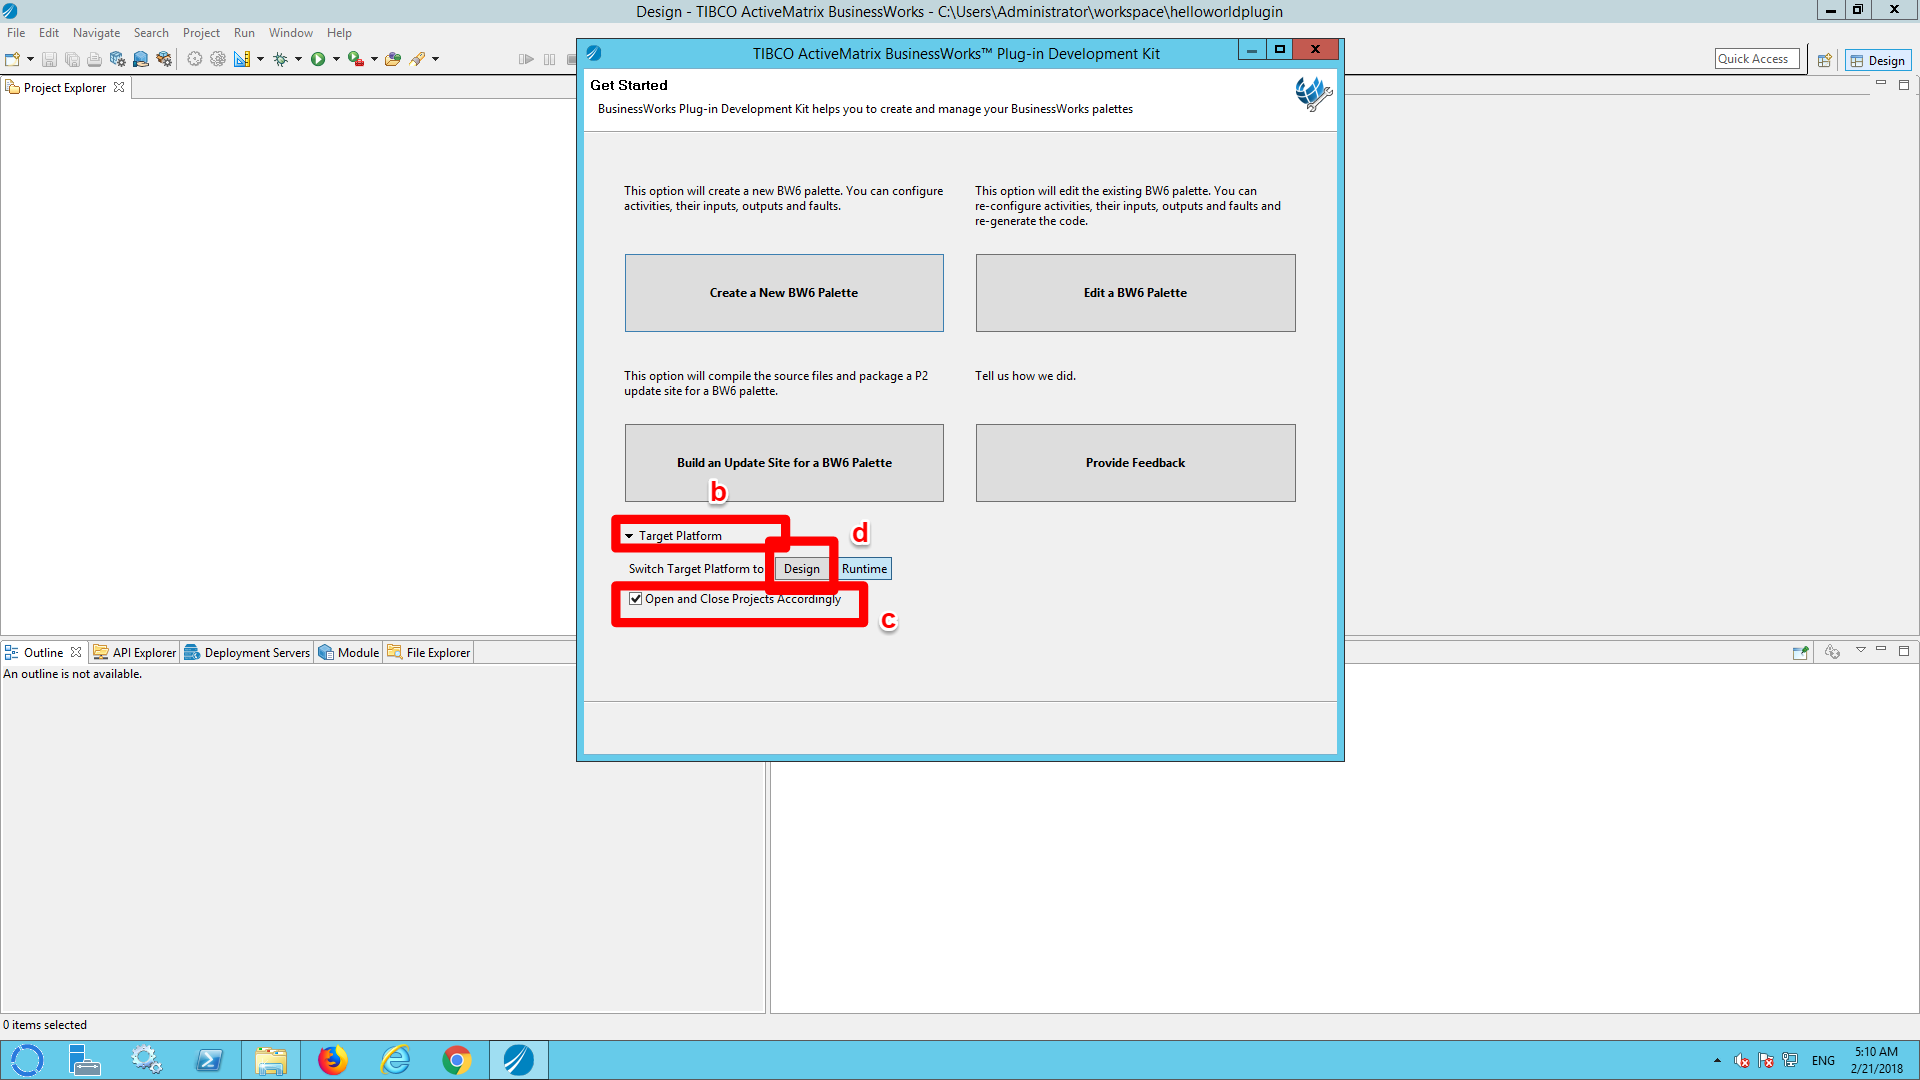
Step 2: Set the target platform to ‘design’ (instead of runtime)
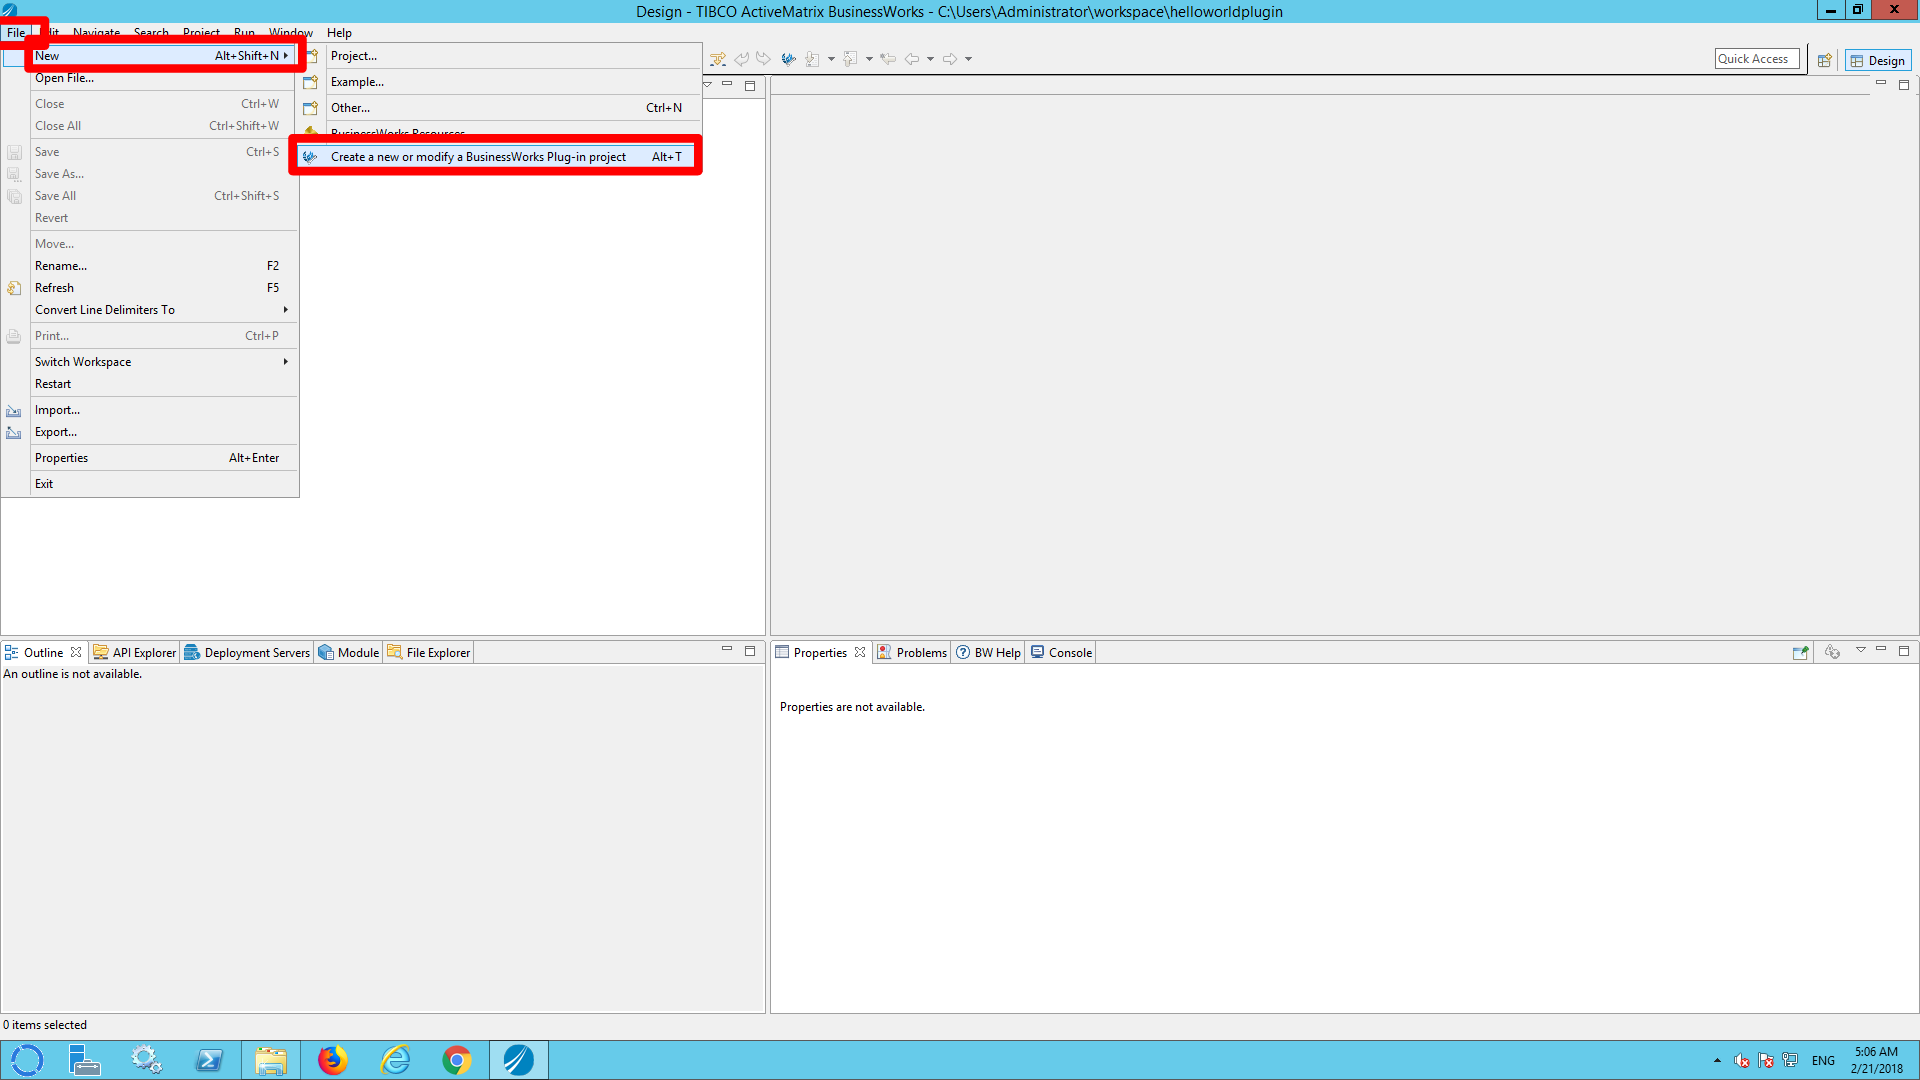
a) Click file –> new –> Create a new or modify a BusinessWorks Plug-in project
b) Expand the ‘target platform’ section
c) Check ‘Open and close projects accordingly‘
d) Click ‘Design’
Step 3: Create a plugin project
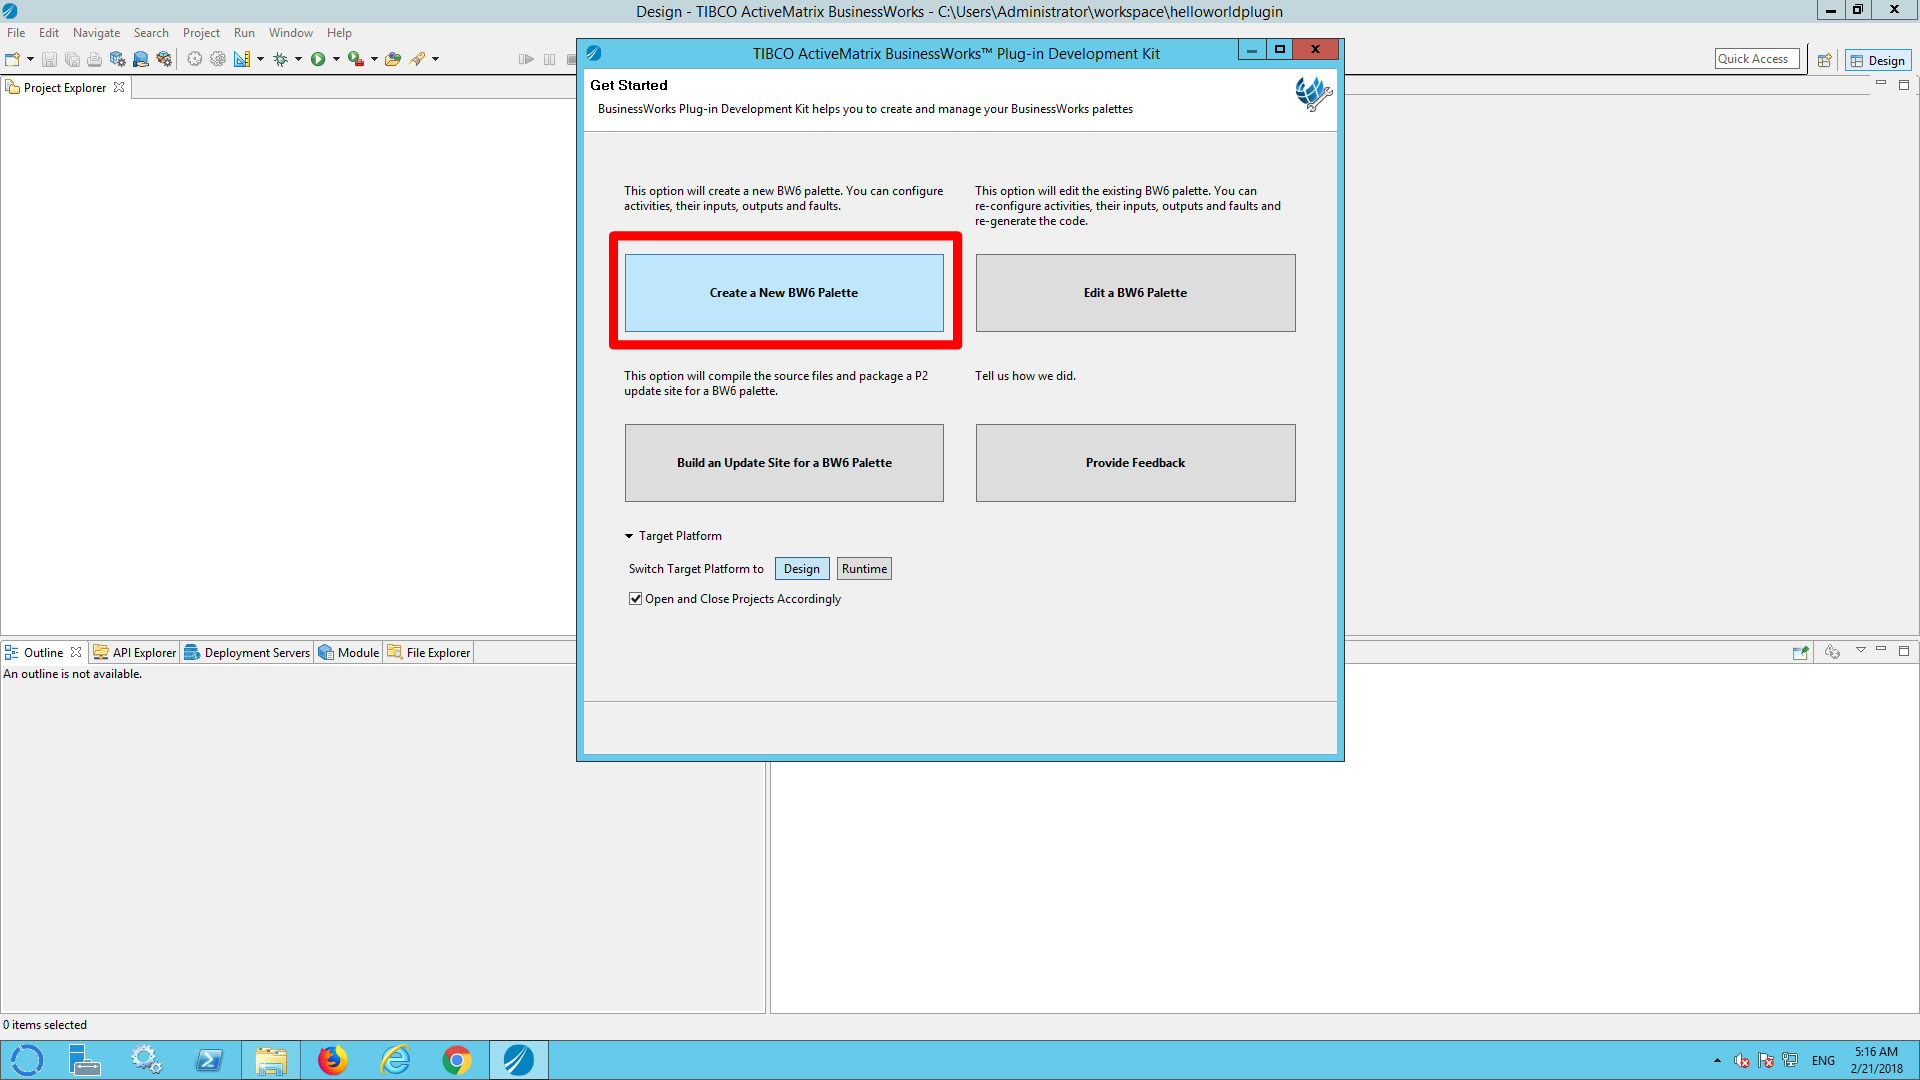
a) Click file –> new –> Create a new or modify a BusinessWorks Plug-in project (again)
b) Click ‘Create a new BW6 Pallette’
c) Fill out the following fields:
Palette name: HelloWorld
Palette package name: com.tibco.bw
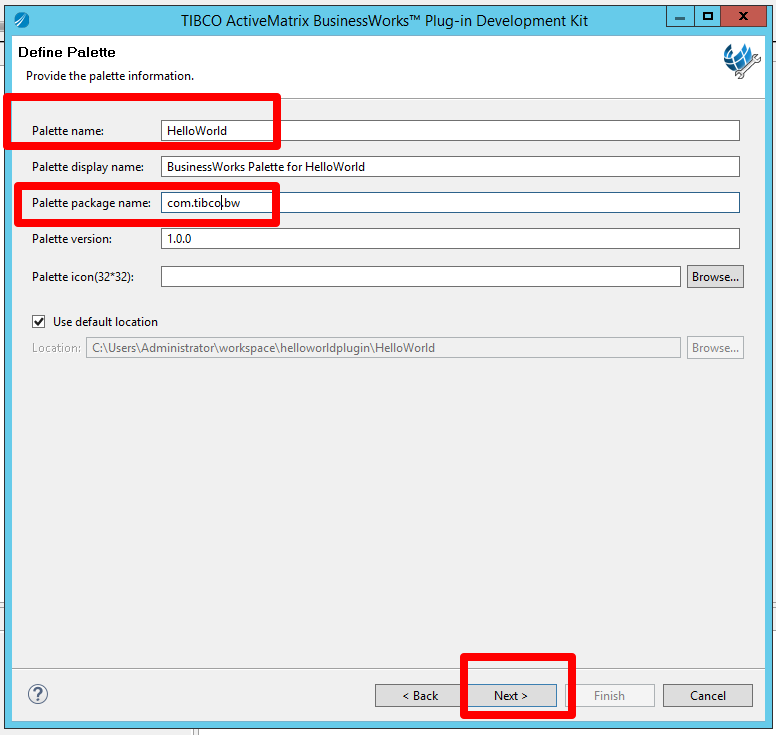
d) Click next
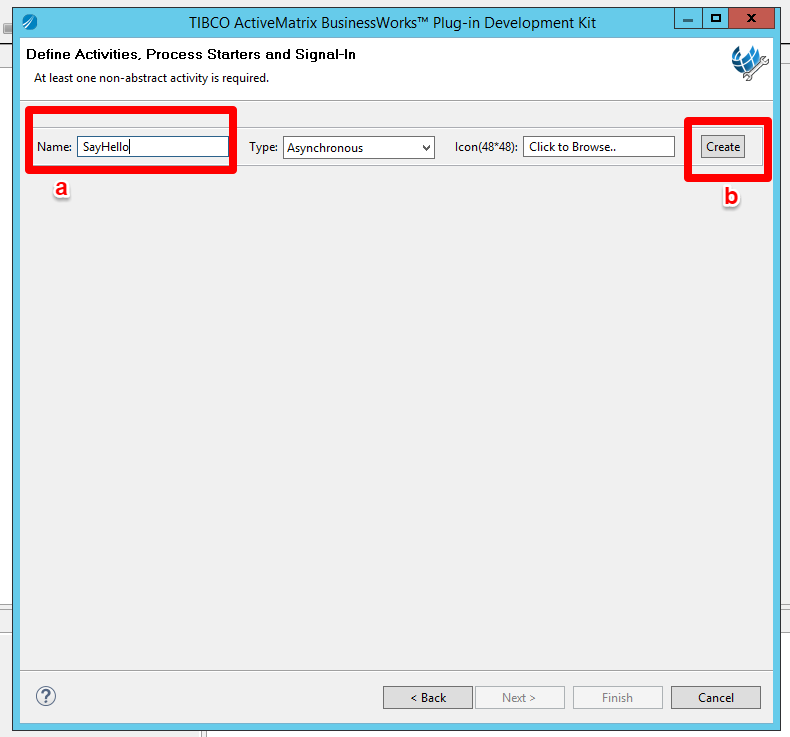
Step 4: Create an activity named ‘SayHello’
a) Fill out name: SayHello
b) Click Create
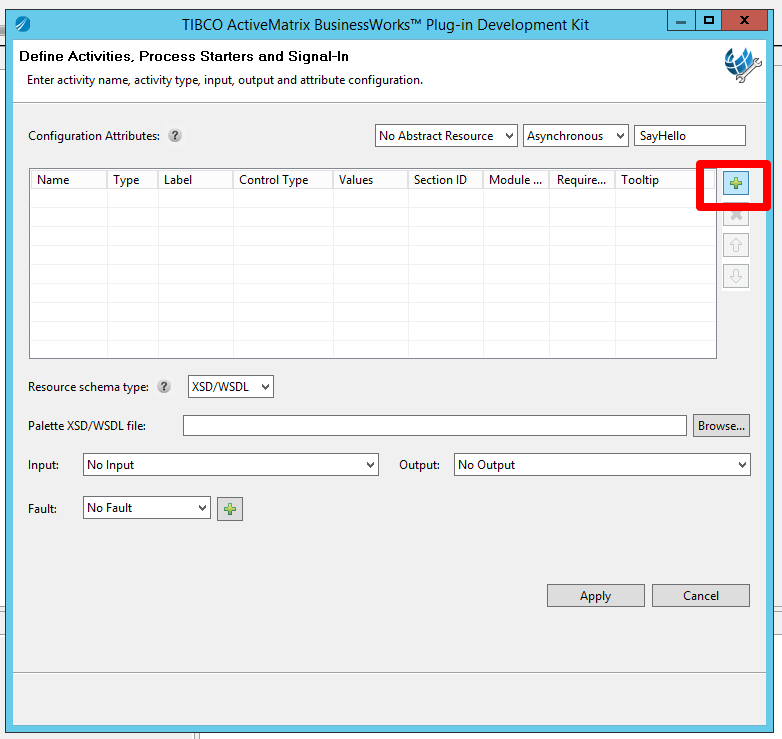
Step 5) Define configuration attribute and an input + output for the activity
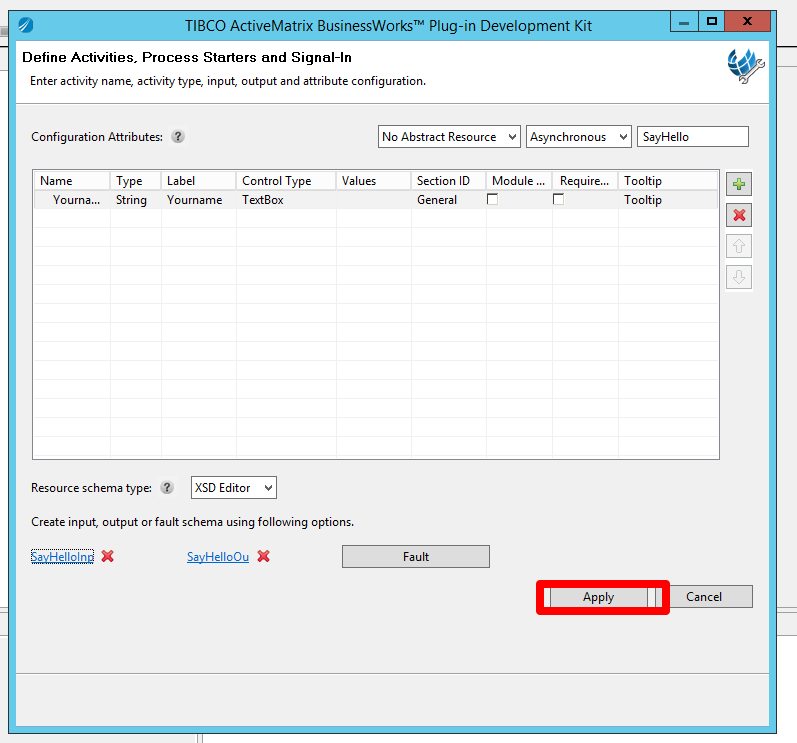
a) Define a new configuration attribute named ‘YourName’.
a1) Click on the “+'” sign.
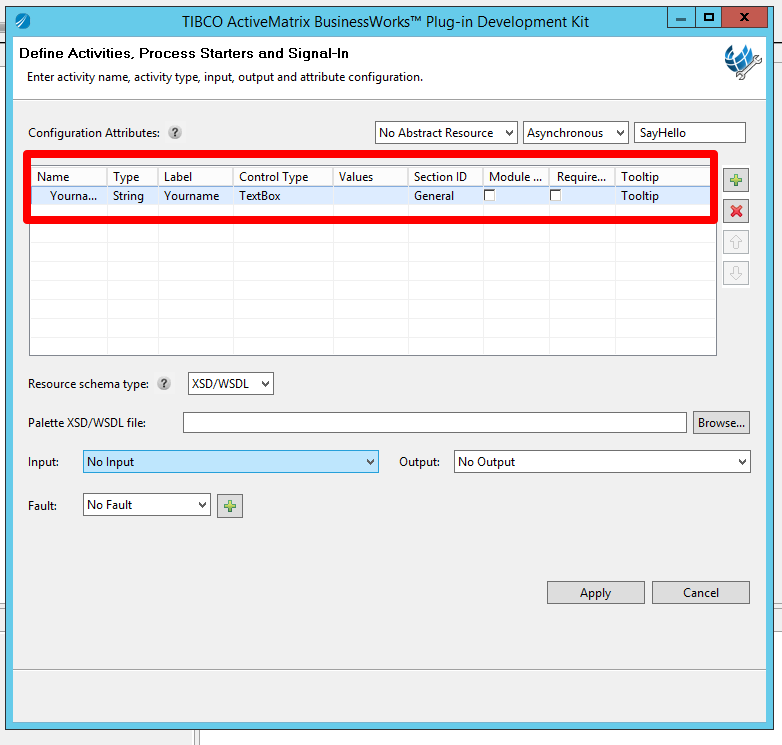
a2) Fill out the following fields
Name: Yourname
Type: String
Label: Yourname
Control Type: TextBox
Section ID: General
Module…: unchecked
Required: uncheched
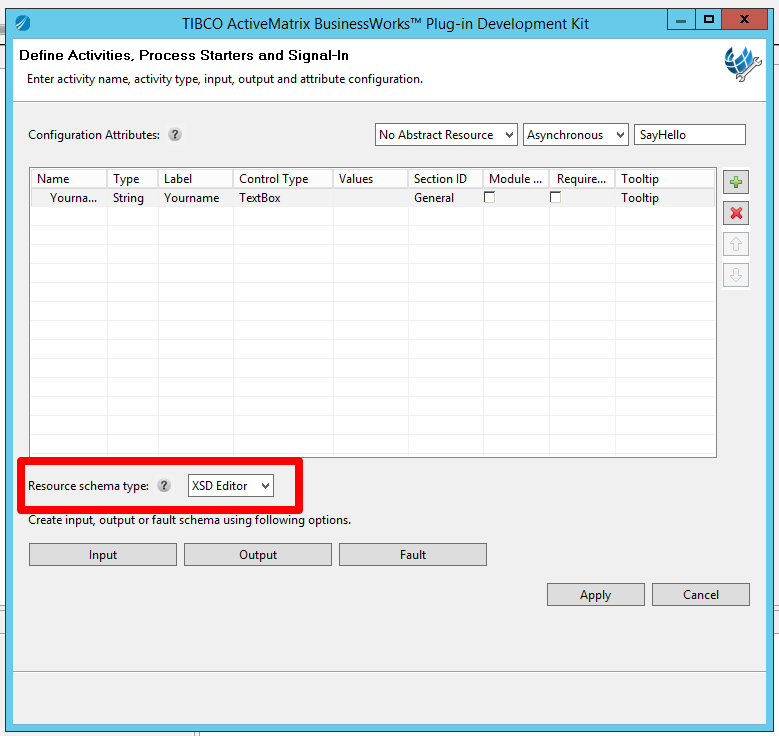
b) Define the input and output
b1) Select ‘XSD editor’ as ‘Resource schema type’
 ‘
‘
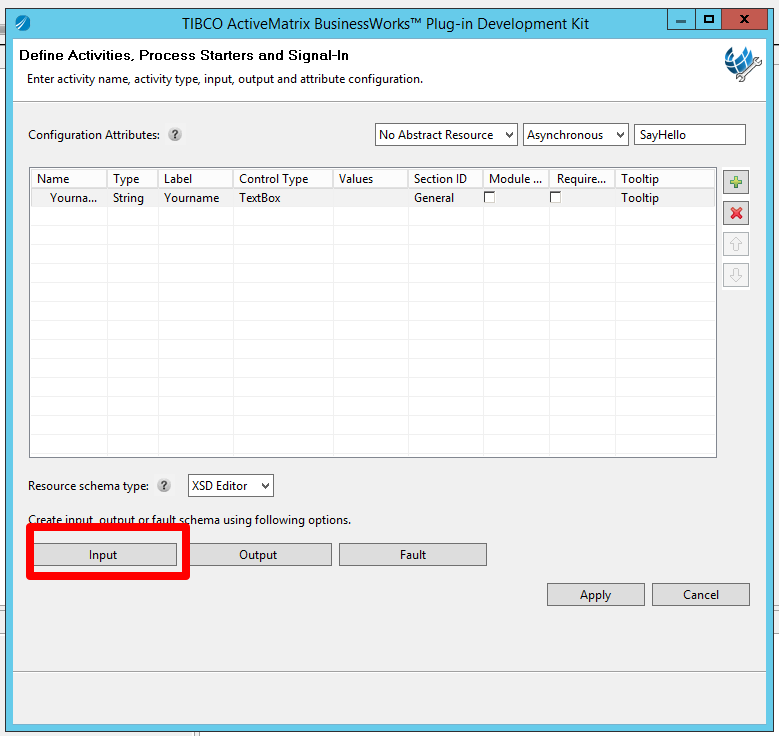
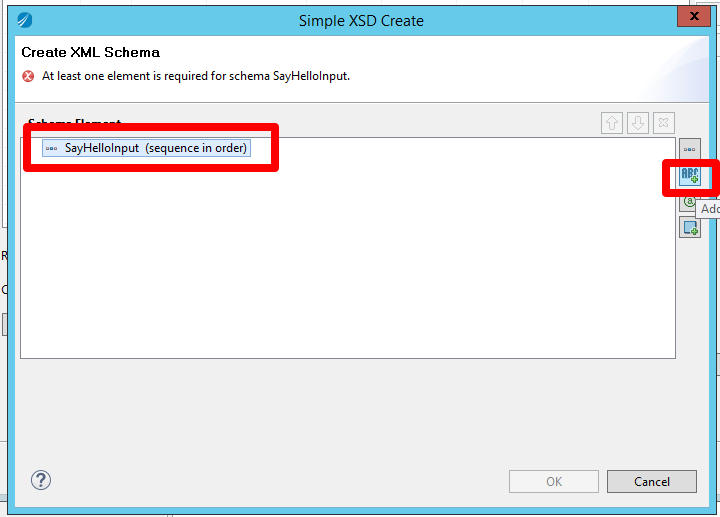
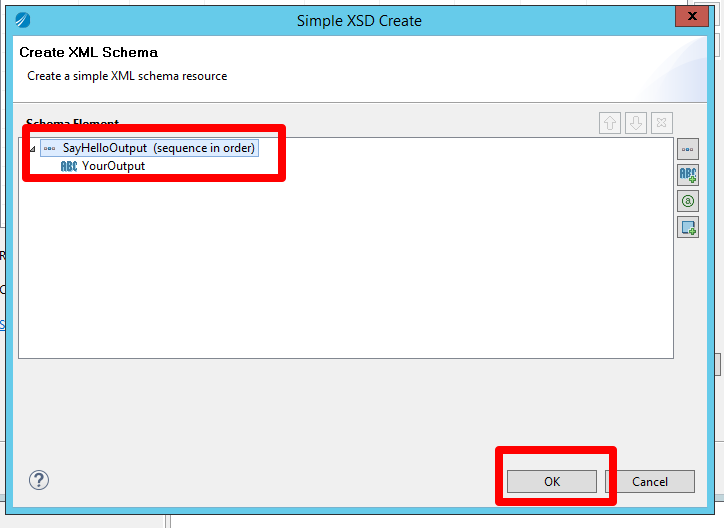
b2) Click ‘Input’ to define a XSD for the input.
b2) Select ‘SayHelloInput (sequence in order)’ and lick the ‘add primitive value’ button.
b3) Double click the ‘primitive’ line.
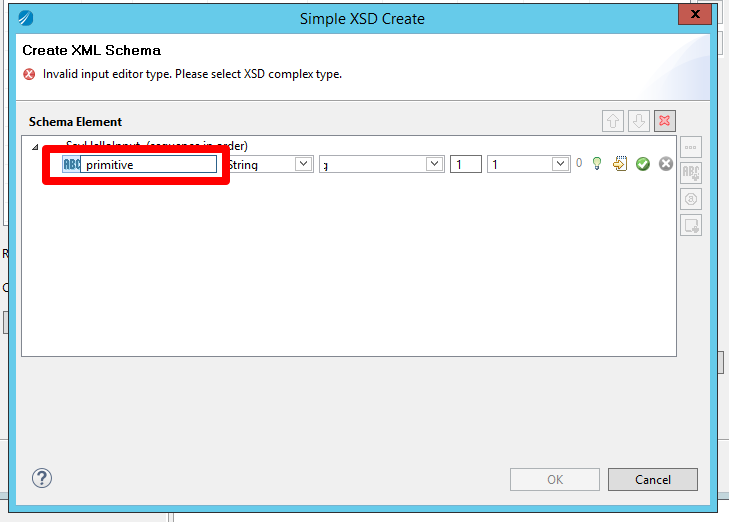
b4) Use ‘YourInput’ as the name for the primitive value.
b5) Click the ‘check’ button.

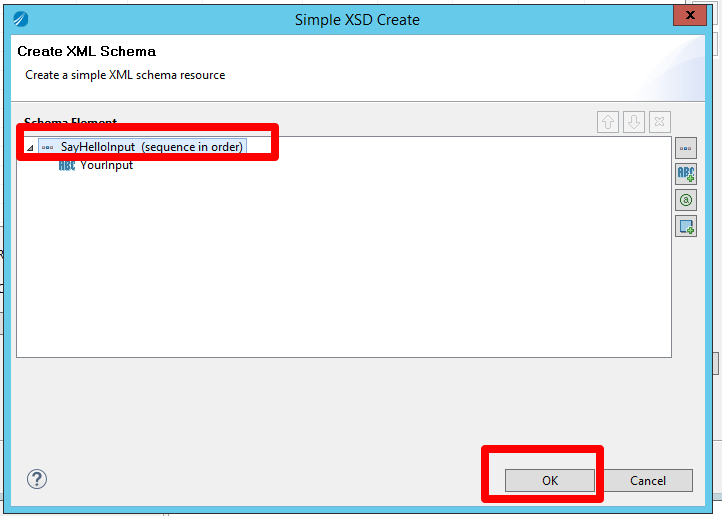
b6) Select ‘SayHelloInput (sequence in order)’ again and click ‘ok’
b7) Click the ‘output’ button the create a schema for the output
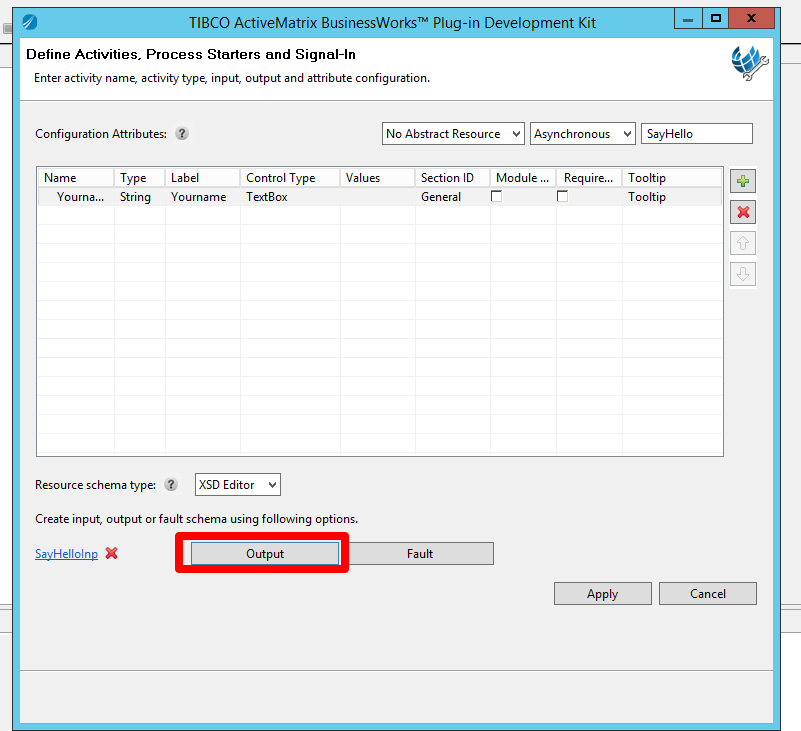
b8) Use the same steps as used for the input to create an output primitive value named ‘YourOutput’
b9) Click ‘OK’
c) Save the configuration
c1) Click ‘Apply’
c2) Click ‘finish’
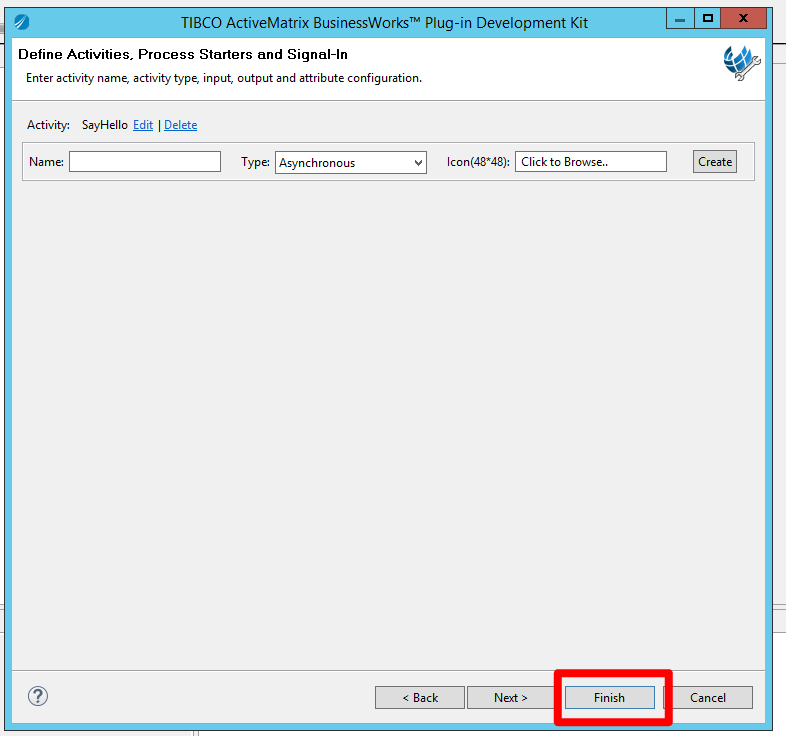
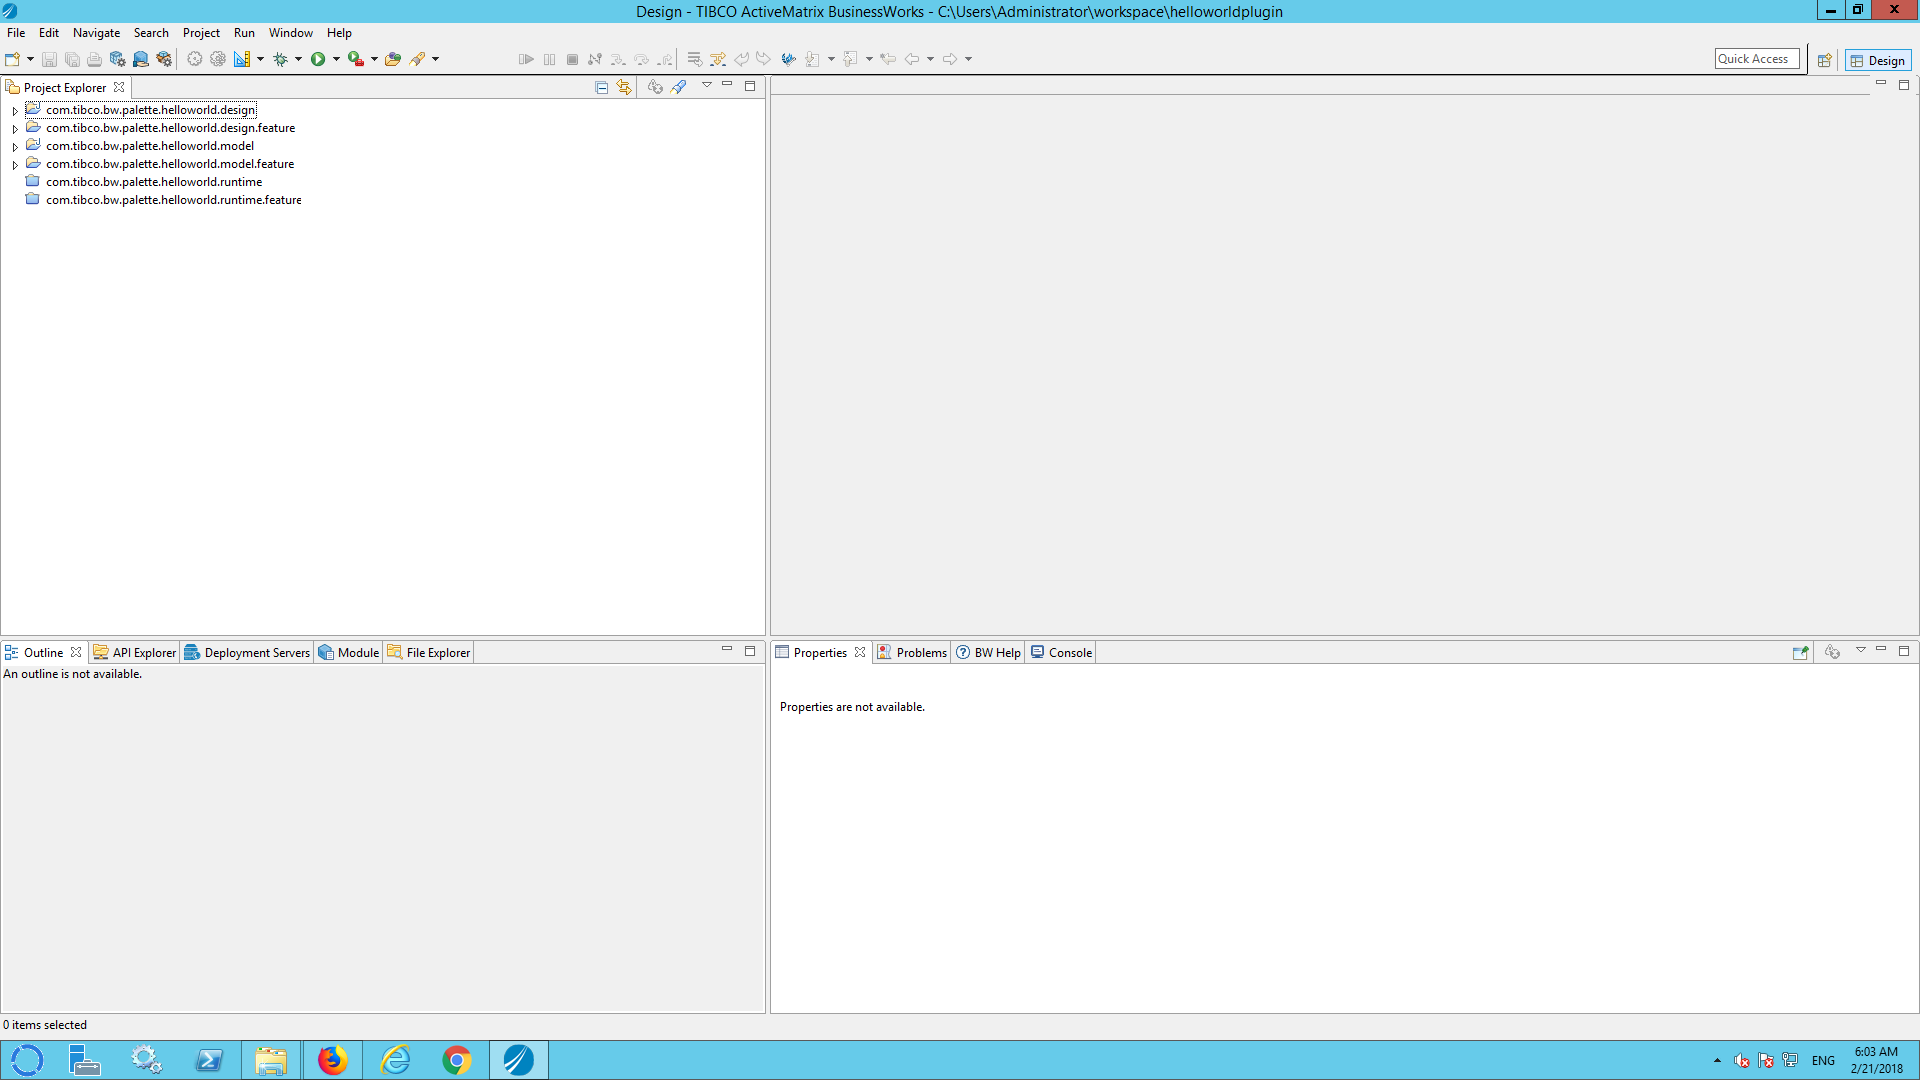
The plugin-code will be generated. The workspace will look something like this:
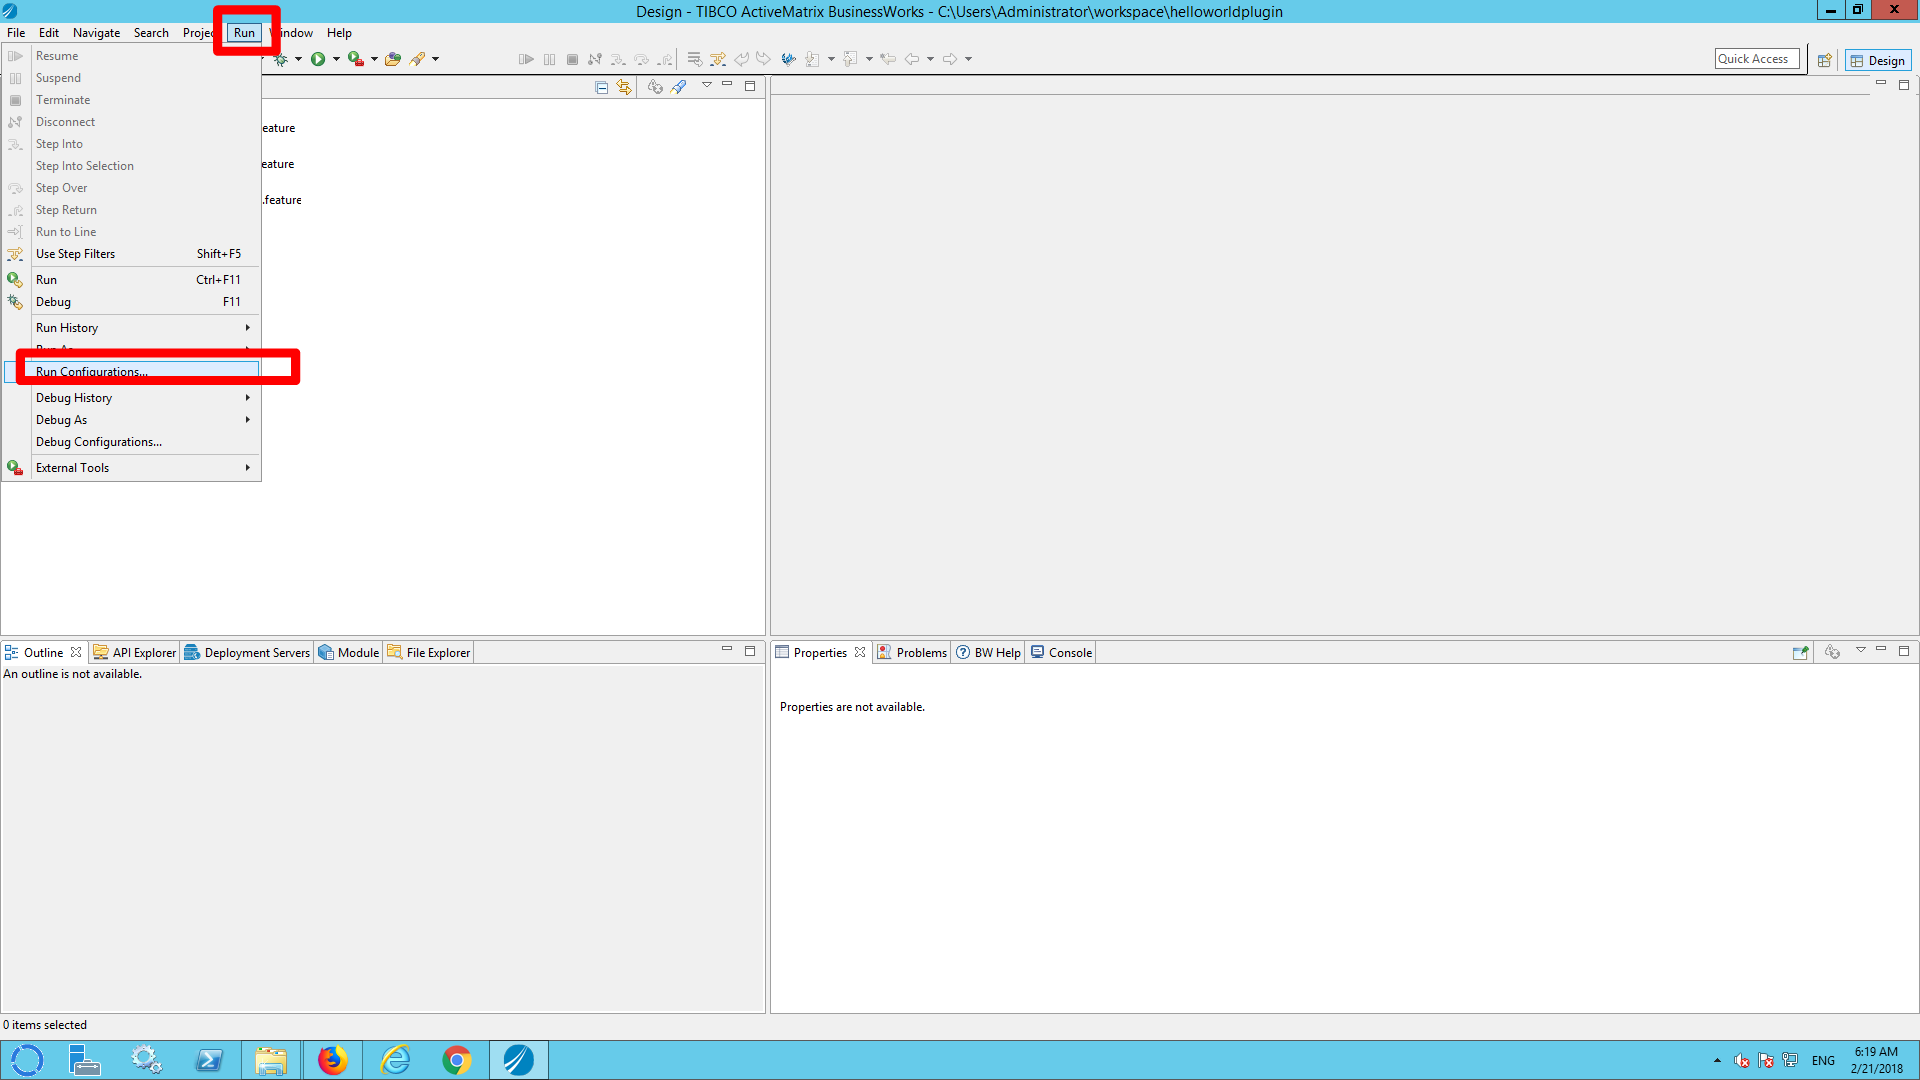
Step 6) Run the plugin and start a new studio instance (to edit the plugin)
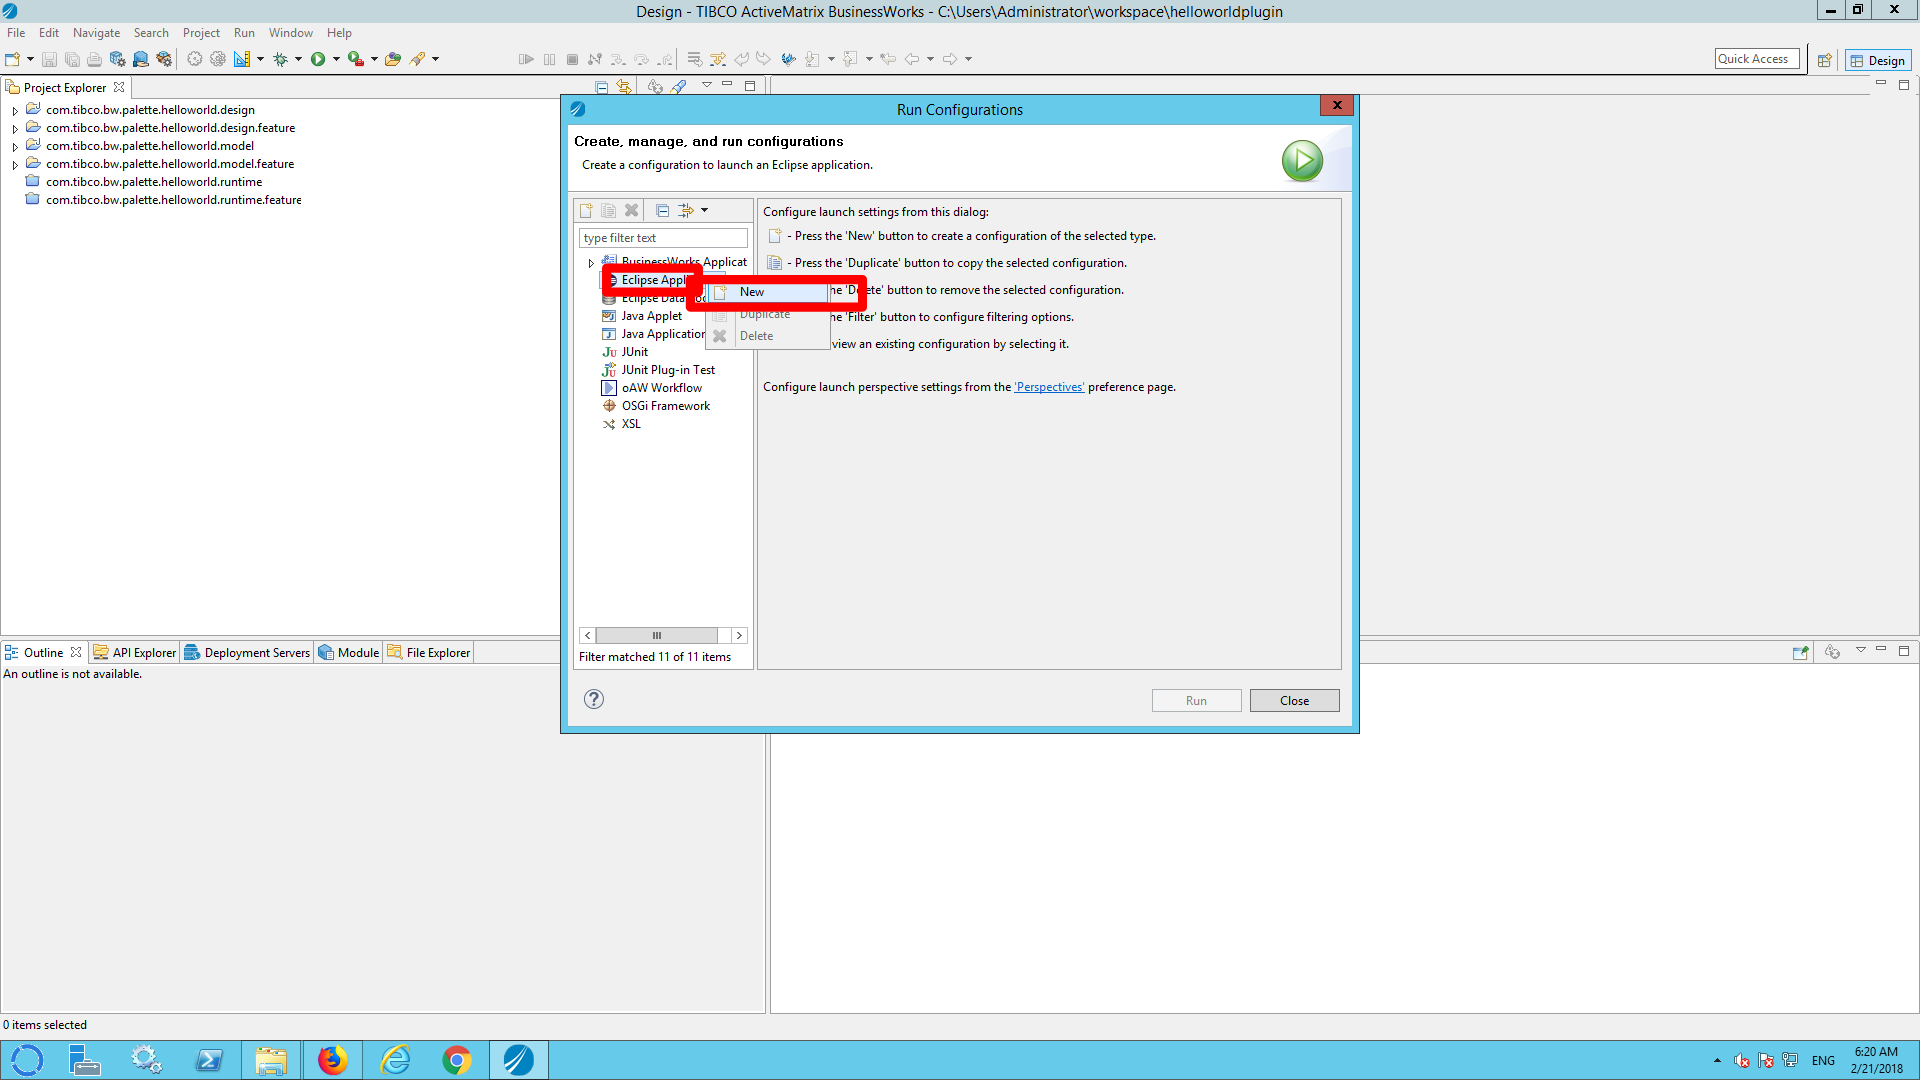
a) Click Run –> Run Configurations
b) Right click ‘Eclipse Application’ and select ‘New’.
c) Rename the configuration into ‘Plugin_configuration’ and click ‘Apply’
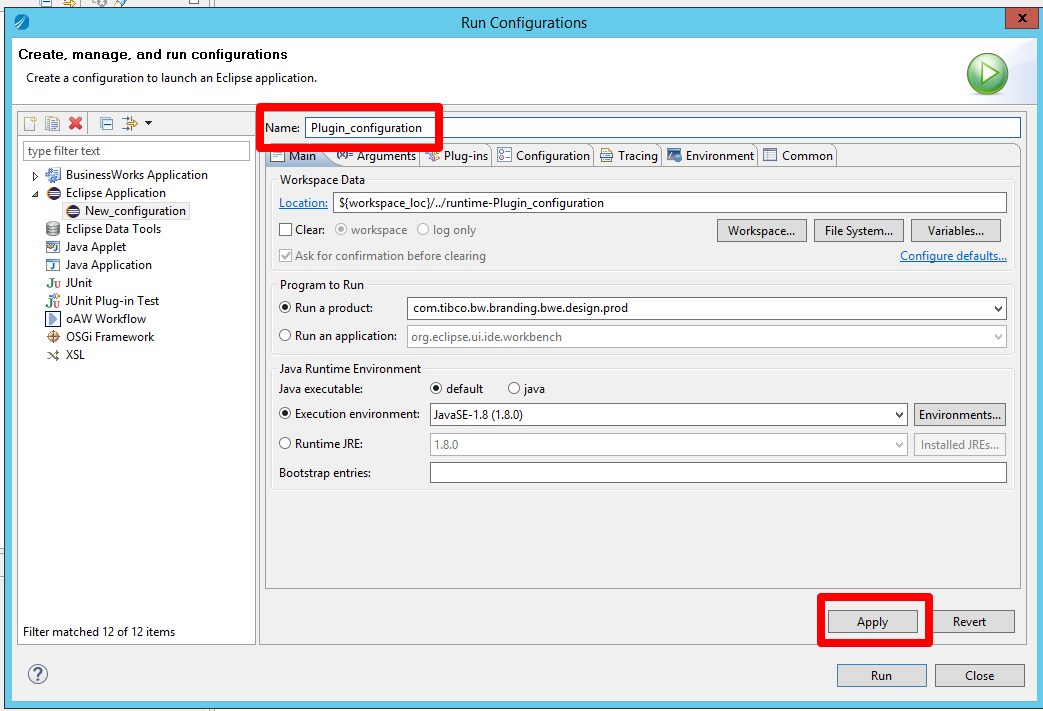
d) Click ‘Run’
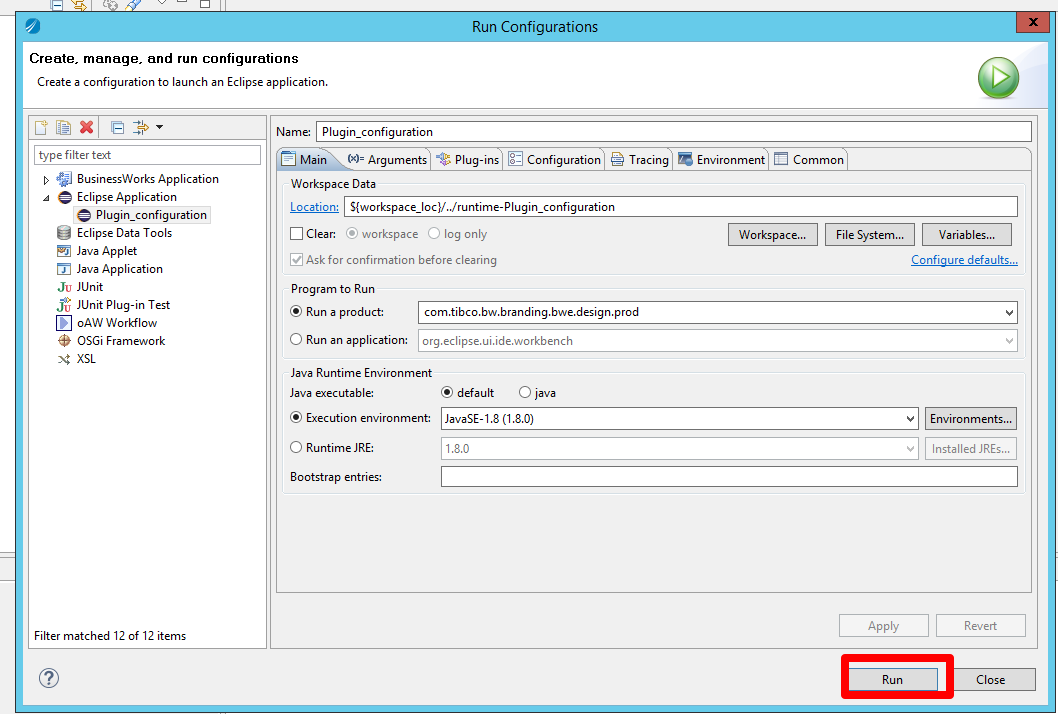
This will startup a new instance of the designer.
Step 7) Load the plugin into the new instance of the designer.
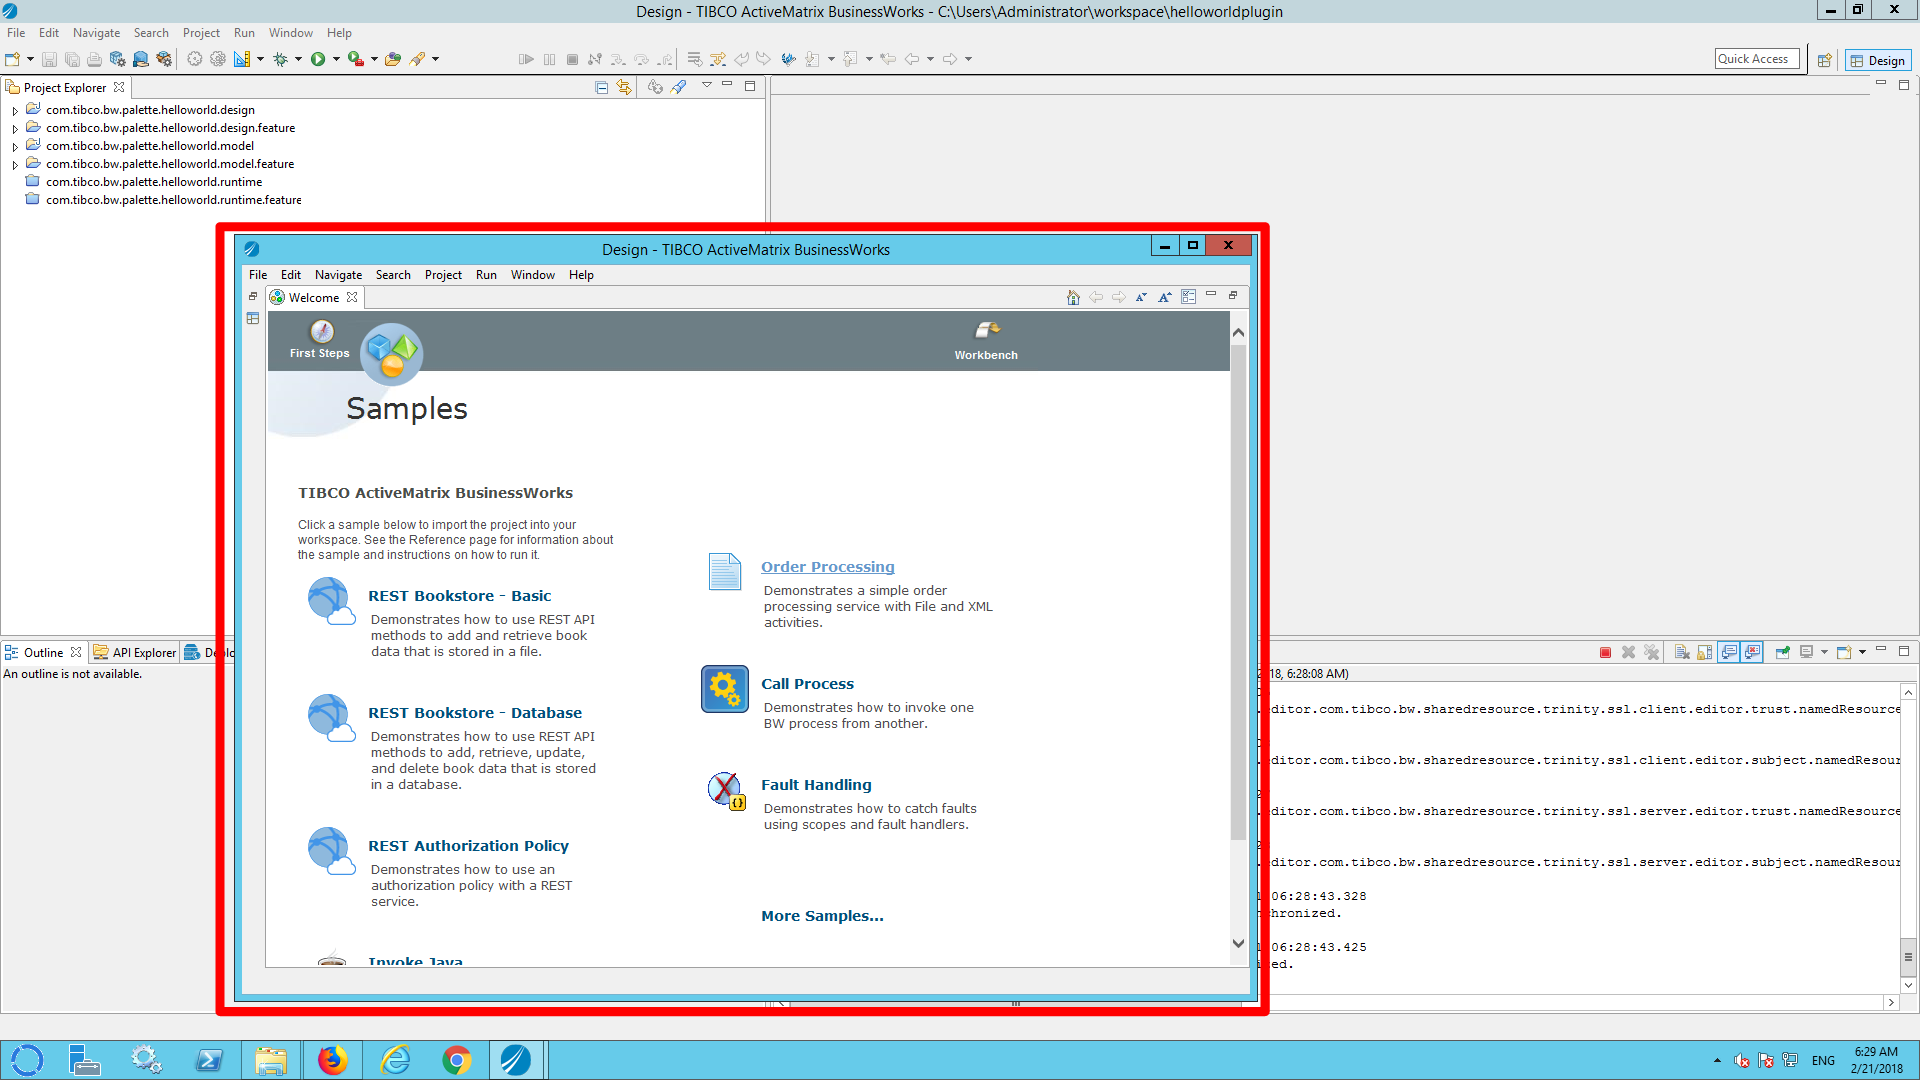
a) In the new instance of the designer close the welcome screen
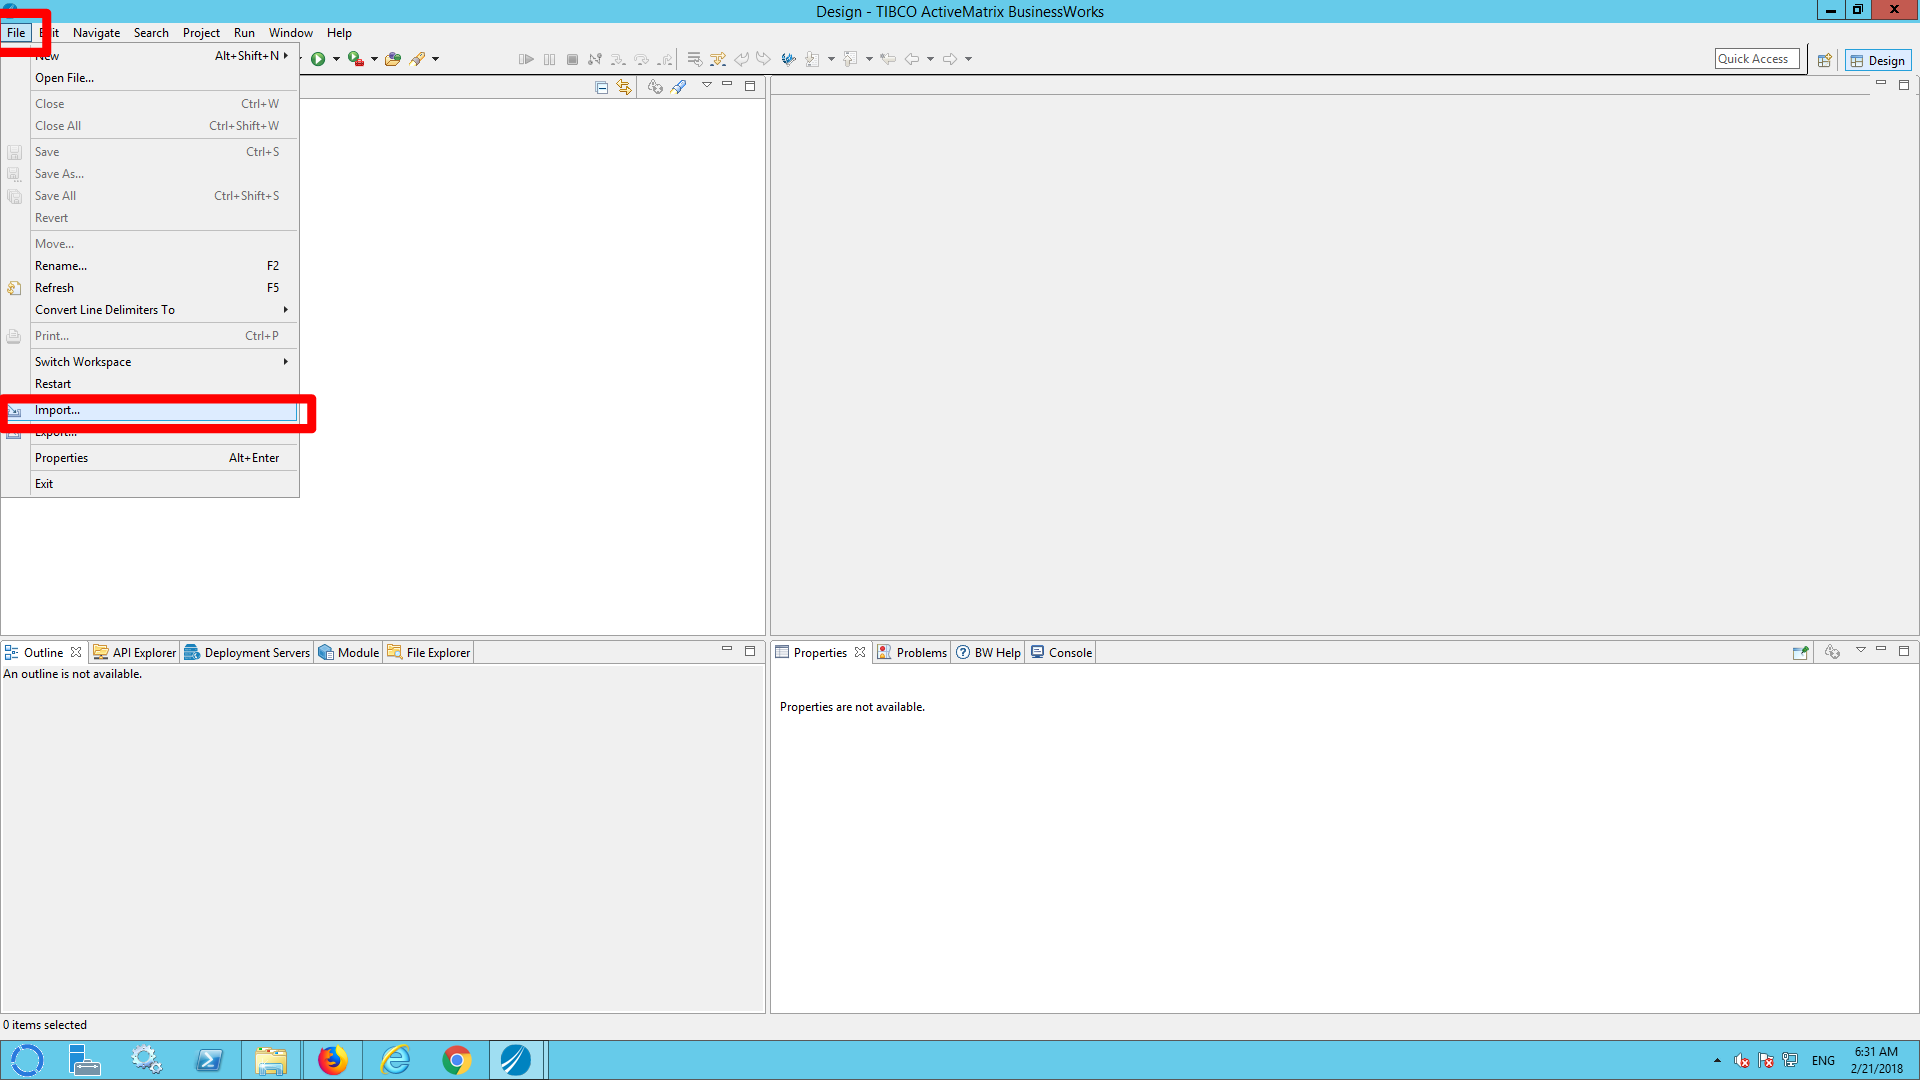
b) Click file –> import
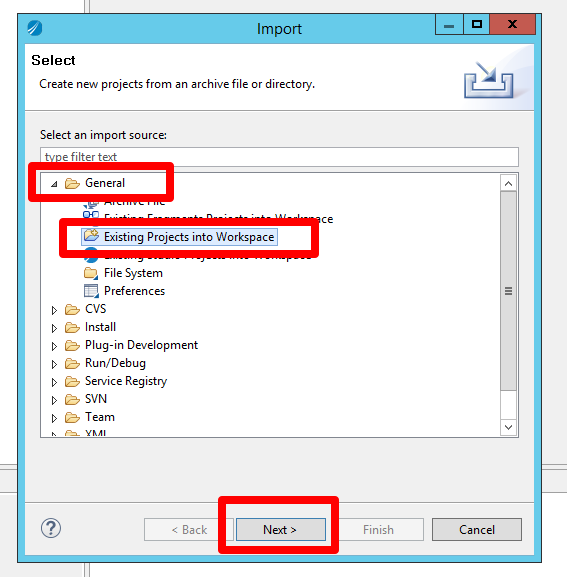
c) Expand ‘General’ and select ‘Existing Project into Workspace’ and select ‘next’
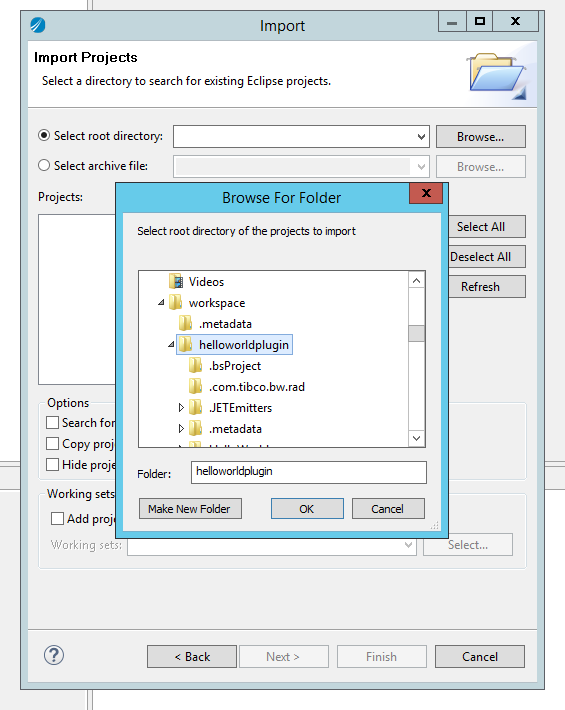
d) Select ‘select root directory’ and click ‘browse’.
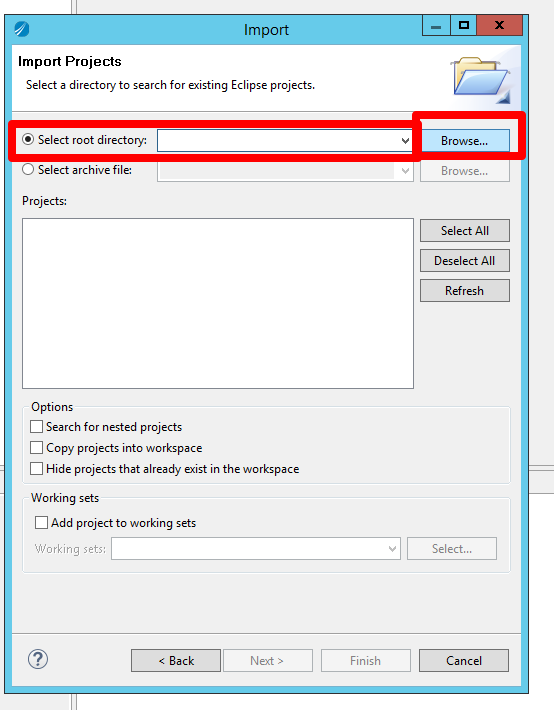
c) Select the directory in which the you created the plugin worspace in step 1c.
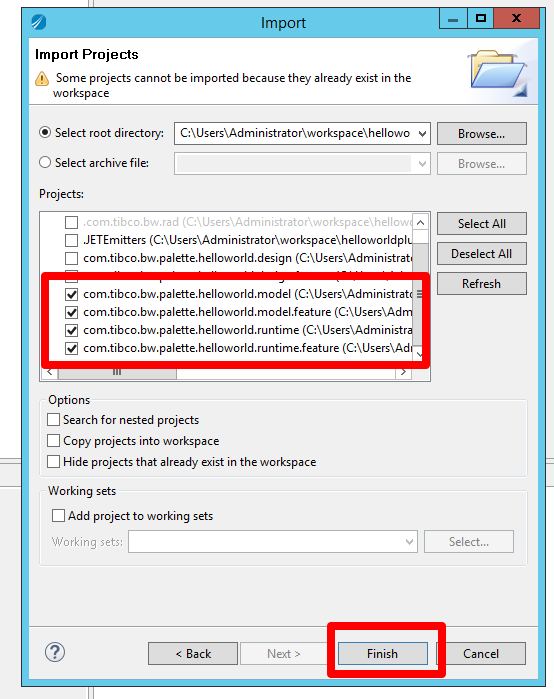
d) ONLY select the model.* and runtime.* lines and click ‘finish’.
Step 8) Add business logic
a) In the Project Explorer view, expand the com.tibco.bw.palette.helloworld.runtime folder, and then open src > com.tibco.bw.palette.helloworld.runtime > SayHelloAsynchronousActivity.java.
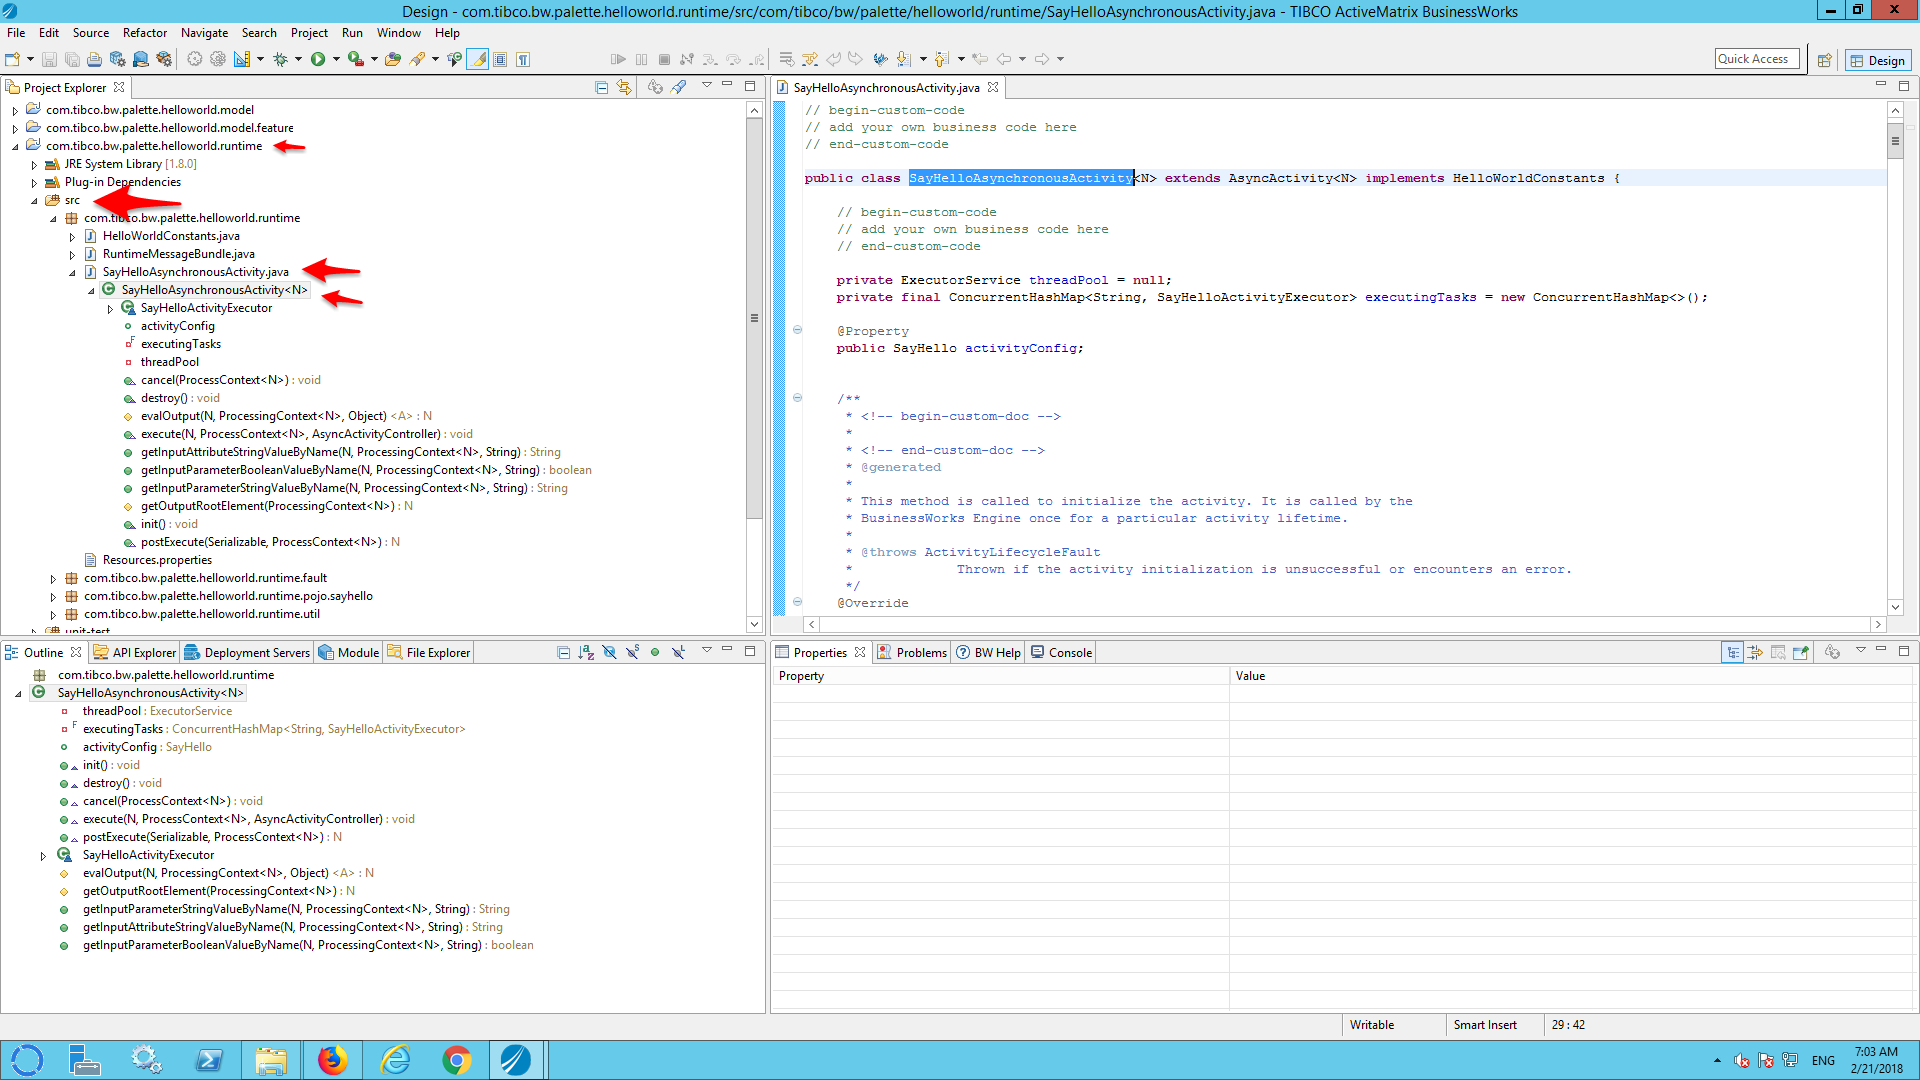
b) Locate the ‘evalOutput()’ method.
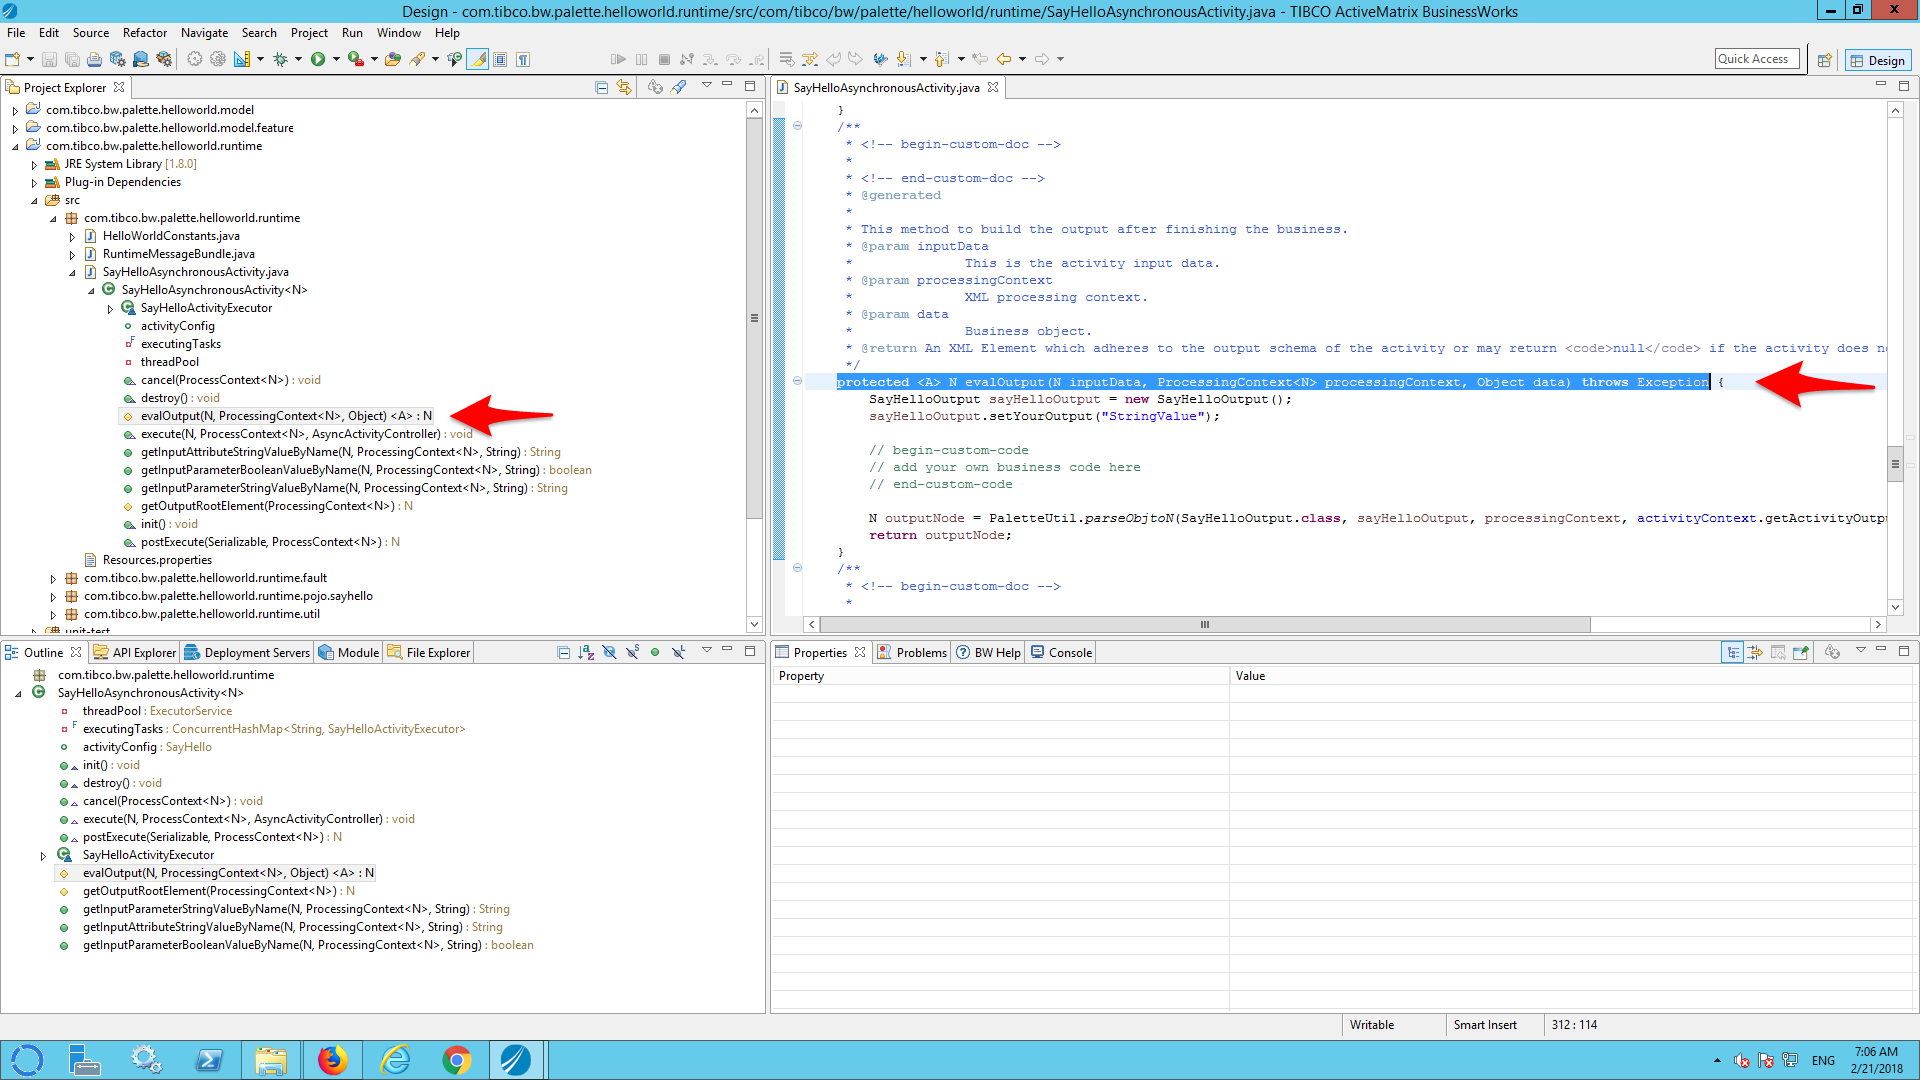
c) Find the rule sayHelloOutput.setYourOutput(“StringValue”); and change it into sayHelloOutput.setYourOutput(“Hello World”);
This will set the the ‘YourOutput’ variable to ‘HelloWorld’.
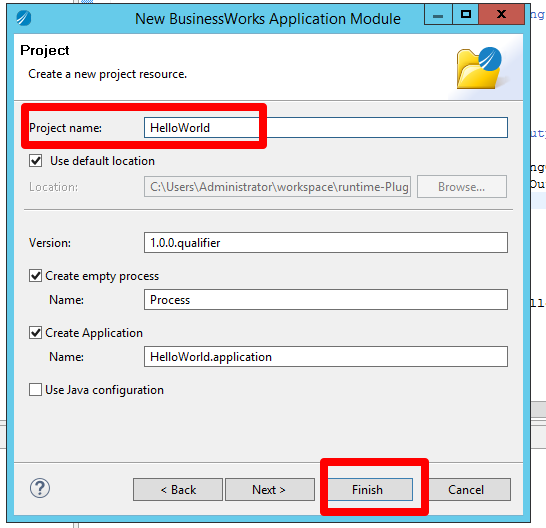
step 9) Create a new BW6 rest project to test the plug-in
a) Click File –> New –> BusinessWorks Resource

b) Select ‘BusinessWorks Application Module’ and click next.

c) Enter ‘HelloWorld’ as the project name and click ‘Finish’
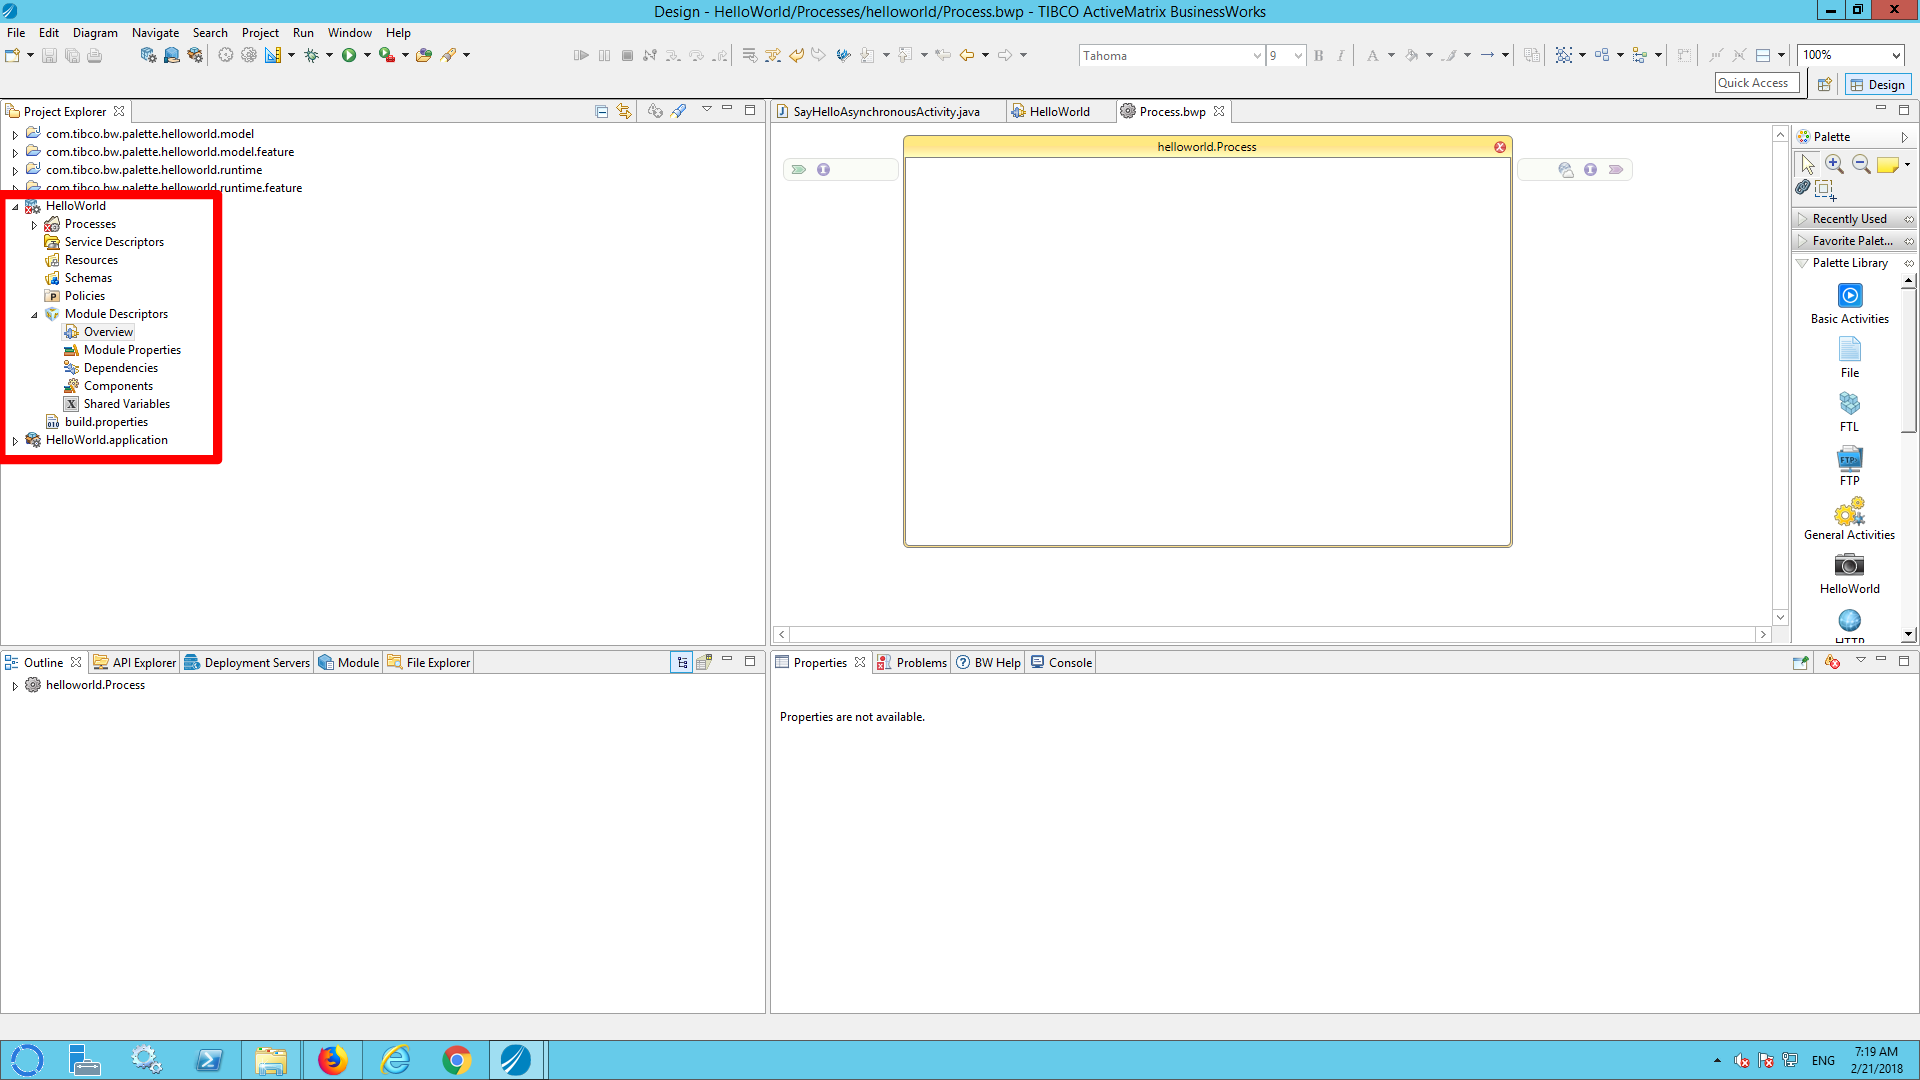
This will create a new BW6 test project:
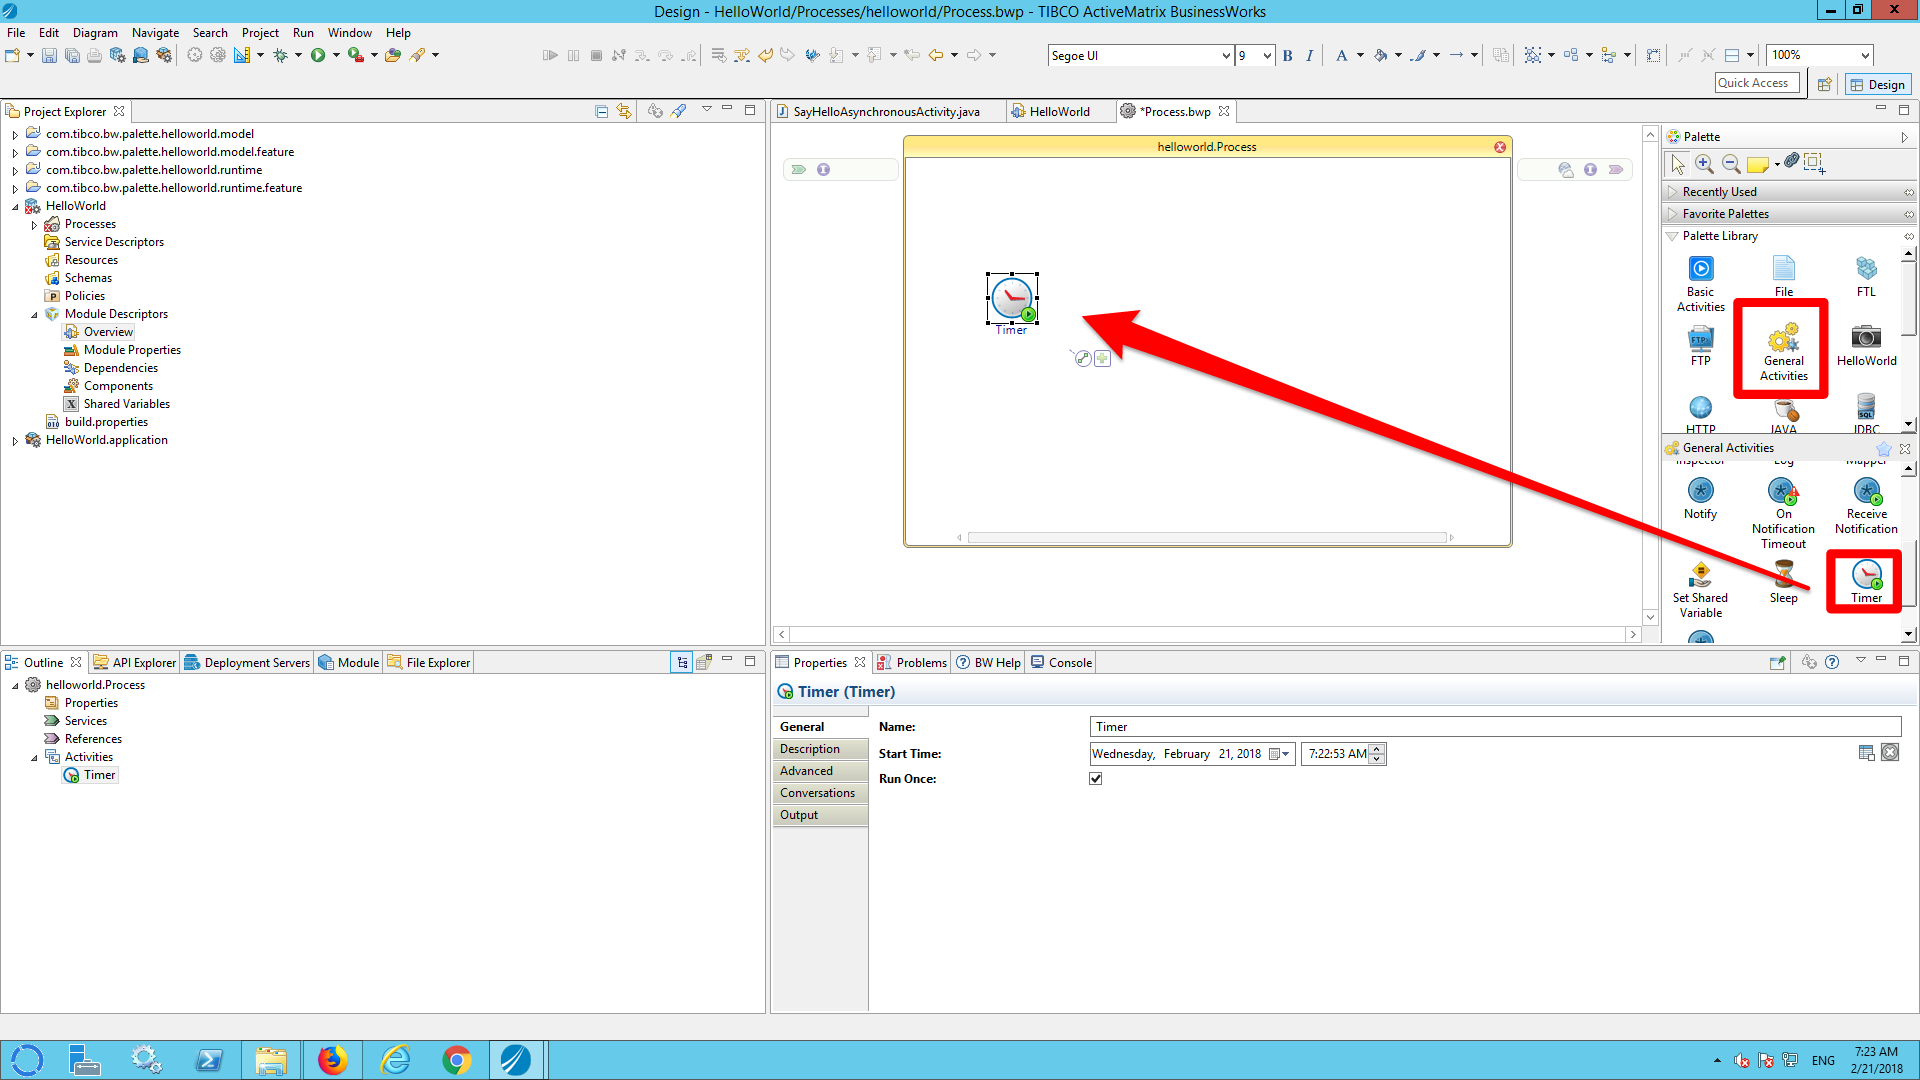
Step 10) Test the plugin
a) Add a timer activity to the process.
a1) Select ‘General activities’
a2) Add the ‘timer’ activity to the process.
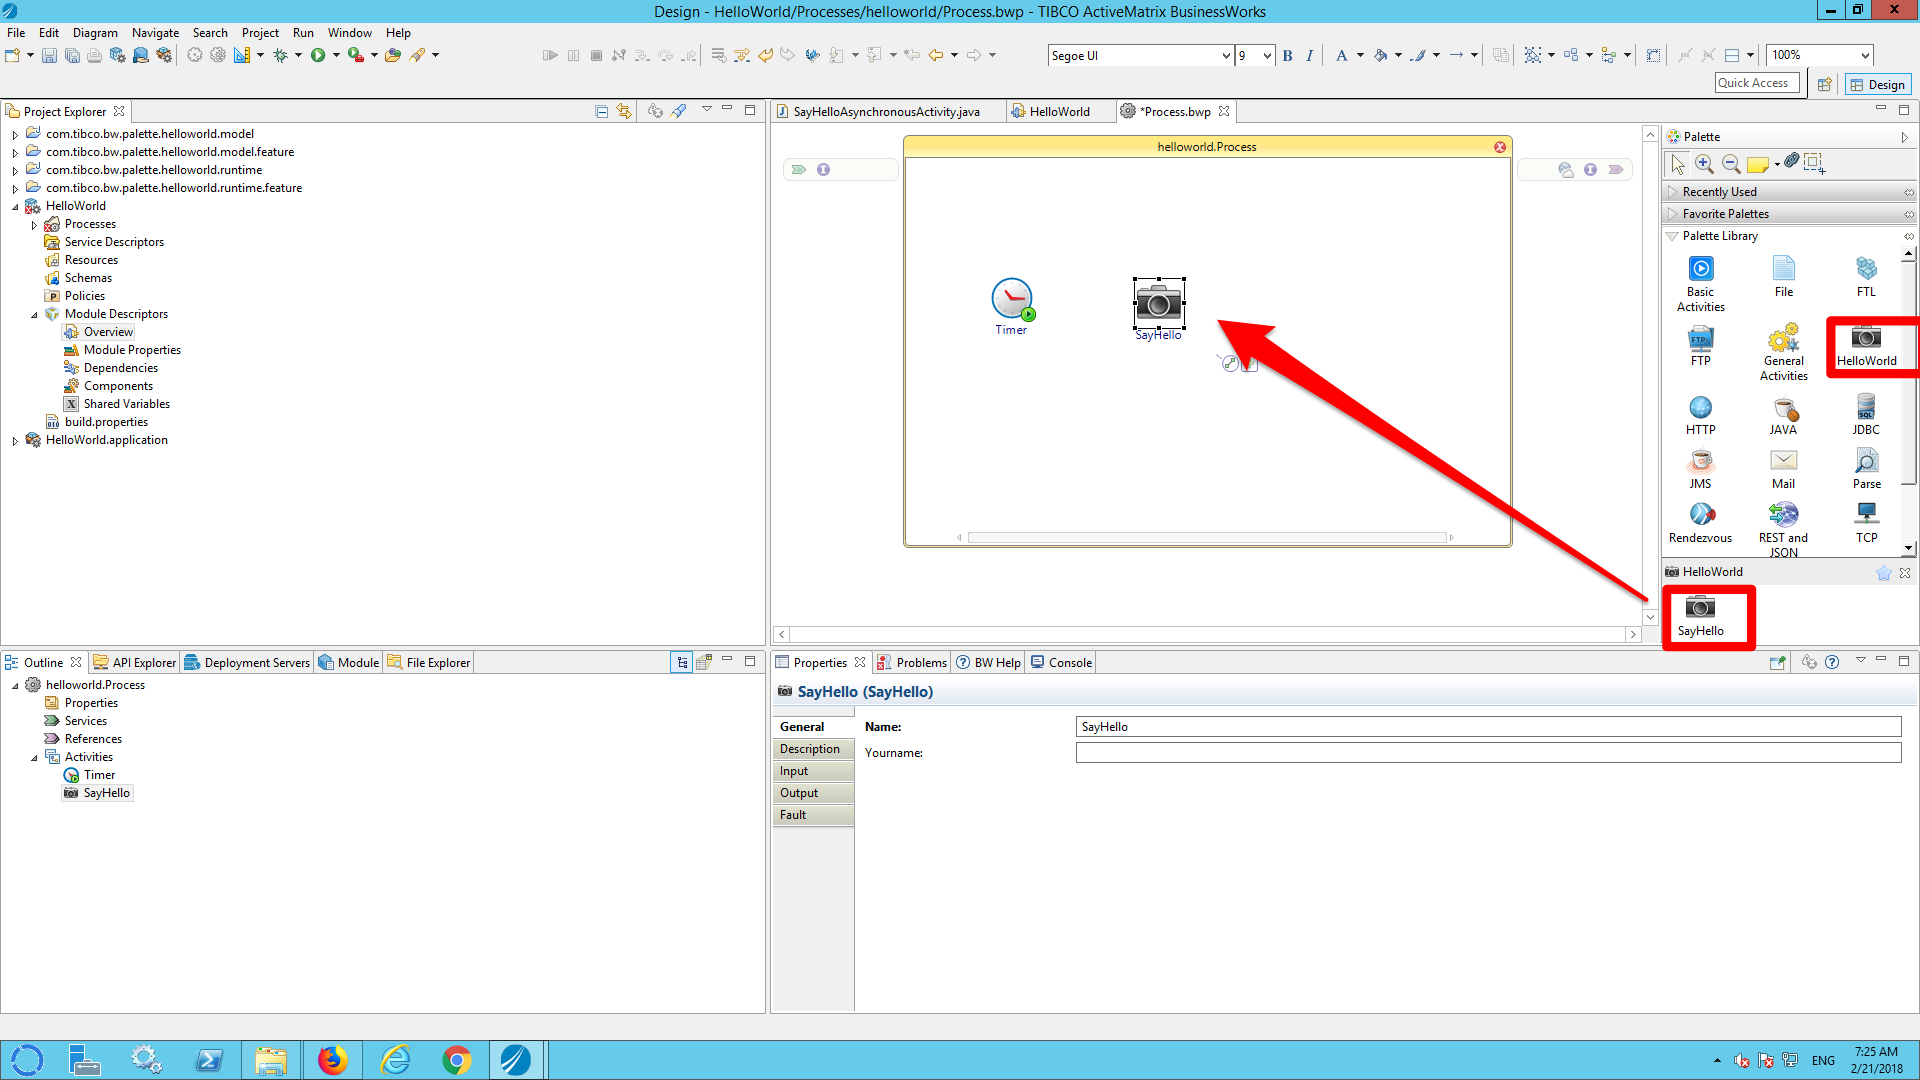
b) Add the SayHello activity to the process
b1) Select the ‘HelloWorld’ pallet
b2) Drag the ‘SayHello’ activity to the process
PLEASE MIND: By default, custom activities will have the ‘camera’ icon. You can change this.
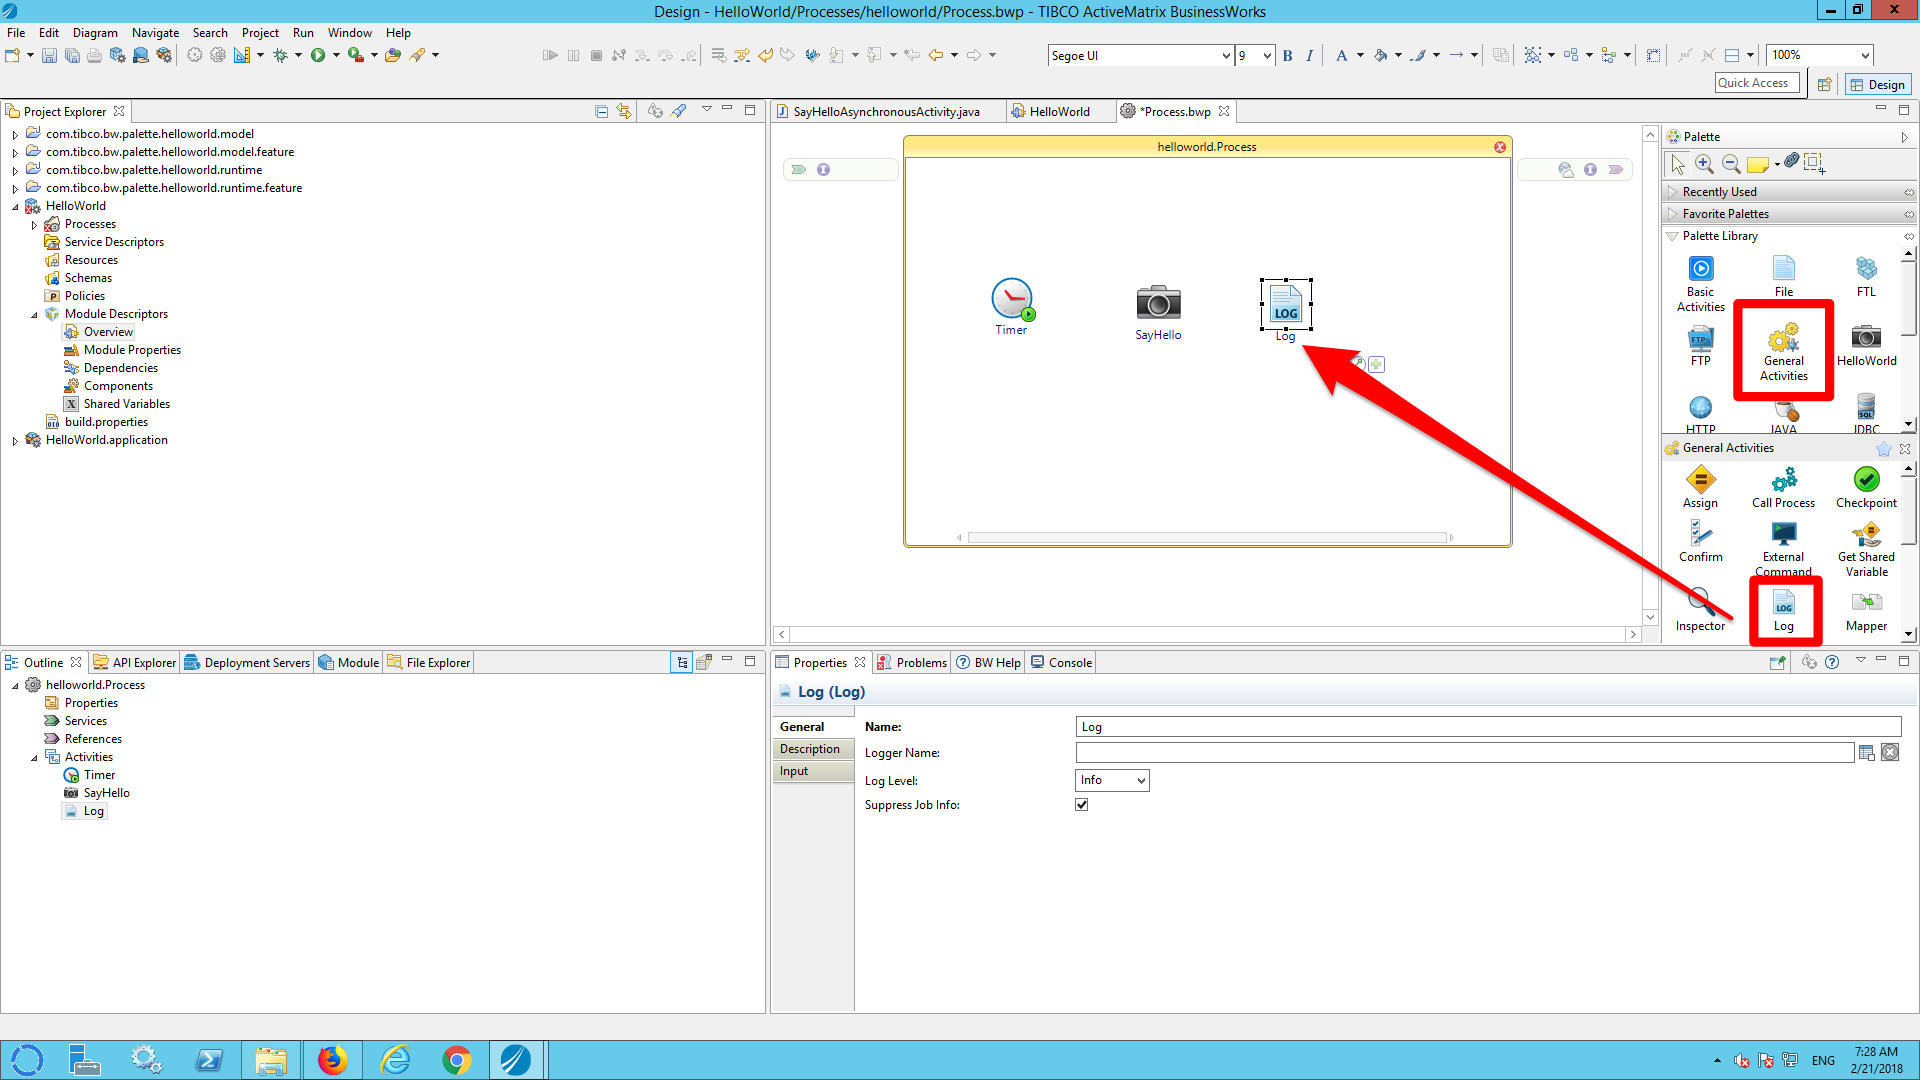
c) Add a log activity to the process
c1) Select ‘General activities’
c2) Select the log activity and drag it to the process
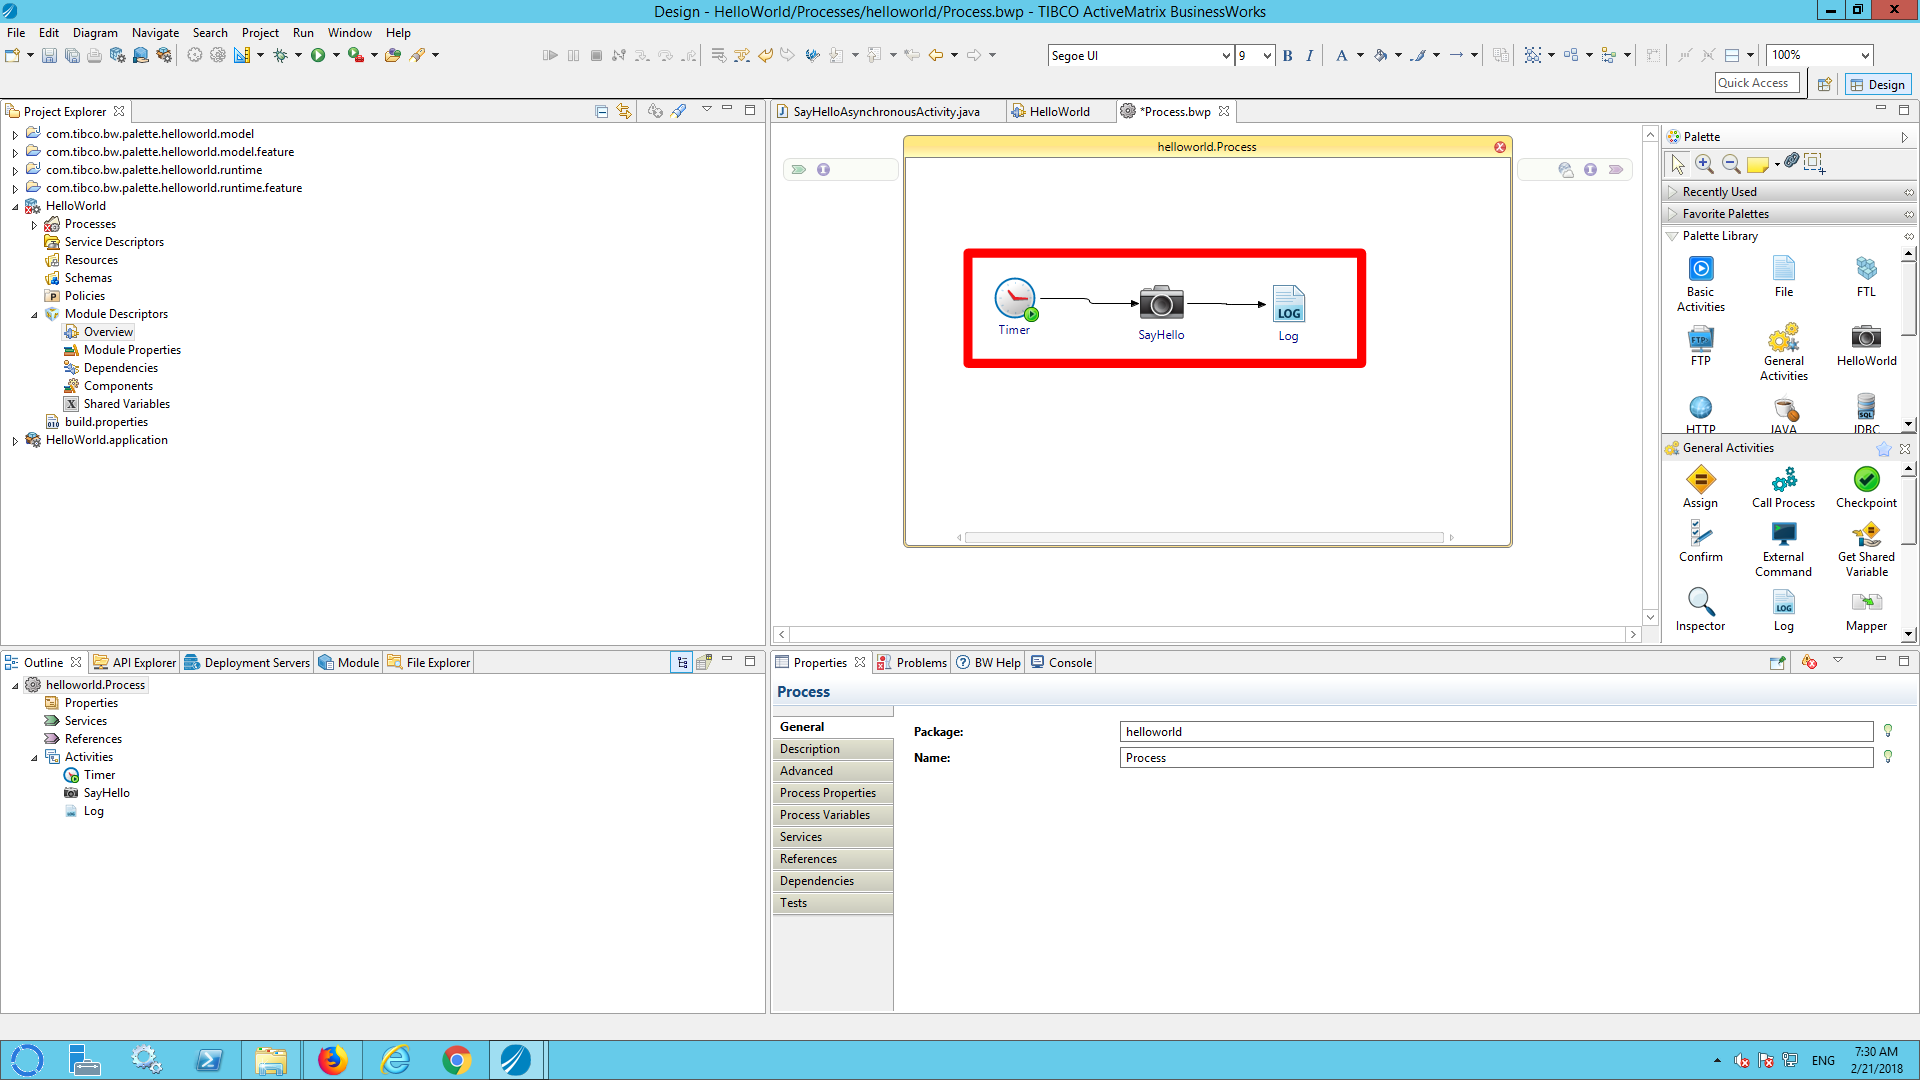
d) Wire the Timer, SauHello and Log activities:
e) Modify the SayHello Activity
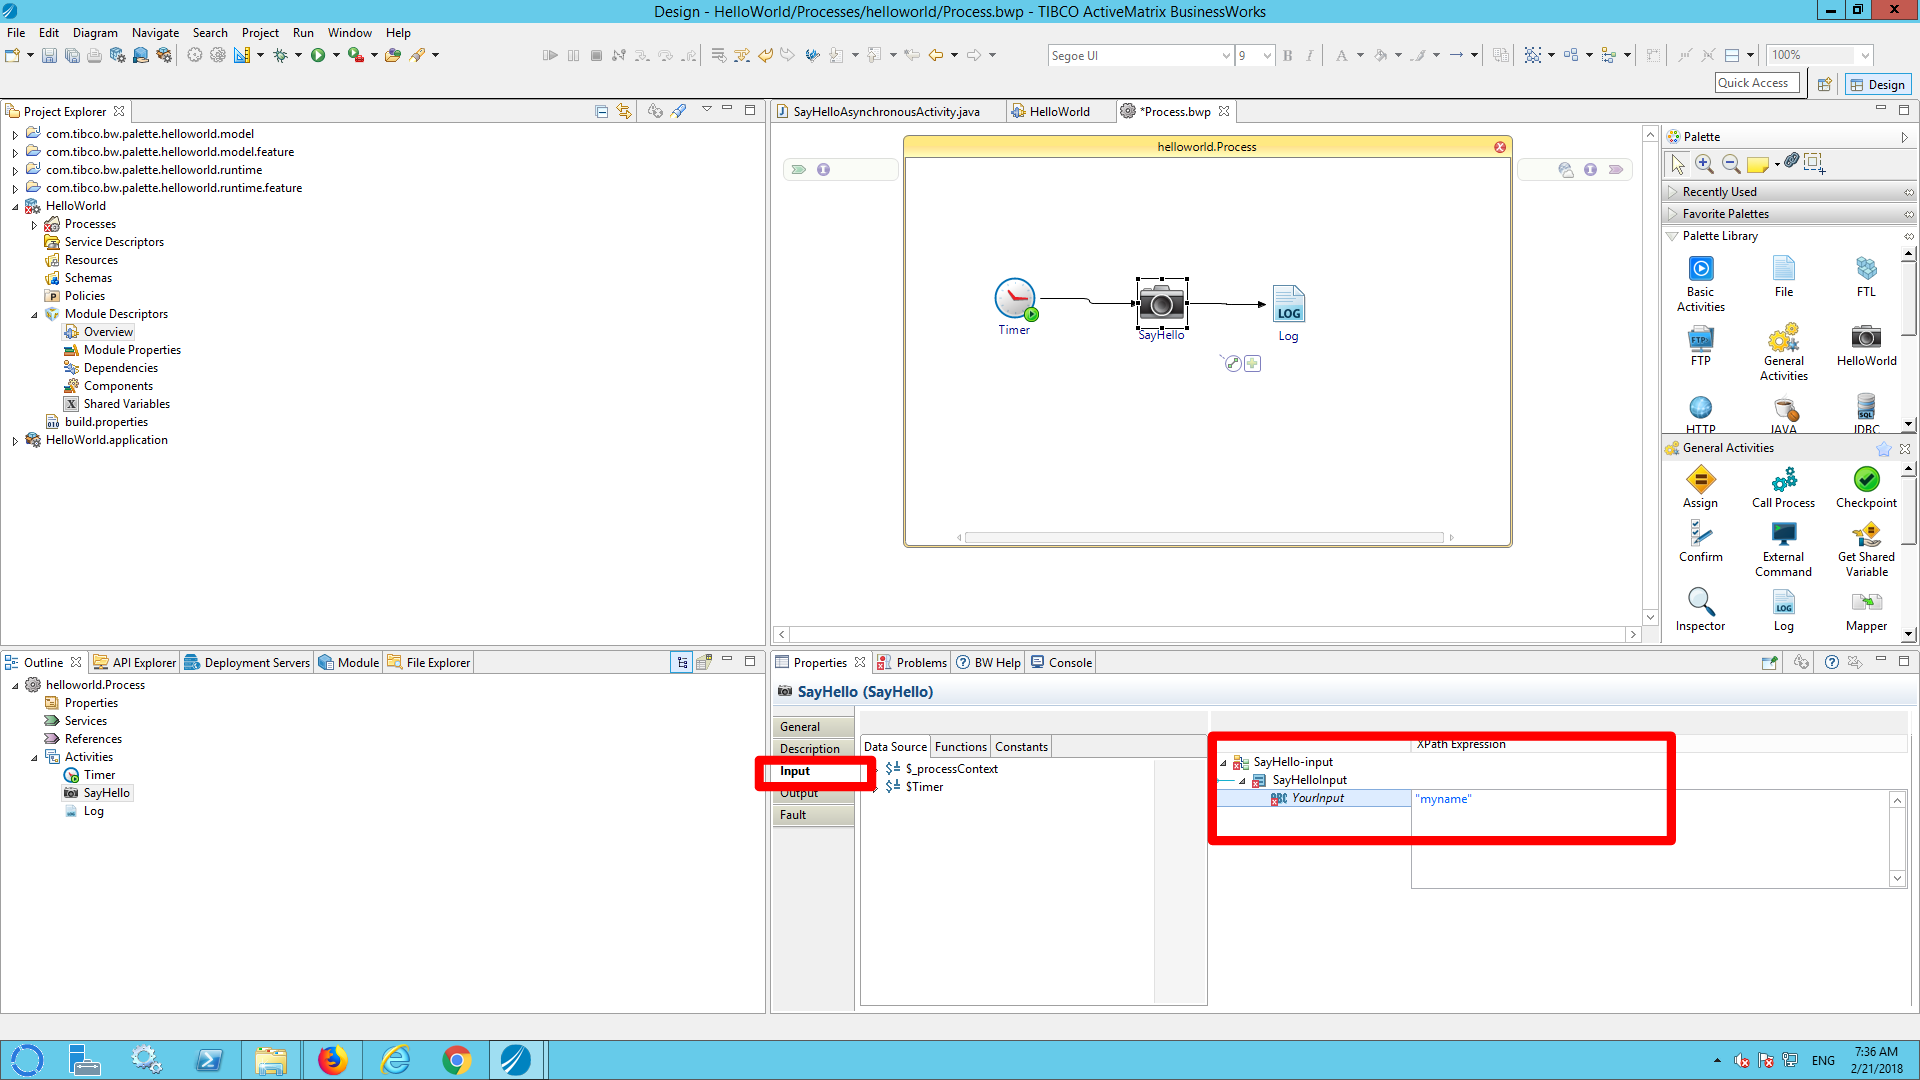
e1) Select the SayHello activity and notice that in the ‘General’ tab of the properties the ‘YourName’ configuration attribute you created earlies is visible.
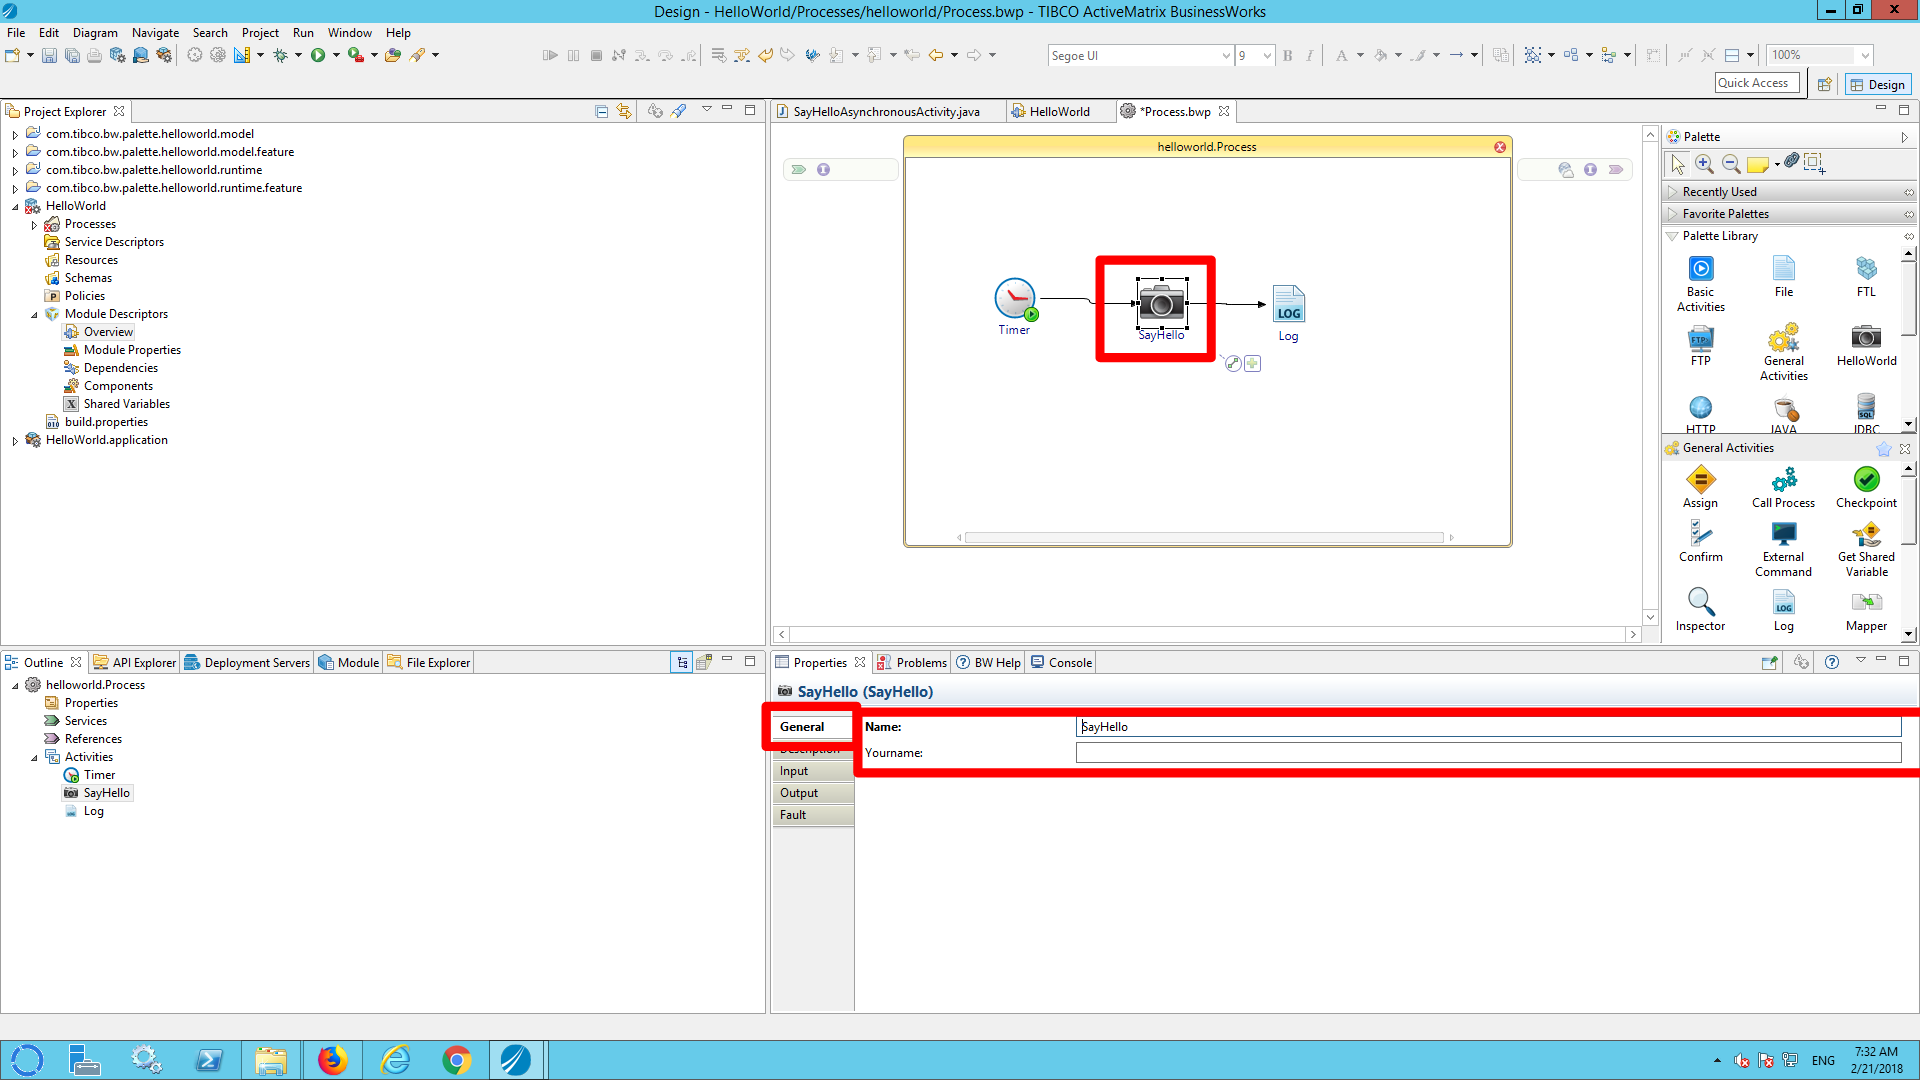
e2) Select input and set ‘myname’ as in the YourInput attribute.
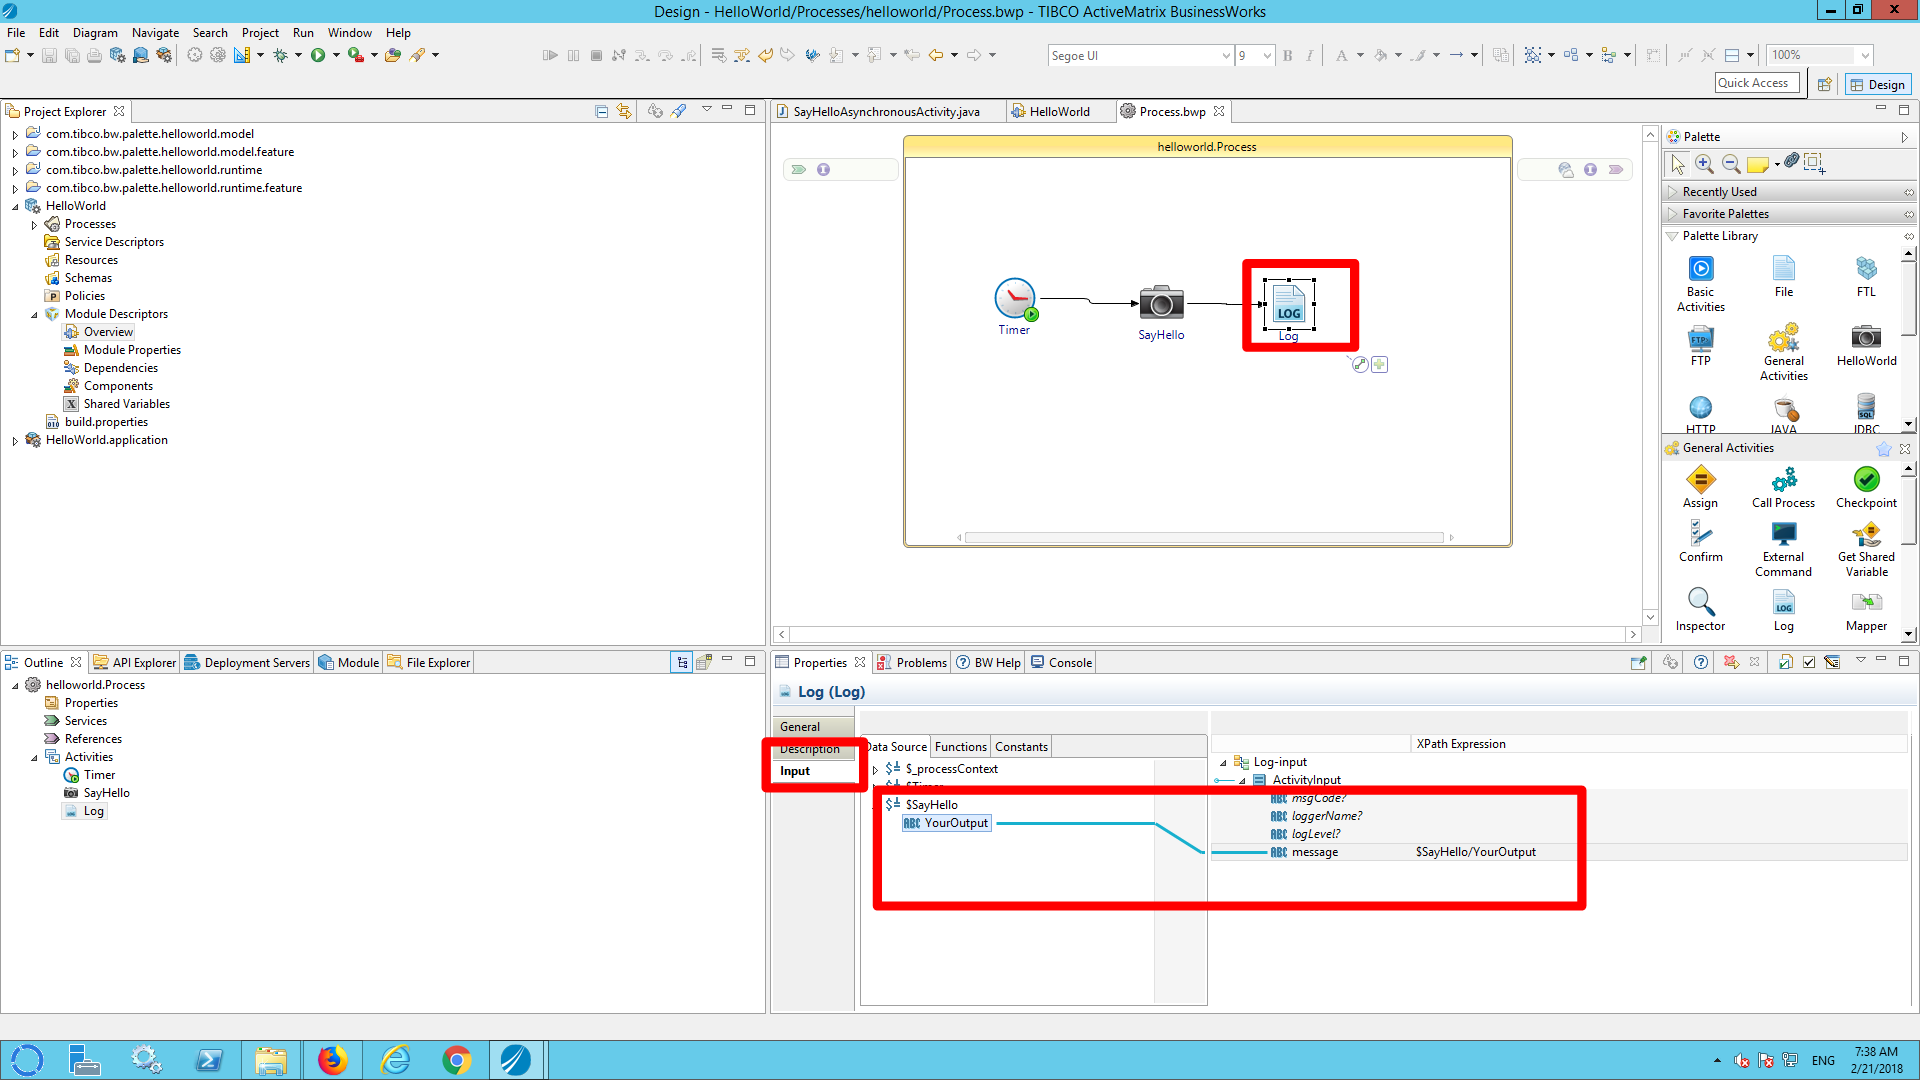
e3) Map the log message to the output of the ‘SayHello’ activity.
e3-i) Select the ‘Log’ activity
e3-ii) Select input
e3-iii) Map YourOutput to Message
f) Save the project.
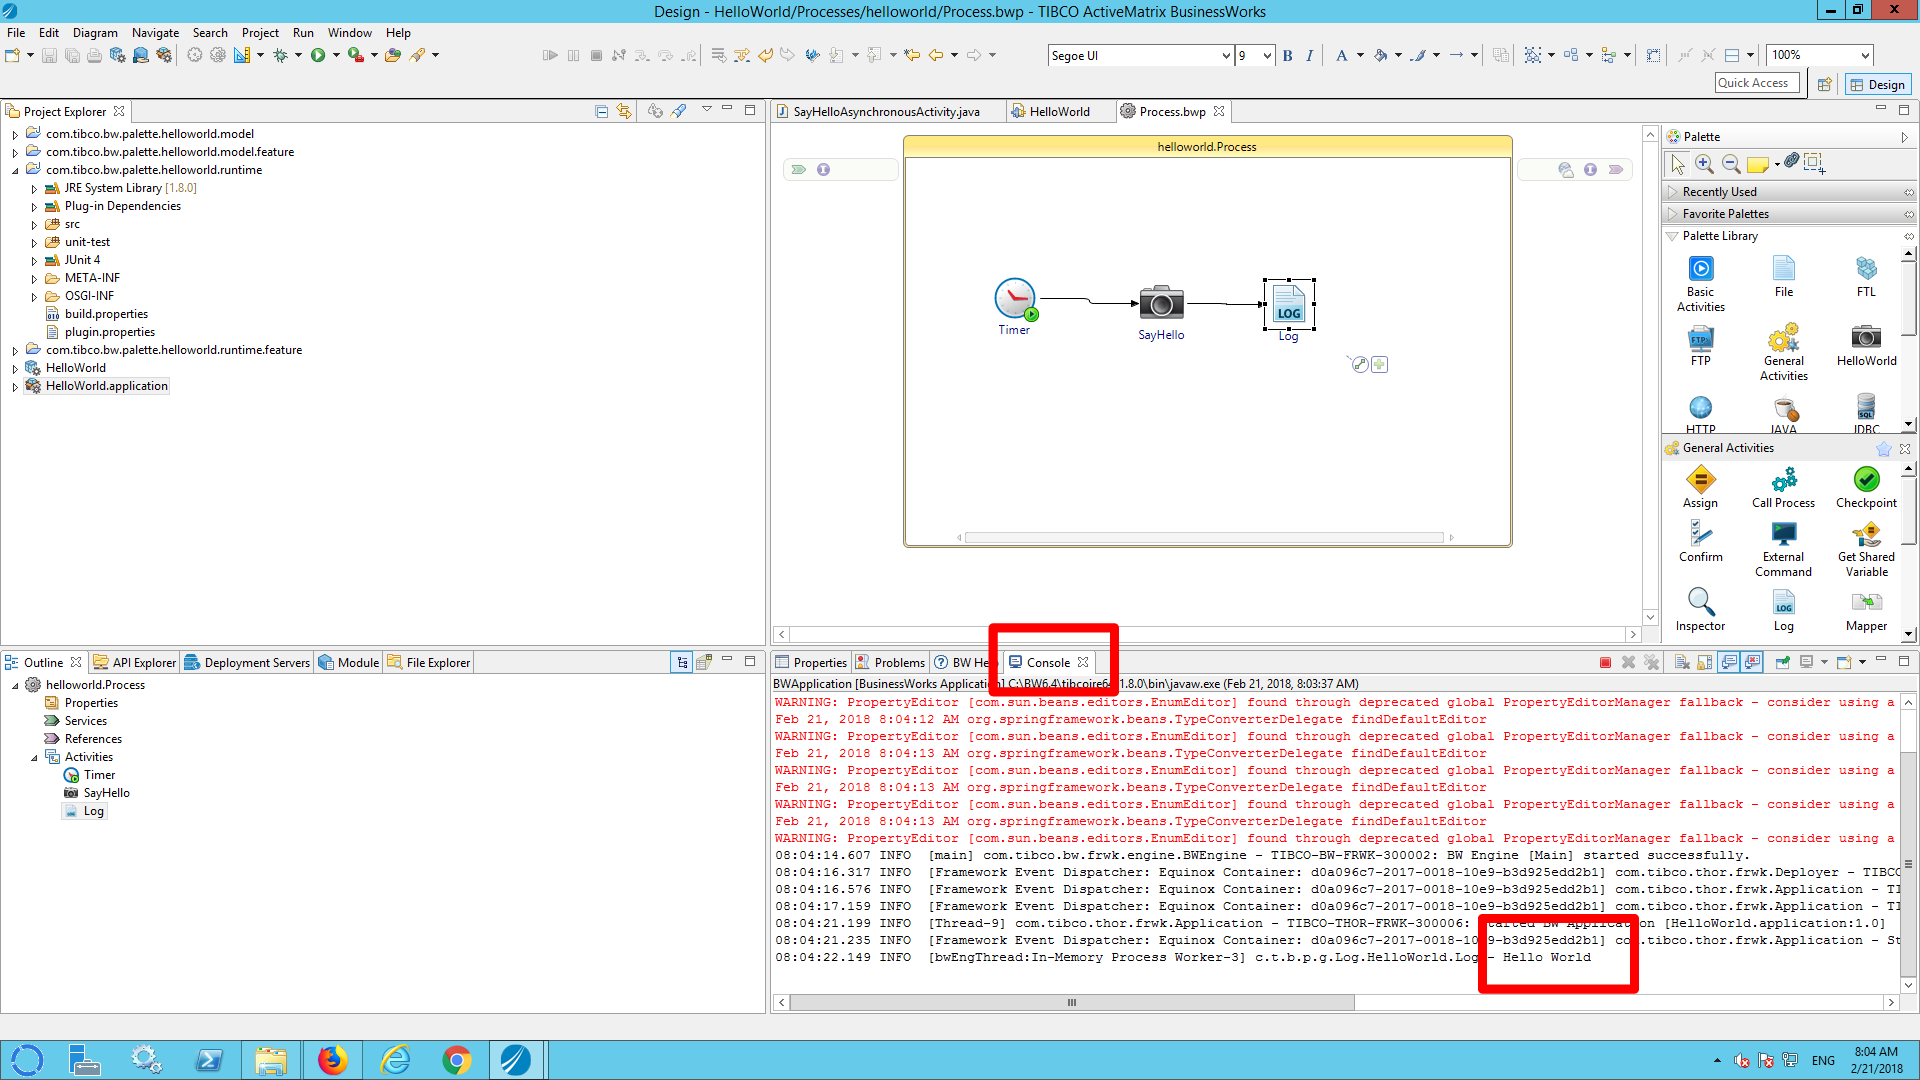
Step 11) Test the project
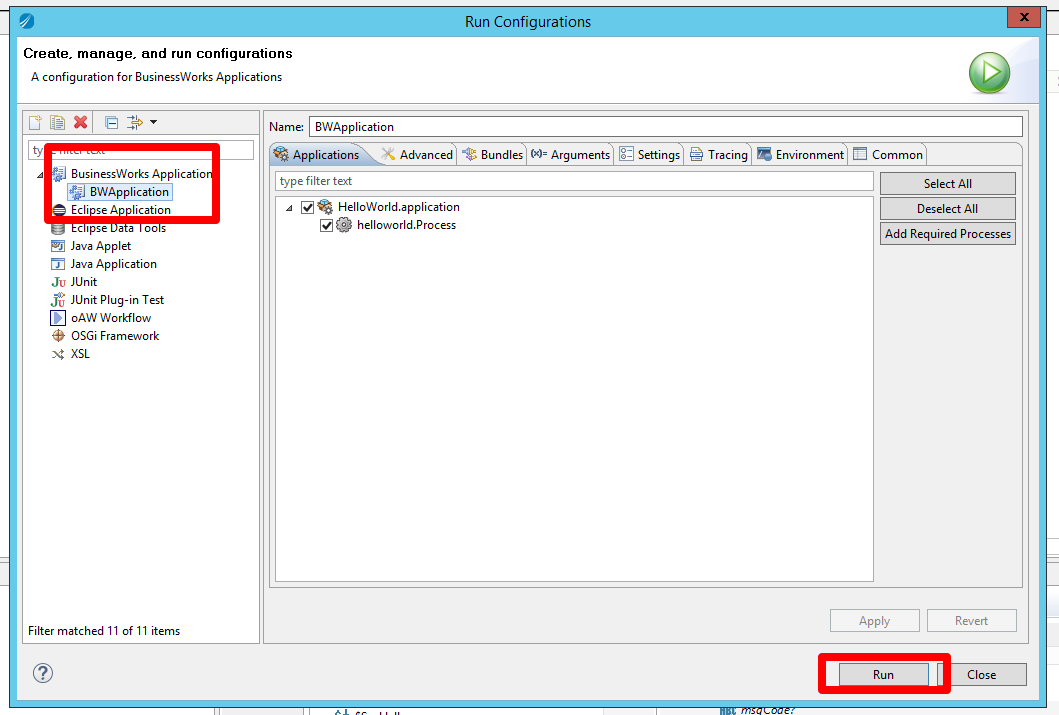
a) Click the run button and select the option ‘Run configuration’.
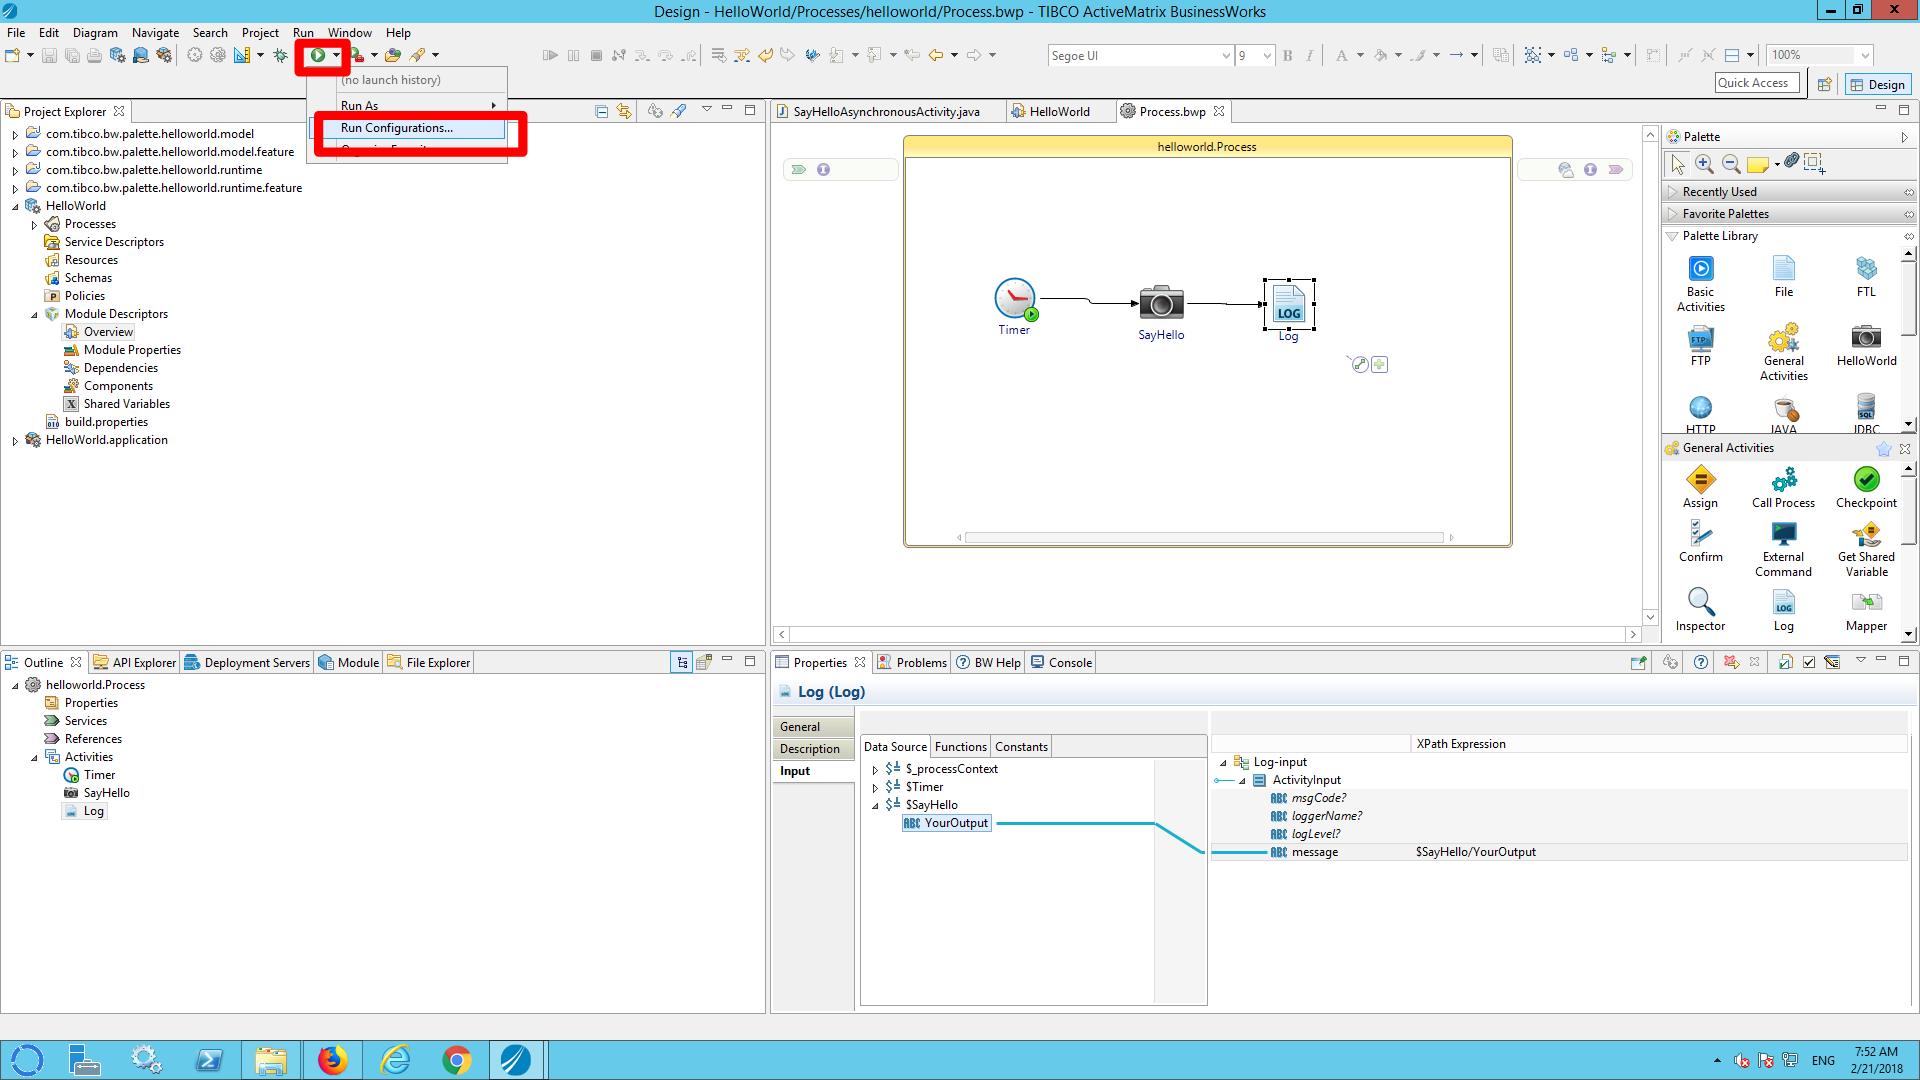
b) Select ‘BW application’ and click ‘run’
c) Select the Console.
d) Notice that ‘Hello World’ is logged.