Introduction
This document contains an step-by-step (hands-on)process that can be used to get a better understanding of Docker.
This document contains instructions for the following exercises:
- Exercise 1: Hello World
- Exercise 2: A restful service in Python
- Exercise 3: Running a composite application
Preparation steps:
Preparation Step A) Have available a docker VM.
A1) In this document it is assumed you have CentOS (VM) server available. If you don’t have a CentOS VM available download it from open osboxes.org. If you prefer to use another flavor of Linux: no problem. The course was tested against CentOS, but it should work for other Linux distributions as well.
A2) Install docker using the following documentation: https://docs.docker.com/engine/installation/linux/centos/
Preparation step B) Create a directory ‘~/mydocker’.
B1) Login to the Docker Linux server (created in step A).
B2) Type ‘cd ~’
B3) Type ‘mkdir mydocker’.
Preparation step C) Upload the following file courseFiles.zip to your home directory and unzip it in ~/courseFiles.
The zip file contains all files needed in this exercise.
courseFiles.zip:courseFiles.zip
Exercise 1: Hello World
In this exercise you will login to docker and run a simple ‘hello world’ container. Furthermore you will learn a few useful docker commands.
Step 1: Login to your Docker Server (VM) and check that docker is running.
a) Login to the Docker Server (VM) using a graphical interface and startup a terminal:
a1) Login to the Docker Server (your VM) using a graphical interface.
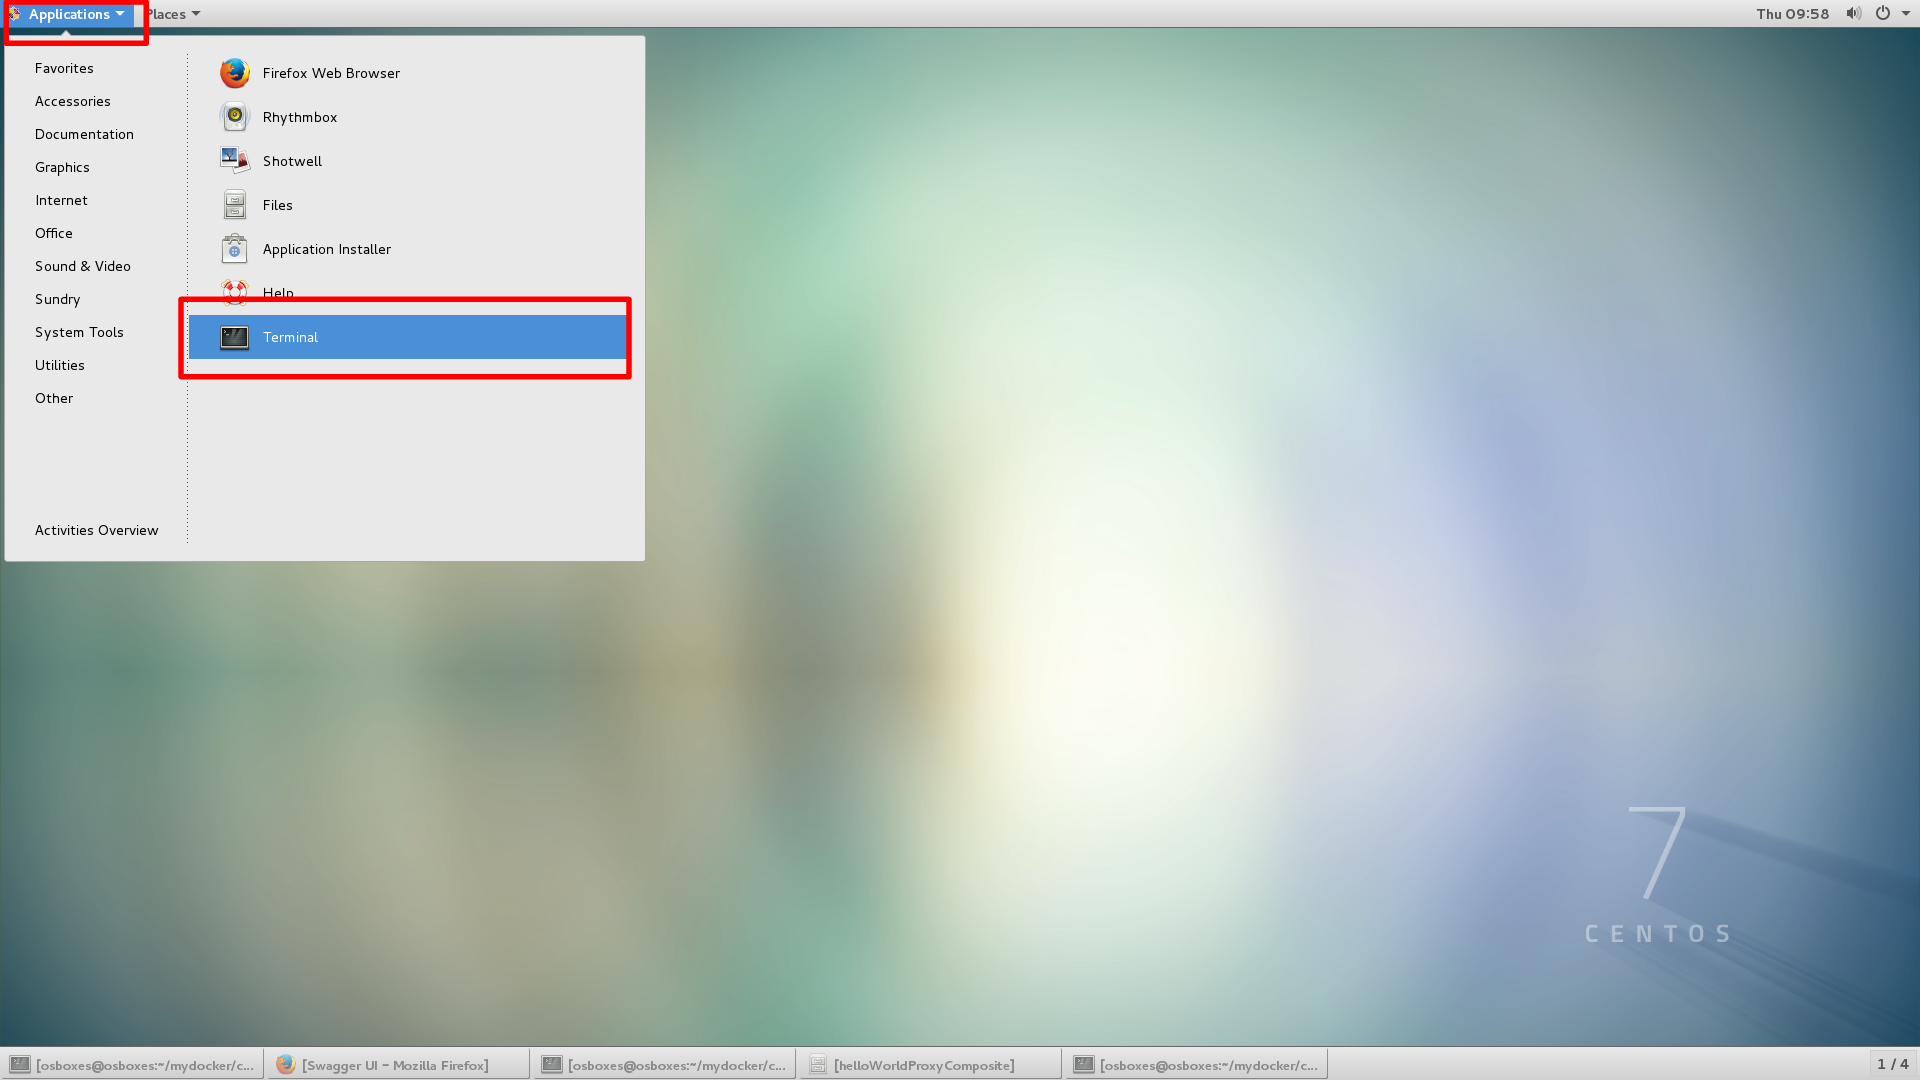
a2) Open a terminal. Do so by clicking ‘Applications –> Terminal’
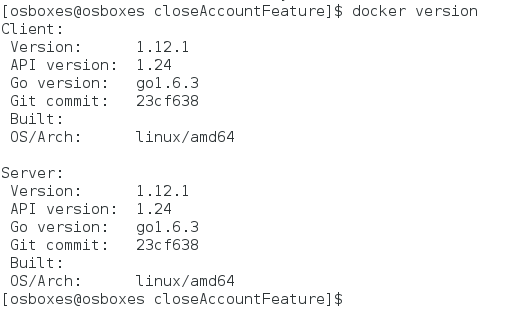
b) Check if docker is running by typing ‘docker version’ at the command prompt in the terminal. Depending on the version of Docker you are using, you should get the following response:
Step 2: Check if there are any images or containers running on the Docker Server (VM).
a) On the command prompt run the following commands:
docker images ==> gives you a list of currently deployed images.
docker ps -a ==> gives you a list of running and stopped containers.
Both commands will not provide (much) output since not much is running (yet).
Step 3: Run a ‘hello world’ container.
Docker offers a ‘hello world’ image that only list a ‘hello world’ on the screen (and then stops running). Before we run the image in a container we need to pull the image from the public Docker repository.
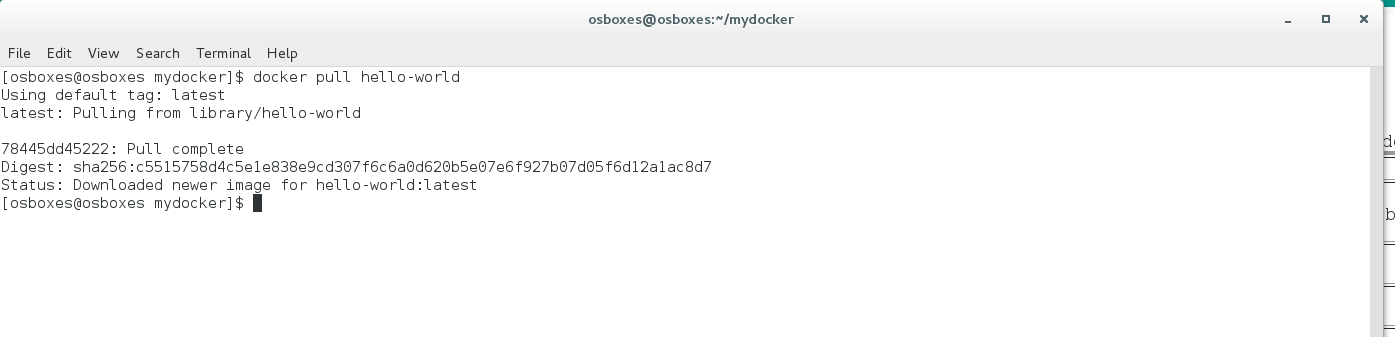
a) Run the command ‘docker pull hello-world’
With this command the latest version of the hello-world image is pulled from the public Docker repository.
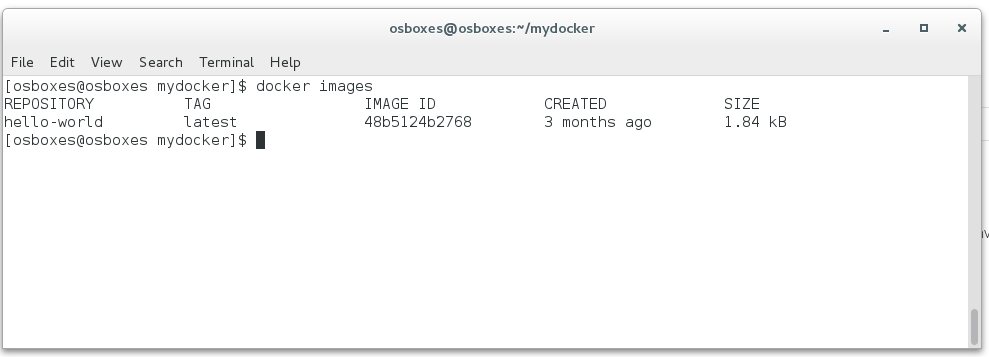
b) Verify that the hello world image is loaded on you server by typing ‘docker images’.
The output must look something like below. Please notice that image has a unique ID.
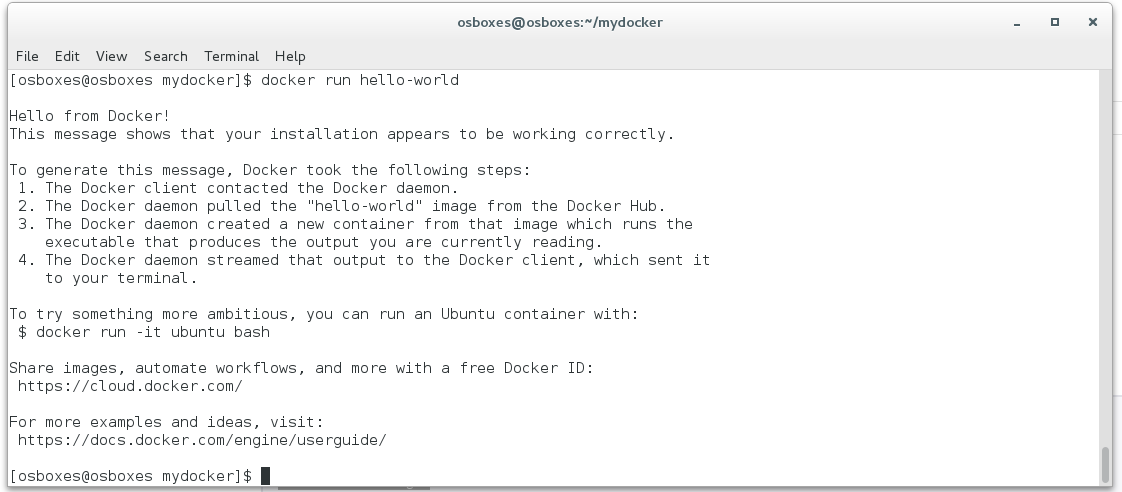
c) Run the docker image in a container by typing: ‘docker run hello-world’ it will lead to the following output:
d) Check which containers are running by typing ‘docker ps -a’. This will lead to the following output:
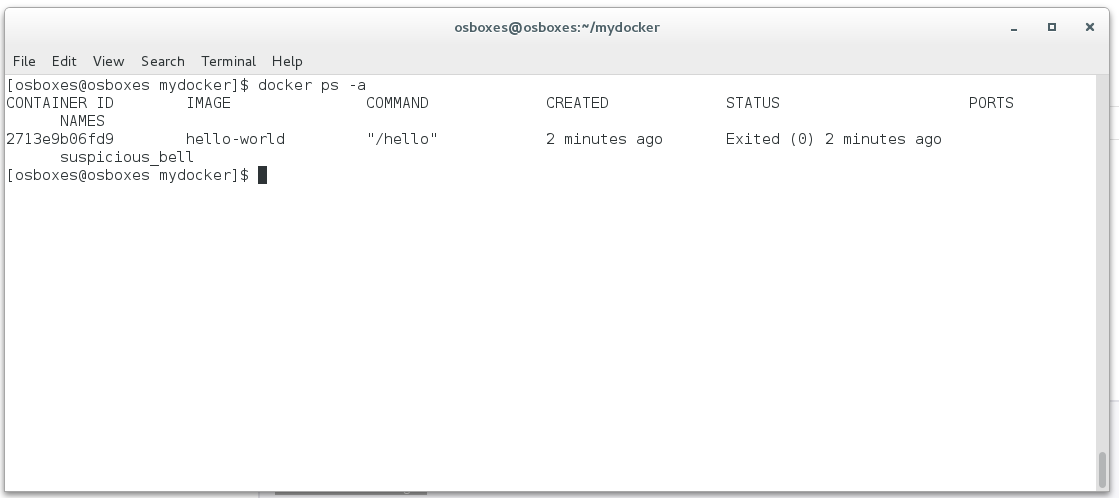
In the status column you can see that the container is no longer running.
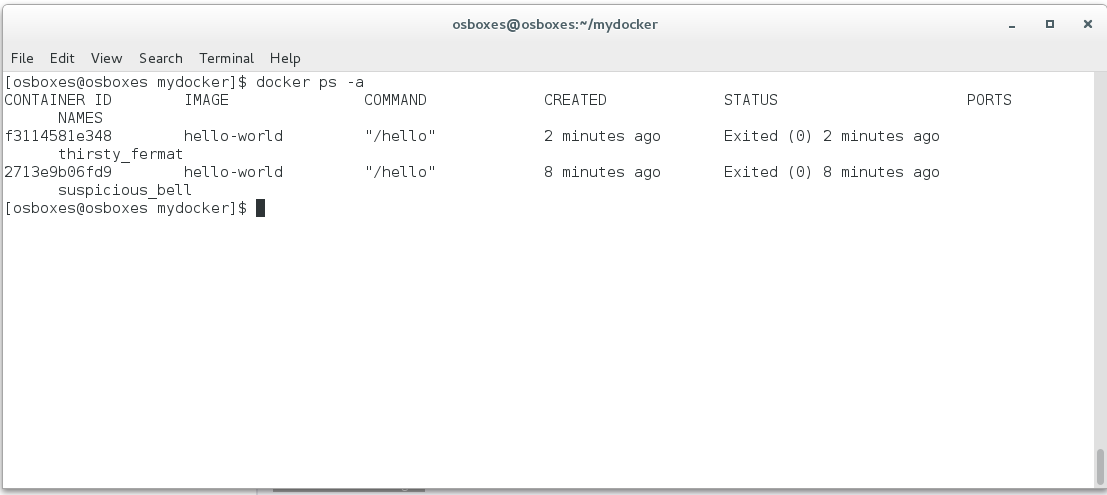
e) Run another instance of the hello-world image and see the effect on the list of containers:
docker run hello-world
docker ps -a
You will find out that two instances of the hello-world container ran (but no longer run).
Step 3: Run a centos container that doesn’t immediately stop.
a) find out which centos image are available in the public Docker repository by typing docker search centos
It will provide you with all flavors of centos.
b) pull the standard centos image from the repository by typing docker pull centos
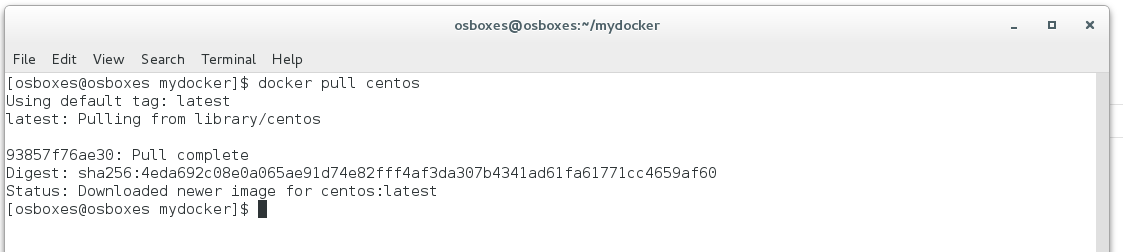
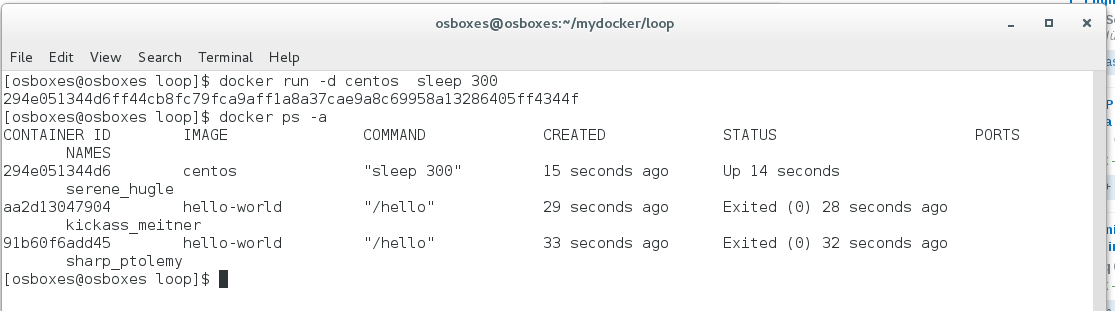
c) Startup the image and run a sleep of 300 seconds (to keep the container alive)
docker run -d centos sleep 300 <== the -d option will run docker in the background
docker ps -a
You will get the following output. Notice that this time the container didn’t immediately stop running.
d) Stop the centos container by typing ‘ docker stop <container ID>’
type docker ps -a again
You will find out that the centos container now stopped running

e) Remove each of the three containers with the command ‘docker rmi <dockerID>’
f) Remove the hello-world and centos images with the commands
docker rmi hello-world
docker rmi centos
Exercise 2: A restful service in Python
In this exercise you learn how to run a simple Python restful service in a docker container.
Preparation:
a) create a directory named ‘mydocker’ in your home directory (mkdir mydocker).
b) go into this directory (cd mydocker).
Remark: the directory ~/mydocker is considered the ‘base directory’ in the remainder of this document.
Step 1) Create the Python application.
a) Create a directory named ‘helloWorldPython’ (mkdir helloWorldPython) and go into that directory (cd helloWorldPython).
b) Create a directory named ‘app’ (mkdir app) and go into that directory (cd app)
b) Create a python file named ‘main.py’ (gedit main.py)
c) Paste the following code in the file. !!TAKE CARE OF THE INDENTATION! and save the file
from flask import Flask, jsonify, request
from flask_restplus import Resource, Api, reqparse
import json
app = Flask(__name__) # Create a Flask WSGI appliction
api = Api(app) # Create a Flask-RESTPlus API
parser = reqparse.RequestParser()
parser.add_argument(‘jsonbody’, location=’json’)
@api.route(‘/helloworld/<inputName>’, methods=[‘GET’])
class HelloWorld(Resource):
# Create a RESTful resource
def get(self,inputName): # Create GET endpoint
resp = app.make_response(“hello world “+inputName)
resp.headers.add(‘Access-Control-Allow-Origin’, ‘*’) #Required for CORS
resp.headers.add(‘Access-Control-Allow-Methods’, ‘POST,PUT,GET’);
return resp
if __name__ == ‘__main__’:
app.run(debug=True, threaded=True) # Start a development server
main.py: main.py
This file is also available in ~/courseFiles/Docker/exercise2
It is beneath the scope of this course to discuss how to build restful services in Python. A few remarks:
- The Python applications imports the rest libraries Flask, FlaskRestPlus
- It exposes a resource /helloworld/{inputName} [get]
- When this resource is invoked, it will return “hello world “+inputName
Step 2: Prepare the creation of a custom image using a Dockerfile
So far we have pulled images and we have run containers directly from the command line. We nevertheless now face a situation in which we have create a new image based on another image. We need to pull a Linux image from the repository that contains Python and the Flask library. On top of that we need to install the flask-restplus library and we need to copy our helloworld service to the image. If you want to customize an images it makes sense to use a Dockerfile to do so.
a) go back to the directory ‘helloWorldPython’ (cd ..)
b) Create a text file named ‘Dockerfile’ (gedit Dockerfile !!mind the capital ‘D’!!) and paste the following content:
FROM tiangolo/uwsgi-nginx-flask:flask-upload
RUN pip install flask-restplus
COPY ./app /app
Dockerfile: Dockerfile
This file is also available in ~/courseFiles/Docker/exercise2
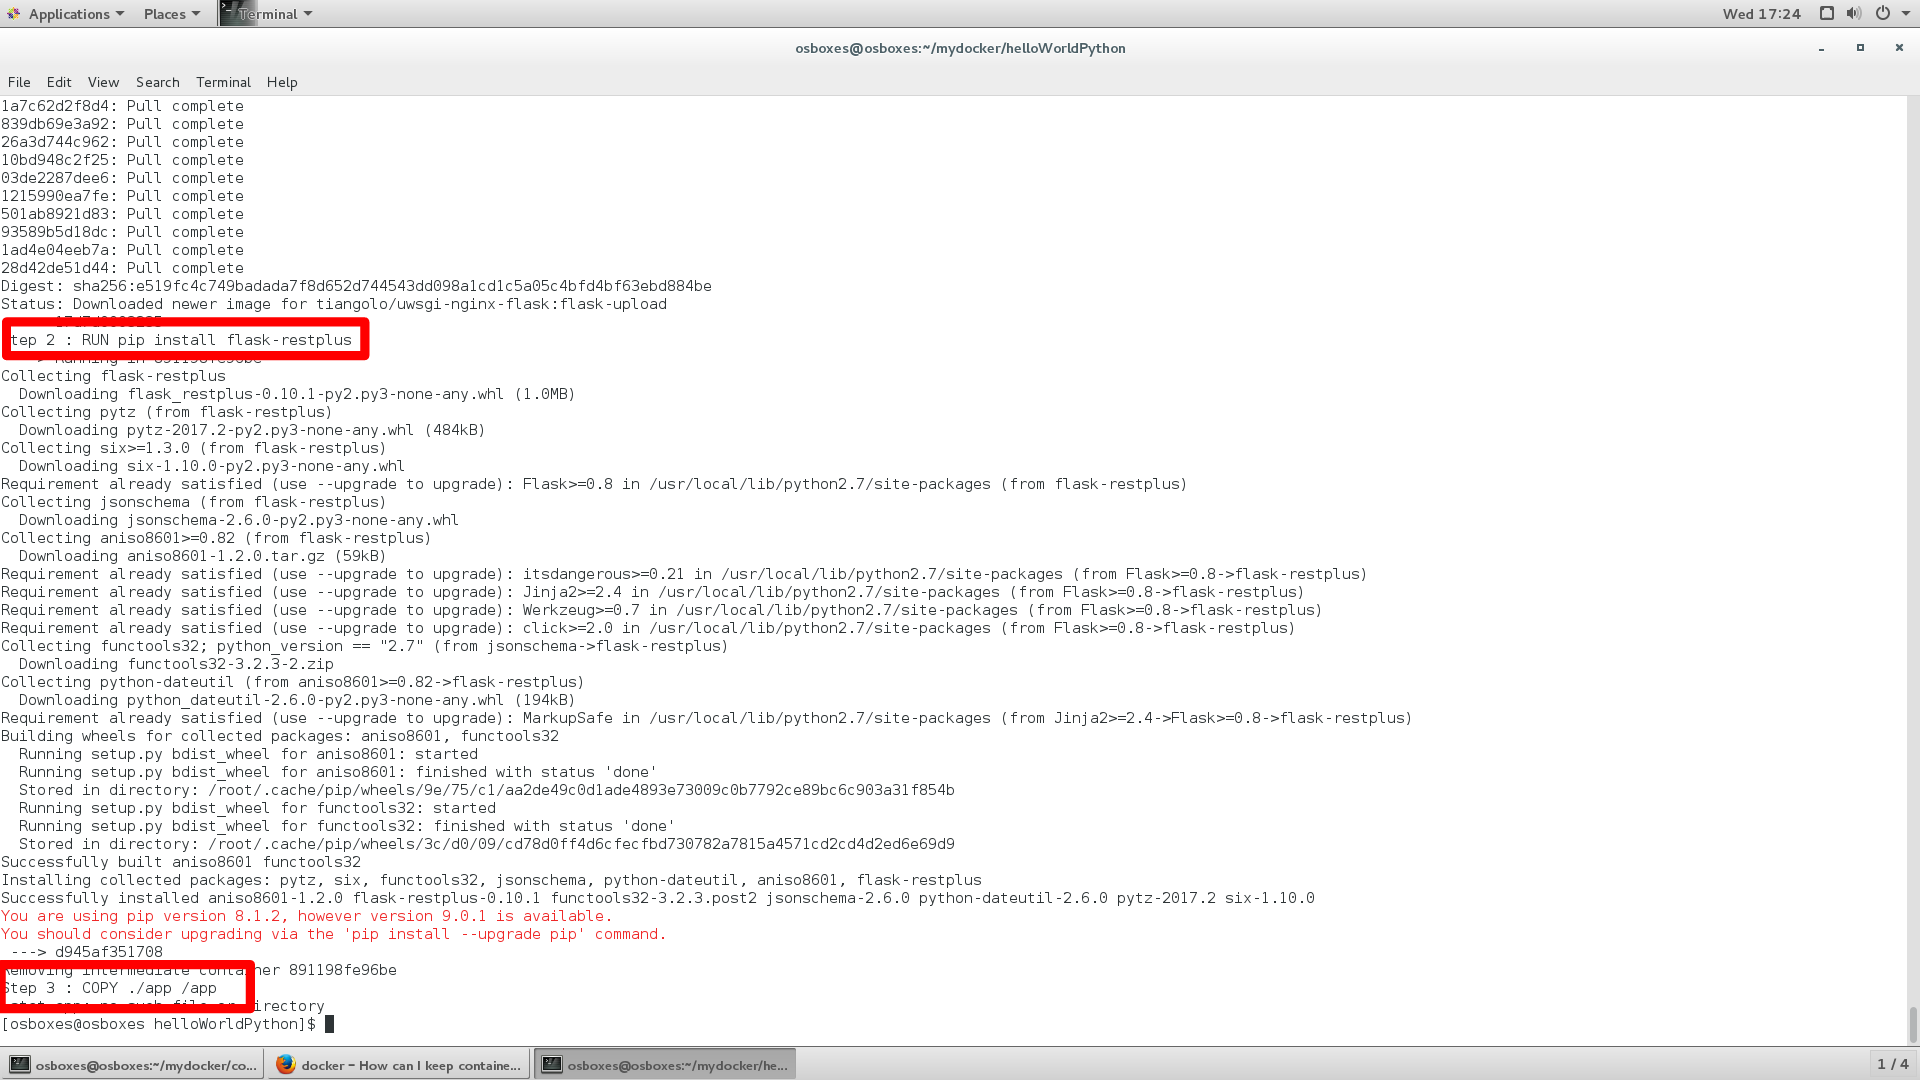
In this Dockerfile contains the following commands:
FROM tiangolo/uwsgi-nginx-flask:flask-upload <== use the image tiangolo/uwsgi-nginx-flask:flask-upload. If it is not available locally pull it from the repository. This image already contains Python and the Flask library.
RUN pip install flask-restplus <== run the command ‘pip install flask-restplus’ to install the flask-restplus library to the image.
COPY ./app /app <== copy the local directory app (that contains our hello world application) to the directory app in the image.
Step 3: Build a custom image and name it helloworldimage
a) Run the command ‘docker build -t helloworldimage .’ (mind the dot). Docker will start by pulling the required bases images.
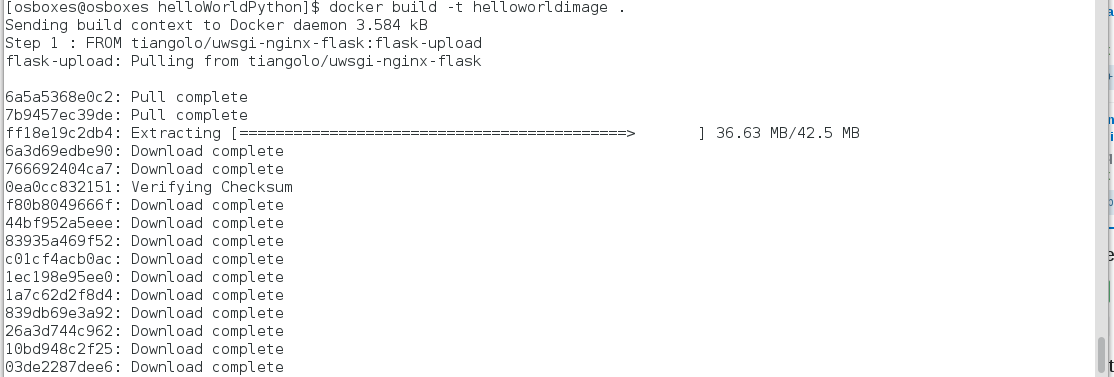
After that required library is installed and our application is copied.
b) Verify that the image exists by running the command ‘docker images’

Step 4: run the image in it’s own container
a) Run the command ‘docker run –name “helloWorldContainer” -p 80:80 -d helloworldimage’ <== please mind the double dash in front of name.
- The –name “helloWorldContainer” indicates that we want to give our container the mentioned name.
- The -p 80:80 indicates that we want to expose port 80 of the image onto the Docker Server (VM). The web server (running our python rest service) runs on port 80 in the container. We want to make this port available outside of the container on the docker host.
- The -d helloworldimage indicates that we container should run our newly created image named ‘helloworldimage’.
b) Run ‘docker ps -a’ to verify that the container was created.

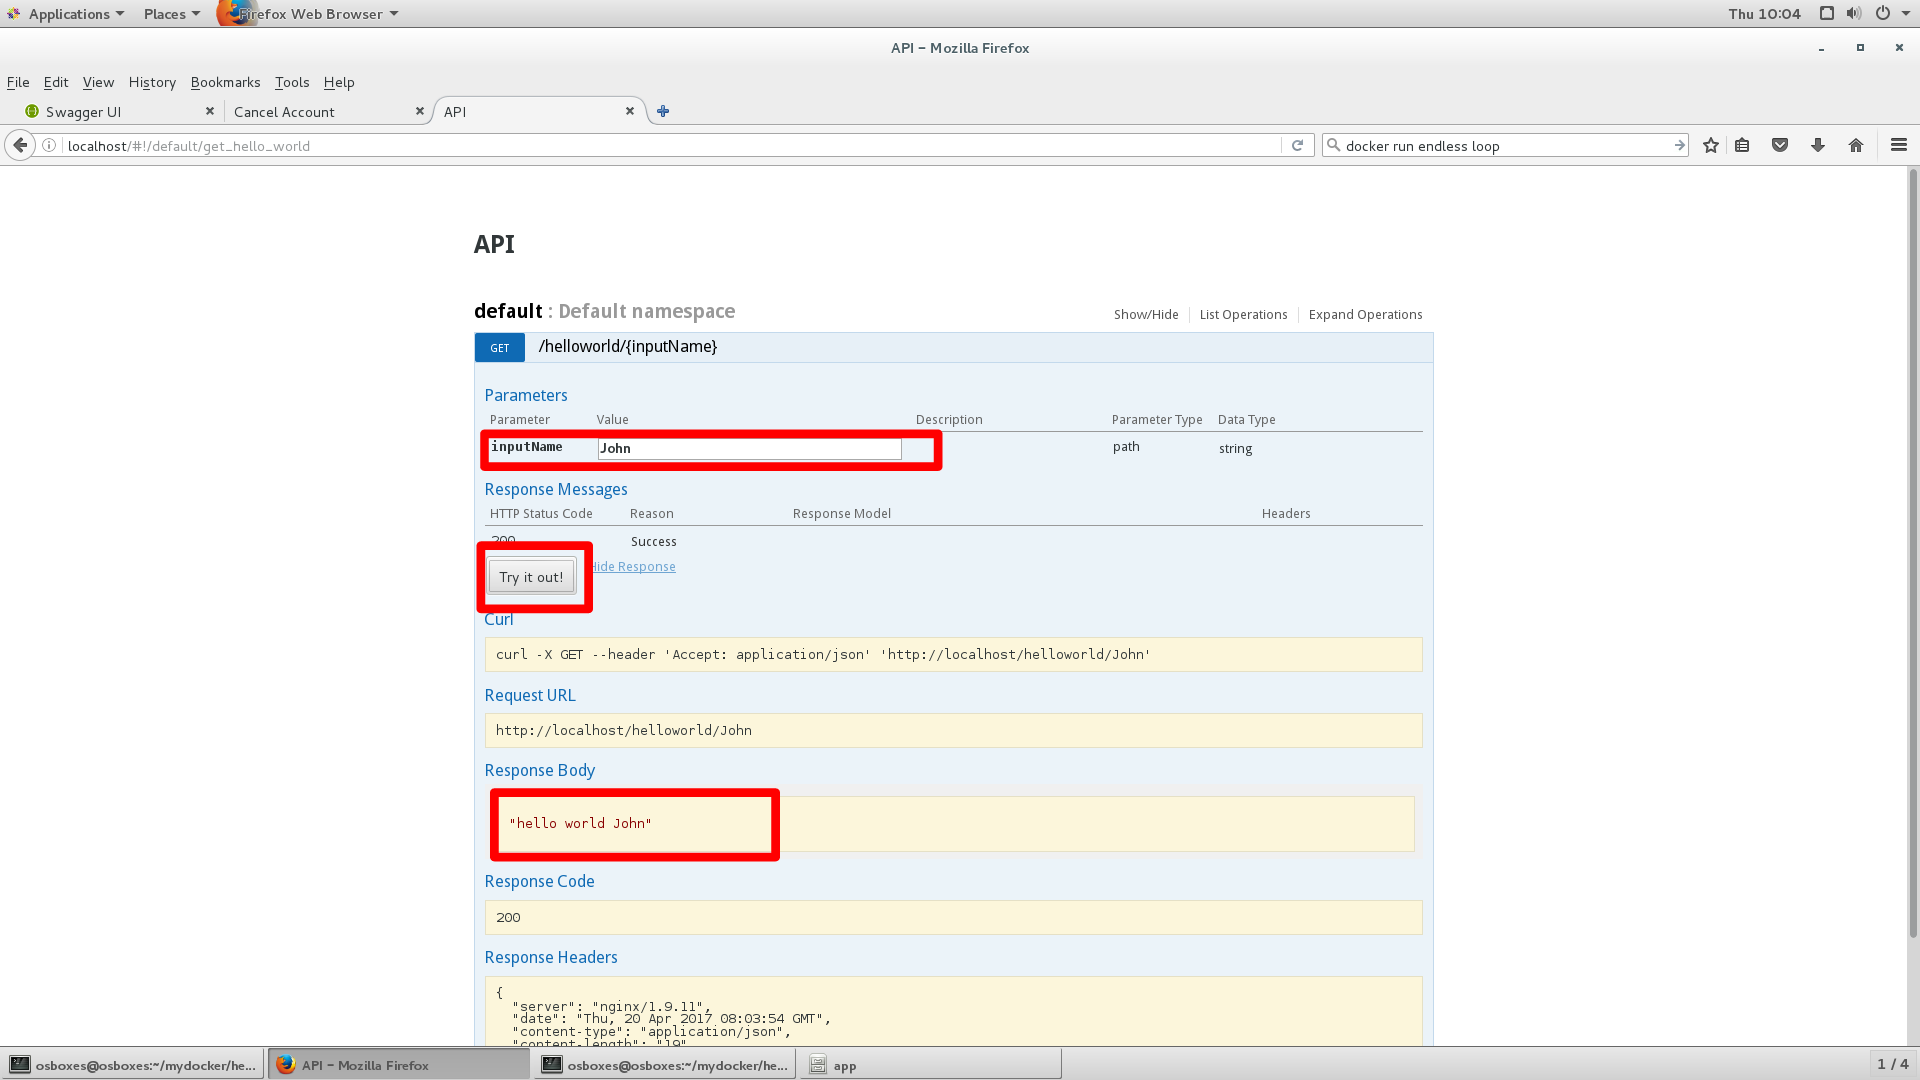
Step 5: test the application
During this step we will test the API using the generated swagger interface. The swagger interface can be used to invoke the Restful service that we created using Python.
a) Open a browser on your Docker Server (VM) and open ‘http://localhost’.
b) Fill out your name as ‘inputName’.
c) Click the ‘Try it out’ button. The output will be ‘hello world <name>’
Step 6: IMPORTANT: clean up
a) List the docker containers (docker ps -a)
b) Stop the helloWorldContainer (docker stop helloWorldContainer).
c) Remove all containers with the command ‘docker rm $(docker ps -a -q)’
Exercise 3: running a composite application
So far we have deployed single containers only. Often applications are made out of multiple parts running in separate containers. In this exercise we will deploy an composite application that consists of two parts:
Part 1: The Python based restful service (deployed in exercise 2).
Part 2: A angular web application that offers a user to enter a name. It will then call the rest service and show the hello world response. The web application will consist of the following simple interface:

Step 1: Create the web application
a) Create a new directory named ‘helloWorldWeb’ (in the directiry ~/mydocker) (mkdir helloWorldWeb).
b) Go into this directory (cd helloWorldWeb)
c) Create a directory content in helloWorldWeb (mkdir content).
d) Create a file in /helloWorld/content named index.html (gedit index.html) and paste the following content in it:
<!DOCTYPE html>
<html lang=”en”>
<head>
<meta content=”text/html; charset=utf-8″ http-equiv=”content-type”>
<title>Hello World</title>
<style>
</style>
<!– load angular via CDN –>
<script src=”//code.angularjs.org/1.4.8/angular.min.js”></script>
<script src=”//cdnjs.cloudflare.com/ajax/libs/angular-filter/0.4.7/angular-filter.js”></script>
<script src=”//code.angularjs.org/1.4.8/angular-animate.min.js”></script>
<script src=”app.js”></script>
</head>
<body>
<div ng-app=”myApp” ng-controller=”mainController”>
Your Name: <input ng-model=”name”>
<button ng-click=”submit()”>submit</button>
{{result}}
</div>
</body>
</html>
index.html: index.html
This file is also available in ~/courseFiles/Docker/exercise3
e) Create another file name app.js (gedit app.js) and paste the following content in the file:
var myApp = angular.module(‘myApp’, [‘angular.filter’, ‘ngAnimate’]);
myApp.controller(‘mainController’, [‘$scope’, ‘$filter’, ‘$http’, ‘$location’, function ($scope, $filter, $http, $location) {
$scope.name=””;
$scope.result=””;
$scope.submit = function() {
console.log($scope.name);
//$http.get(“http://52.166.143.94:8080/cancelaccount/”+inputSelectedAccount).then(function(response){ $scope.dependenciesResult = response.data; });
$http.get(“http://”+$location.host()+”:5000/helloworld/”+$scope.name).then(function(response){ $scope.result = response.data; });
}
}]);
app.js: app.js
This file is also available in ~/courseFiles/Docker/exercise3
Remark: it is beyond the scope of this course to discuss the web application in detail. The web application itself is implemented in html (in index.html). The AngularJS javascript is stored in the file app.js.
Step 2: Create a Dockerfile to create a image base on nginx that can run the web application
a) Go to the directory helloWorldWeb (cd ..)
b) Create a text file named Dockerfile (mind the capital ‘D’) (gedit Dockerfile) and paste the following content into it:
FROM nginx
COPY content /usr/share/nginx/html
Dockerfile: Dockerfile
This file is also available in ~/courseFiles/exercise3
The Dockerfile does the the following:
FROM nginx <== an (out of the box) nginx image is fetched from the Docker repository
COPY content /usr/share/nginx/html <== the index.html and the app.js files are copied to /usr/share/nginx/html/content. This is the directory that is used by nginx to server content.
Step 3: Create a docker compose script to create a composite application.
Background: When running a composite application, it is necessary to build multiple images and to start these in a certain sequence. When starting multiple containers we also have to make sure that we don’t cause port conflicts. Finally it may be required to ‘pass on’ parameters from one container to another. For example: if you start a rest service and a database in separate containers, you may need to pass on the database name and credentials to the restful service (provided that this service is to query the database).
One of the ways to build composite applications, is to use docker-compose. This docker add-on acts as an orchestrator. Based on a configuration written in yaml, you can configure the composite application. In this step we will compose a yaml script to startup our rest service and the web application.
a) Go back to the base directory (the parent of helloWorldWeb and helloWorldPython) and create a directory helloWorldCompose (mkdir helloWorldCompose).
b) Go into helloWorldCompose (cd helloWorldCompose).
c) Create a text file named docker-compose.yml (gedit docker-compose.yml) and paste the following content in the file. Save it.
Please mind: the name of the file does matter, the indentation is also important!
version: ‘2’
services:
helloworldrestservicecontainer:
build: ~/mydocker/helloWorldPython
expose:
– 80
ports:
– “5000:80”
helloworldrestwebcontainer:
build: ~/mydocker/helloWorldWeb
depends_on:
– “helloworldrestservicecontainer”
expose:
– 80
ports:
– “80:80”
docker-compose.yml: docker-compose.yml
This file is also available in ~/courseFiles/exercise3
The docker-compose file contains the ‘services’ to be started:
version: ‘2’
services:
helloworldrestservicecontainer: <== Create a service for the Python rest application.
build: ~/mydocker/helloWorldPython <== Build an image for it in the mentioned directory
expose:
– 80 <== Docker compose will create a private network for the application. On that network the Python container will be using port 80.
ports:
– “5000:80” <== Port 80 is to be exposed as port 5000 on the Docker Server (VM) (the host).
helloworldrestwebcontainer: <== Next to the Python image, we will need to create a container for the AngularJS web application
build: ~/mydocker/helloWorldWeb
depends_on:
– “helloworldrestservicecontainer” <== This container can only start after the Python rest service started
expose:
– 80 <== The web server will use port 80 on it’s own container.
ports:
– “80:80” <== The web server will expose port 80 on the Docker host.
Step 4: Start up the composite application
a) Start up the composite application with the command ‘docker-compose up -d’.
Docker compose will build the Python and nginx images and these will be started in separate containers.
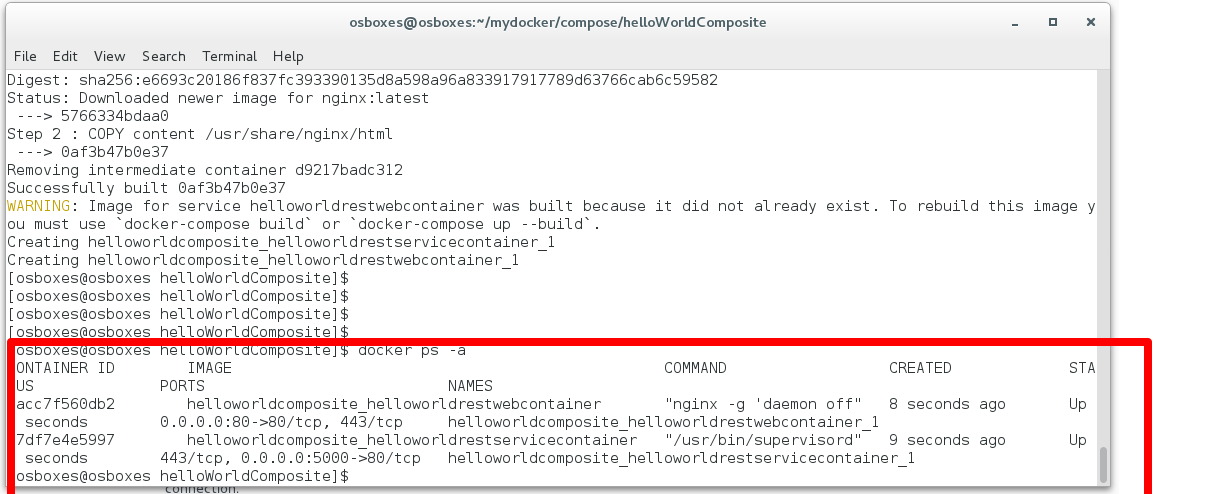
b) Once the application started check the running containers with the command ‘docker ps -a’.
You will find out that there are two containers running:
c) Take a look at the log of the nginx container with the command ‘docker logs helloworldcomposite_helloworldrestservicecontainer_1’
d) Login to the nginx container with the command ‘docker exec -it helloworldcomposite_helloworldrestservicecontainer_1 bash’
e) Do a ‘ls’ to see the content of the container filesystem
f) Type ‘exit’ to escape from the prompt.
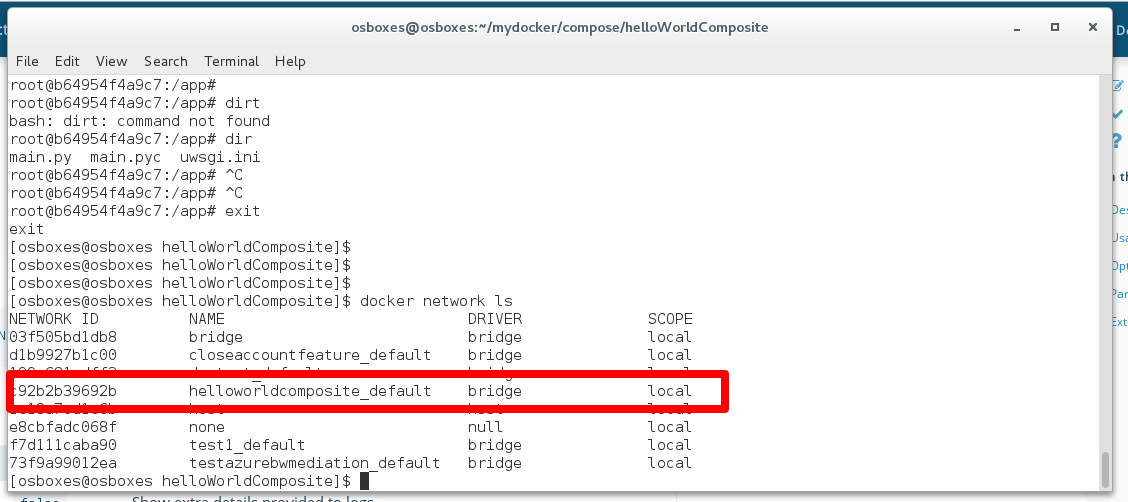
g) Type ‘docker network ls’ to take a look at the networks that docker created.
You will find the network ‘helloworldcomposite_default’ that was created to run our application.
h) Inspect this network by typing ‘docker network inspect helloworldcomposite_default’. The output will be something like this:
[
{
“Name”: “helloworldcomposite_default”,
“Id”: “c92b2b39692be417180c3e57309aa1467bf38a02b3217f98cd807a157ec4f028”,
“Scope”: “local”,
“Driver”: “bridge”,
“EnableIPv6”: false,
“IPAM”: {
“Driver”: “default”,
“Options”: null,
“Config”: [
{
“Subnet”: “172.22.0.0/16”,
“Gateway”: “172.22.0.1/16”
}
]
},
“Internal”: false,
“Containers”: {
“93a5d7e5a4f34157821f2e2b21edfb3b9e7c3b6482f4132c9a154a44143e3b62”: {
“Name”: “helloworldcomposite_helloworldrestwebcontainer_1”,
“EndpointID”: “64e75cf2e1871d4943aaa1276a96c1c7ab1a2d134f433aeb1e8aa47c4ae811cc”,
“MacAddress”: “02:42:ac:16:00:03”,
“IPv4Address”: “172.22.0.3/16”,
“IPv6Address”: “”
},
“b64954f4a9c7617267862a196ba2546b6c27158930eff328d817efdc0326a44b”: {
“Name”: “helloworldcomposite_helloworldrestservicecontainer_1”,
“EndpointID”: “d2f56db0cd04cbdb6aa64bea9a46b9bc9eb7b81d37450621b1843756d72f03e6”,
“MacAddress”: “02:42:ac:16:00:02”,
“IPv4Address”: “172.22.0.2/16”, <== you need this IP address in step 5b).
“IPv6Address”: “”
}
},
“Options”: {},
“Labels”: {}
}
]
It shows that for both containers have their own IP address and hostname.
Step 5: Test the application
a) Open localhost in your browser and type a name.
You should get the deployed application:
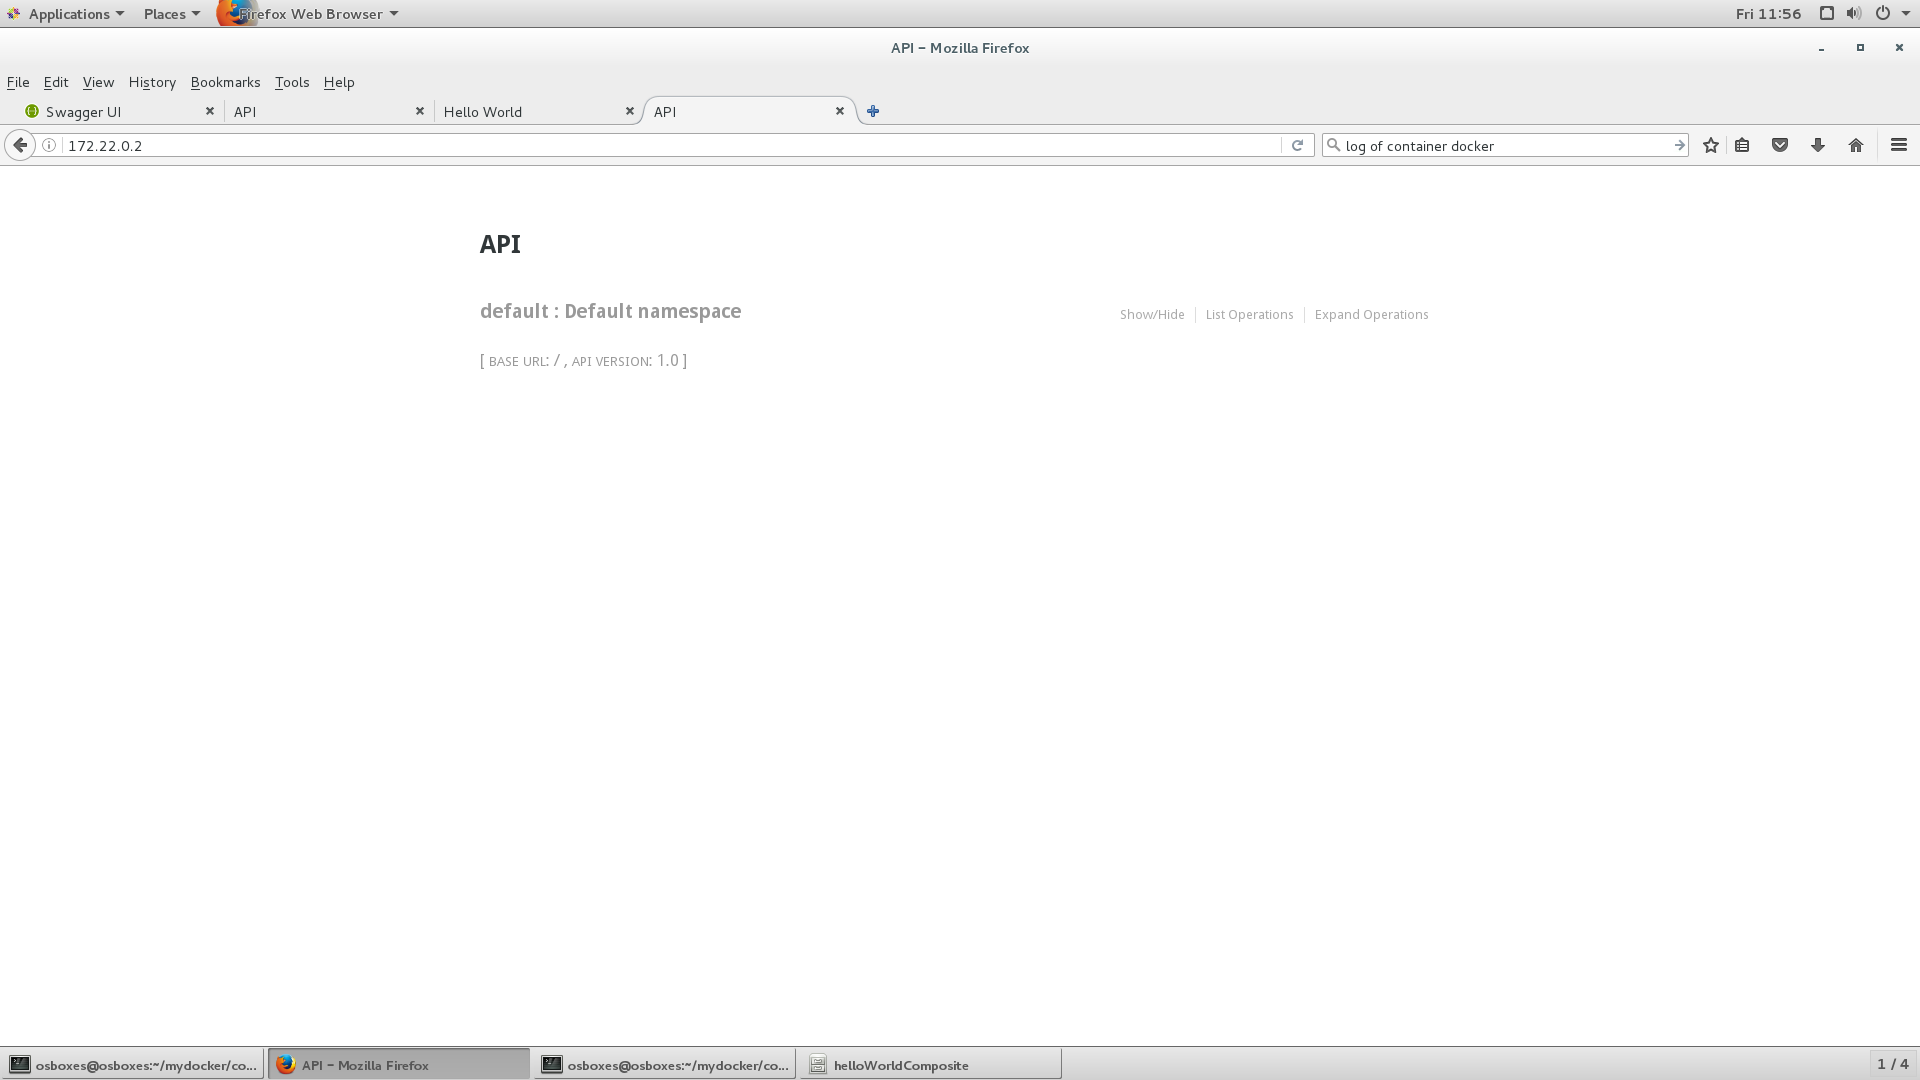
b) Test the Python service using it’s own IP address. Open another tab and type the ip address of the container ‘helloworldcomposite_helloworldrestservicecontainer_1’. Get the IP address from the output of step 4h.
It should provide you with the swagger interface of the restful service: