How to create restful services descriptions and use these to generate mocks……
Introduction
In the SOAP world, a service is defined using a WSDL. Unfortunately restful services don’t have a similar (fully accepted) standard. Some argue, there is no need for service descriptions in Rest. I disagree. When you are in development project of a reasonable size, it is a good practice to define service descriptions and to create mocks first (the so called Design by Contract approach).
Luckily there are a couple of standards available that enable a team creating restful services to adopt the Design by Contract approach. Actually, when combining a couple of free tools, it is not so hard after all. In this document I will show you how.
| Design by Contract is a development methodology in which formal a 'interface' is defined for 'services' before coding these. Especially in development projects in which multiple people (or even multiple teams) work, it is important to define the interfaces between the various components first. As a next steps mocks are generated. Once this is done, the various developers can start coding without having to wait for the services they will need to consume to be finished. |
Standards
The restful community likes standards so much that they have (at least) four when it comes to service descriptions (:-)). In 2009 Sun submitted the WADL standard to the W3 consortium. It has never been accepted widely. Over the last few years various others released alternative formats like API Blueprint, RAML and Swagger. The latter seems to be the most popular at this point in time. For that reason, swagger is the standard used in this document.
Tooling
In order to be able to use ‘Design by Contract’, you need four things:
- A service description (and documentation) language. As mentioned, we will use Swagger. The beauty of swagger is, that it is not only a service description language, but also standardized way to document and test API’s. For this we will use the cloud based swagger editor.
- Design tooling. The swagger editor is a great documentation and testing tool, but it doesn’t provide much functionality when it comes to designing an API. We will use the cloud based Restlet studio application for that.
- Mocking application. Prior to coding the services , we need to make mocks. We will use ‘good old’ SOAPUI for that. Contrary to what the name suggests, this tool supports both SOAP and Rest services. The open source version of SOAPUI can be downloaded here.
- Programming environment to build the actual API’s. While this not the scope of this document, no tooling is suggested here. For those interested in programming API’s in Java, I refer to my document building a restful json service using java.
Use case
In this document we want to be able to define and mock for a service with two parameters <FirstName> and <LastName> on the URL (http://<host>/rest/hello/<firstname>/<lastname> and return the following json:
{
"firstName":<first name>,
"lastName":<last name>,
"greeting":"Hello "+<first name>+<space>+<last name>
}
Step 1: define the API
In this step we will use Restlet studio to define the API and we will export the swagger file.
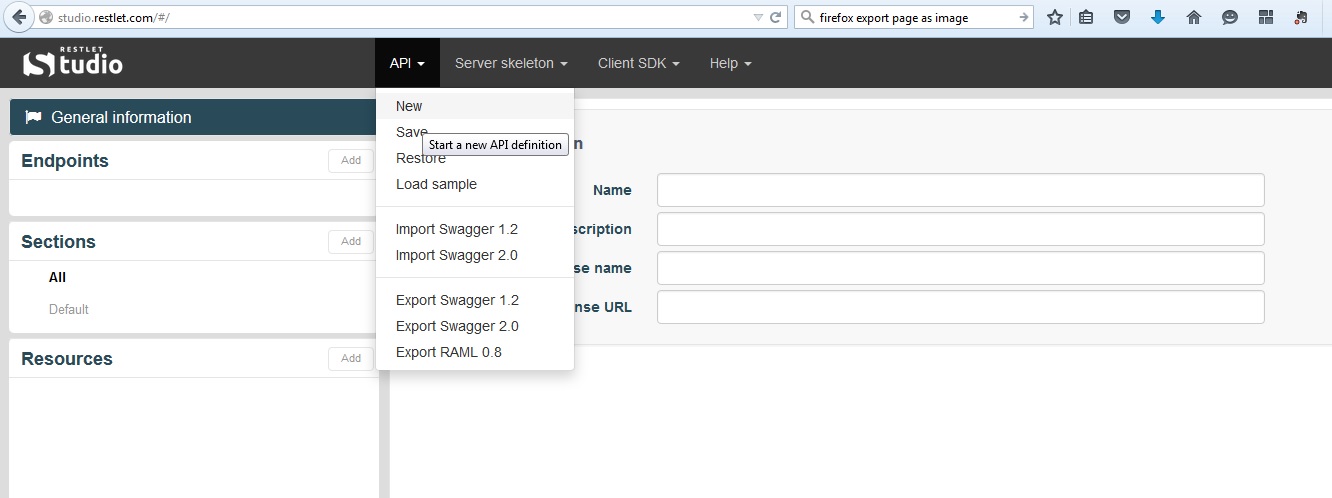
a) Open Restlet studio in your browser and click API –> New
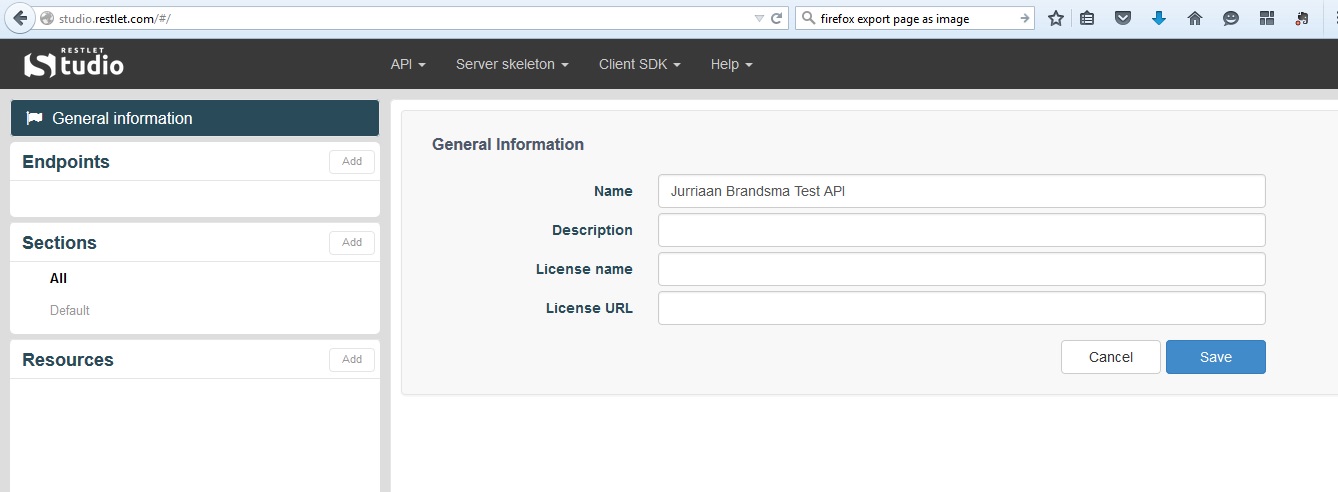
b) Fill out the general information section as shown below:
c) Click the add button in the Endpoints section (left top of the window) and fill out the form as listed below. Click add when finished.
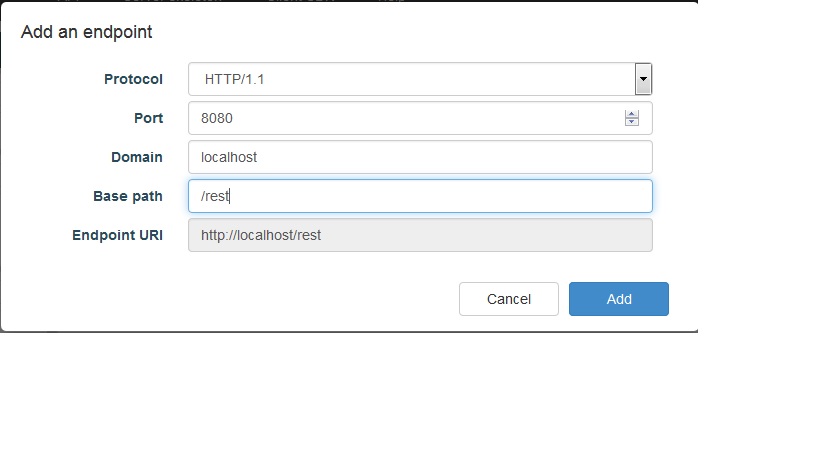
Remark: for testing purposes we used ‘localhost’ as the domain.
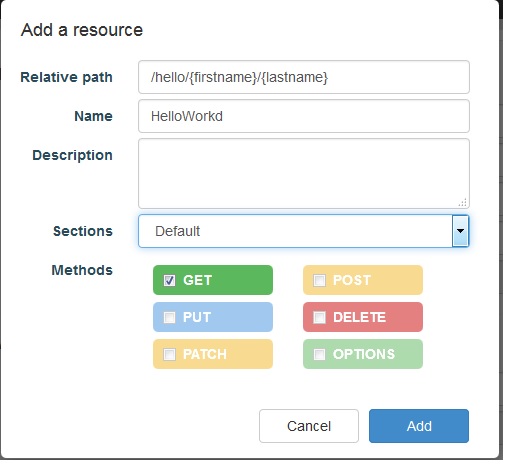
d) Define the resource hello/<firstname>/<lastname>. Click on the add button in the resources section and fill out the form as listed below. Click add when finished.
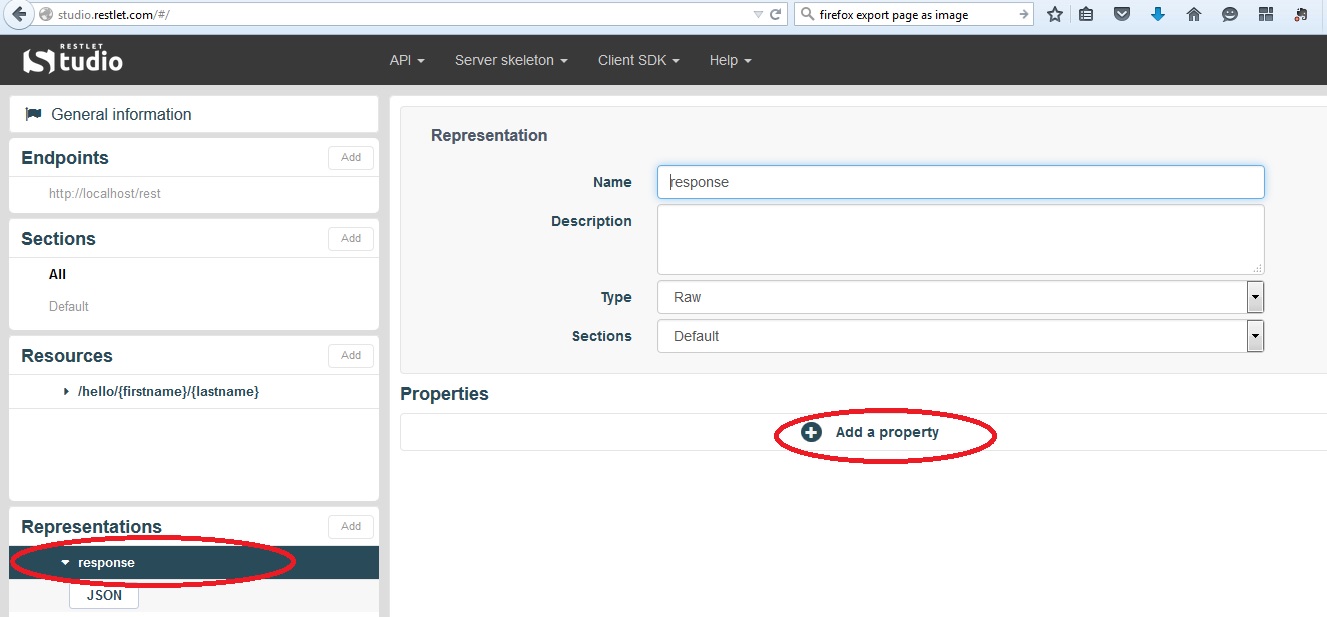
e) Create the json definition for the response document (to be used to define the json datastructure to be returned). Click the add button in the representations section and fill out the form as listed below. Click add when finished.

f) Select the ‘response’ representation just created and click ‘add property’:
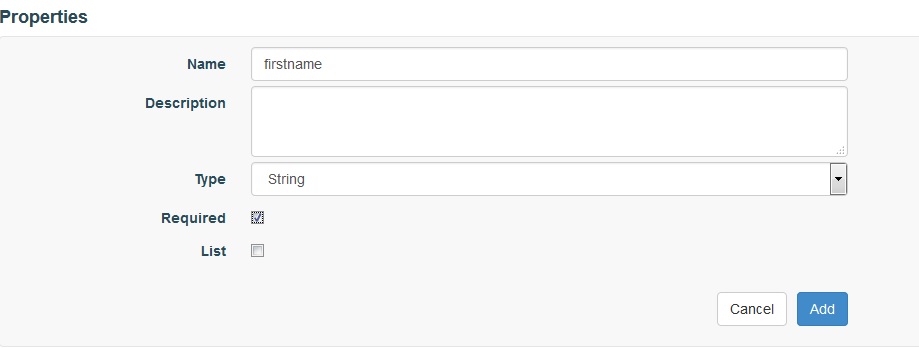
g) Add the firstname property (see screenshot below):
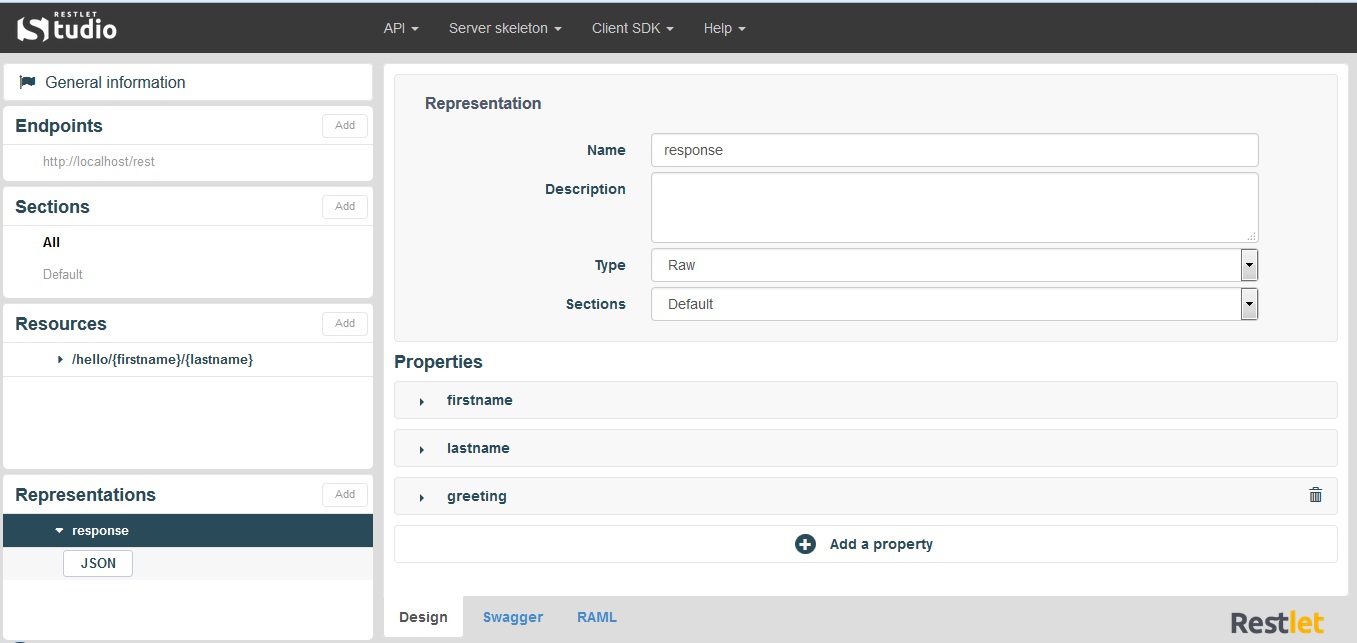
h) Do the same with the lastname and greeting properties. The screen should like this:
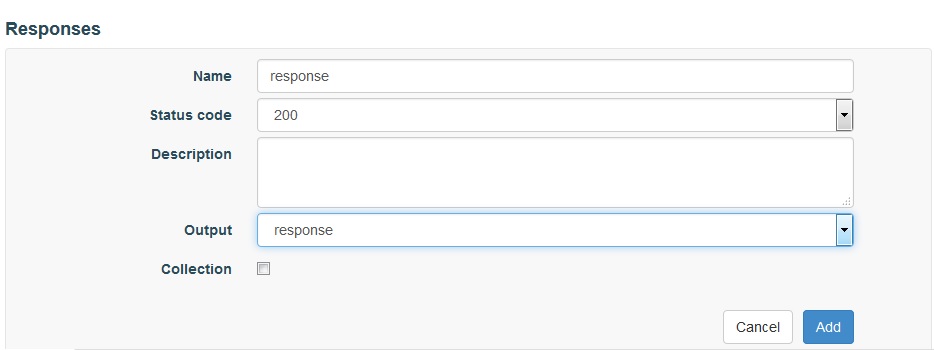
i) Define the response for the get operation of our resource hello/{firstname}/{lastname}. Select the GET operation and click ‘add a response’:

j) Fill out the form as shown below and click add.
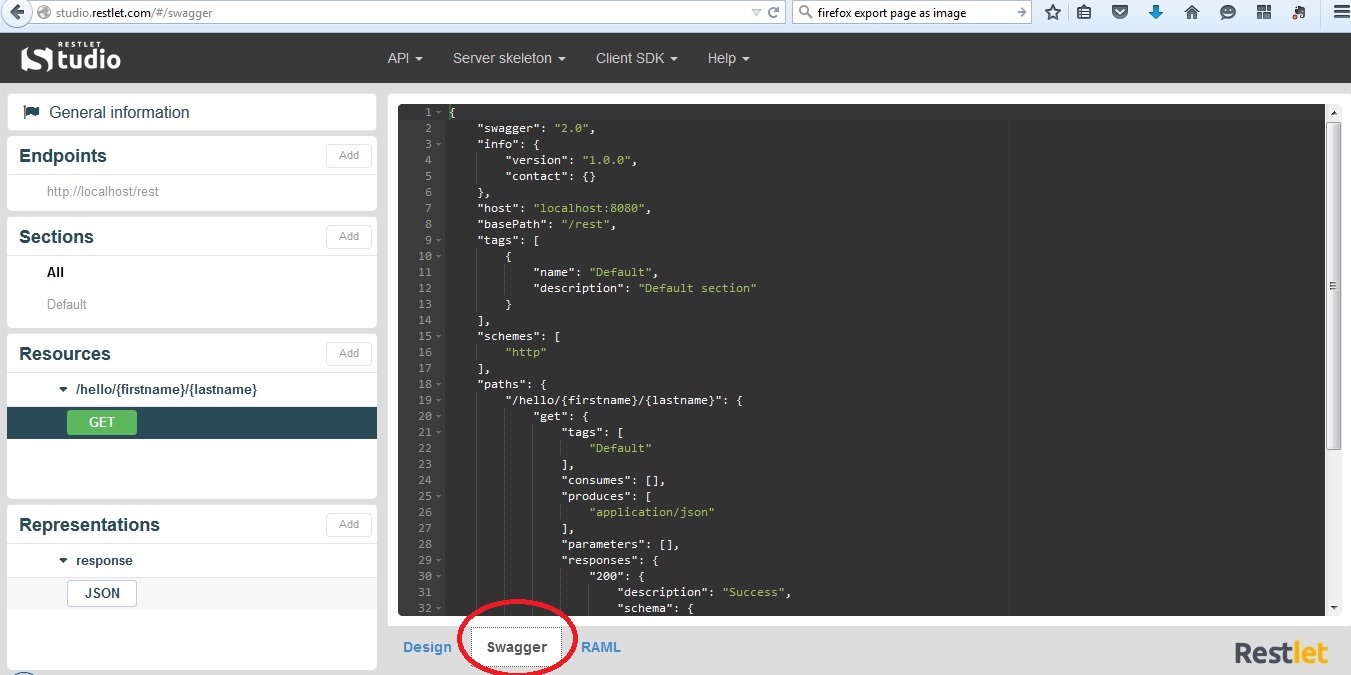
k) Click the ‘Swagger’ tab (at the bottom) to view the swagger document created.
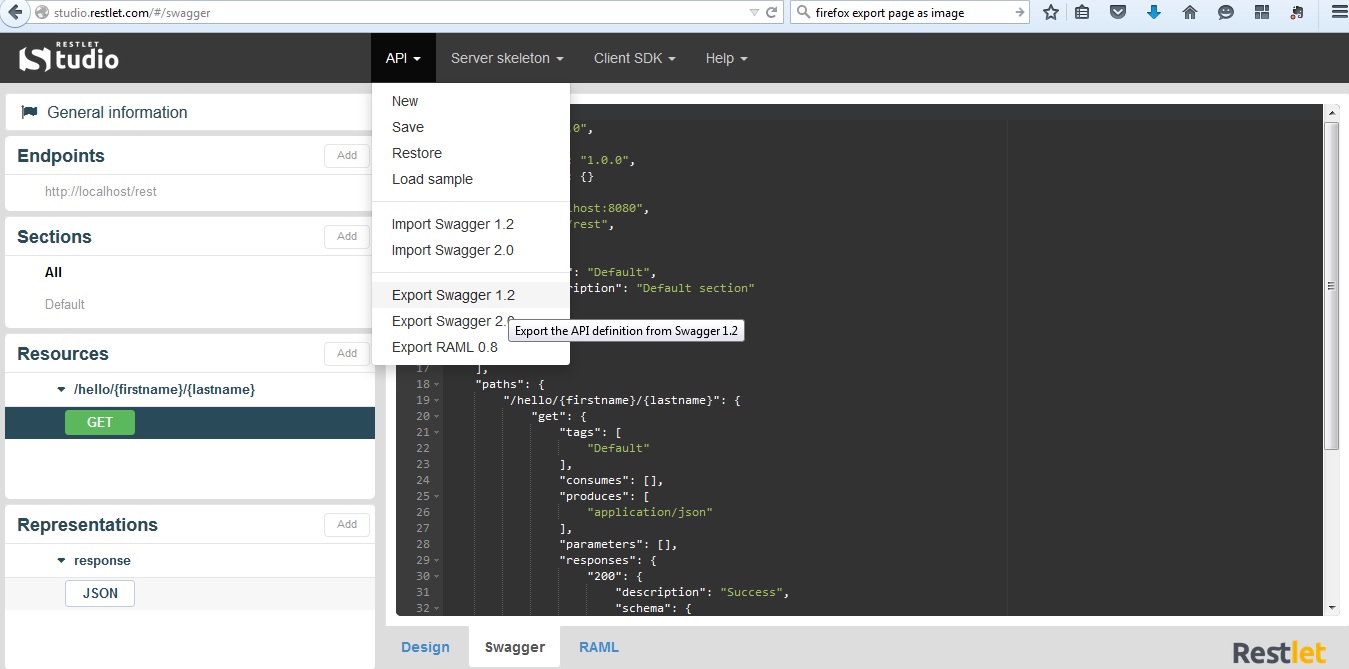
l) Export the swagger in the 1.2 format. Click API –> export swagger 1.2. Save the swagger.zip file.
Step 2: Import the swagger in SOAPUI
In this step we will generate a mock based on the swagger document created in step 1.
a) Unzip the swagger.zip exported in step 1l.
b) Open SOAPUI and click file –> Create Empty Project

c) Right click the empty project and click ‘rename’. Choose ‘MyAPI’ as a name.
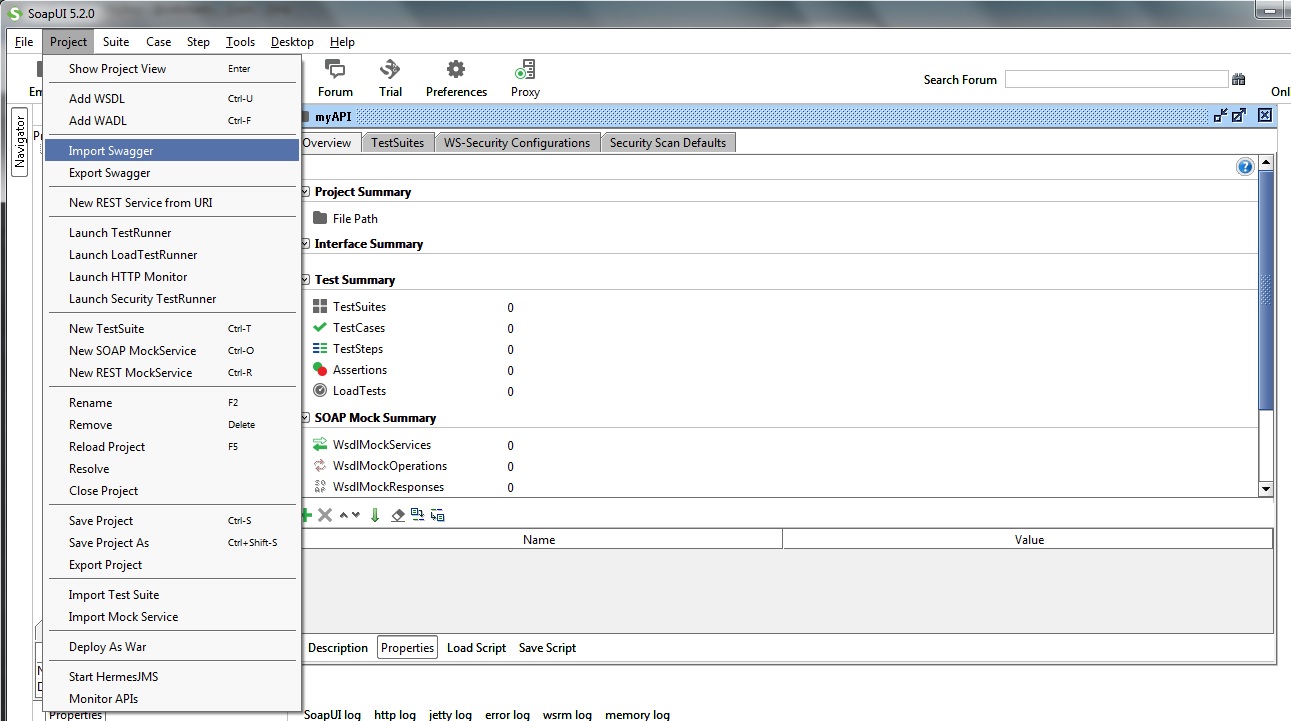
d) Select the MyAPI project and select file -> import swagger.
e) Choose ‘API Declarations (Only for swagger 1.x).
f) Click the browse and select the api-declaration-default.json file you unzipped in step 2a.
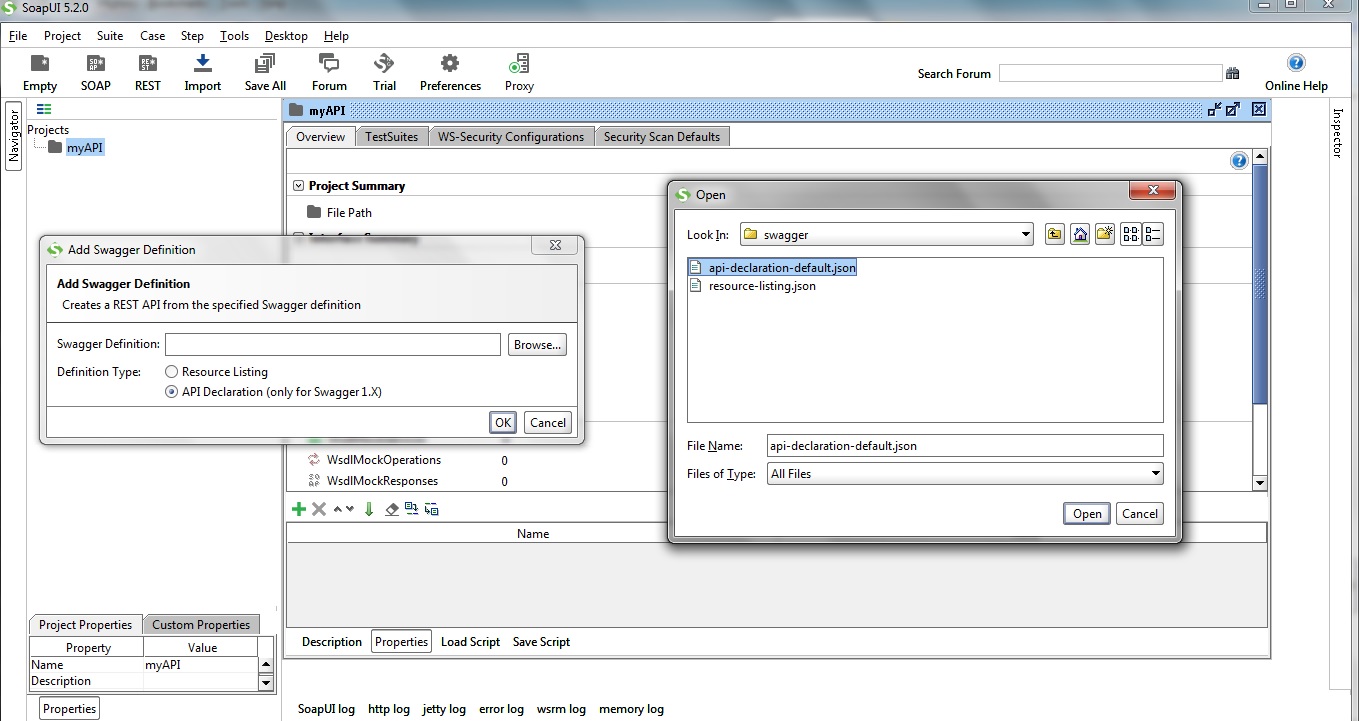
g) Click ‘Open’ and click ‘Ok’.
Step 3: Generate a mock
In this step we will generate a mock service.
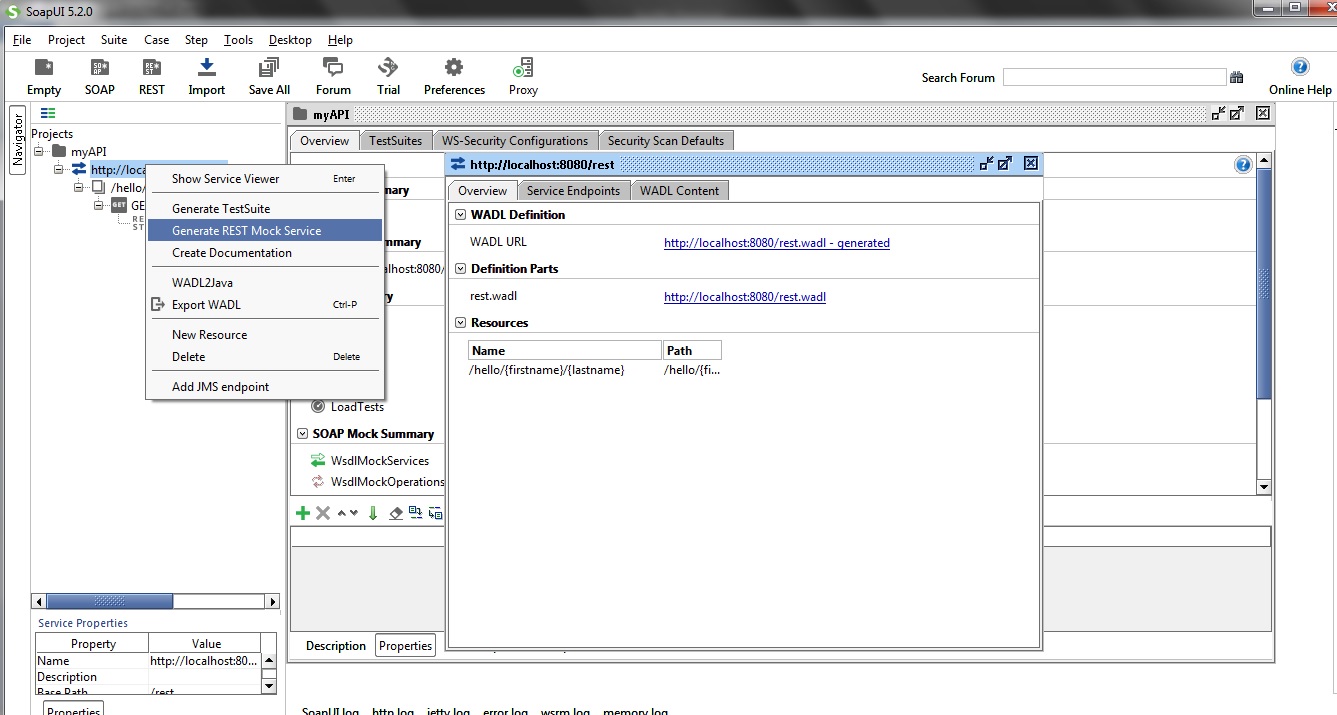
a) Right click the url (under myAPI) named http://localhost/rest/ and click ‘Generate REST Mock Service’.
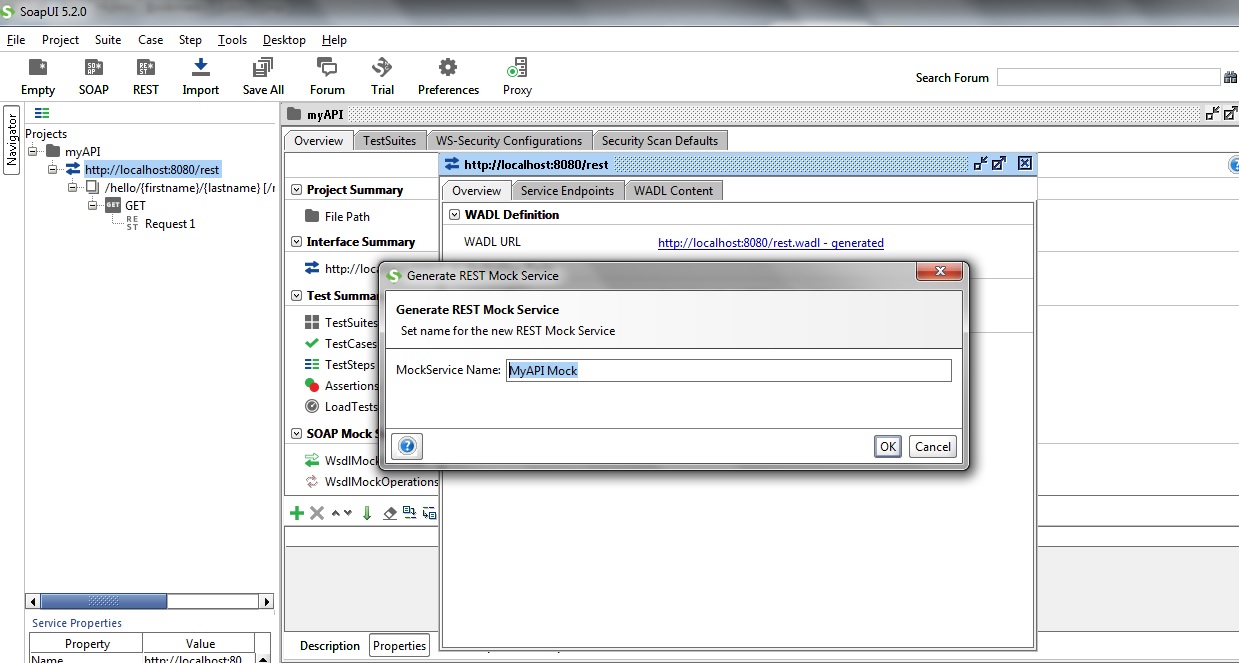
b) Enter the name ‘MyAPI Mock’ and click ok.
After clicking ‘ok’, the generated mock automatically starts up.
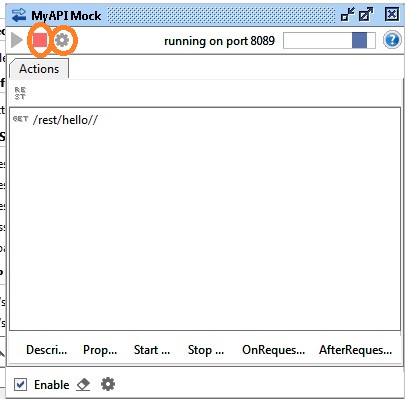
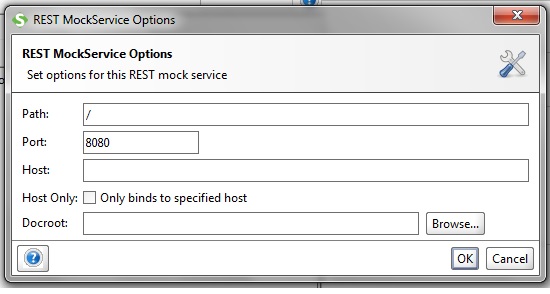
c) Click on the red square to stop the Mock an click on the settings icon right next to it.
d) Change the port to 8080 and click ok.
e) Click the green run button to restart the mock.

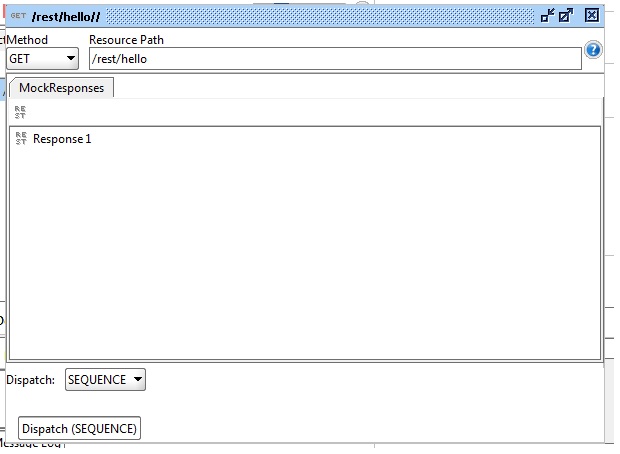
Next we are going to specify a response for the mock.
f) Double click the ‘get /rest/hello//’ line.
g) Double click the ‘response1’ line.
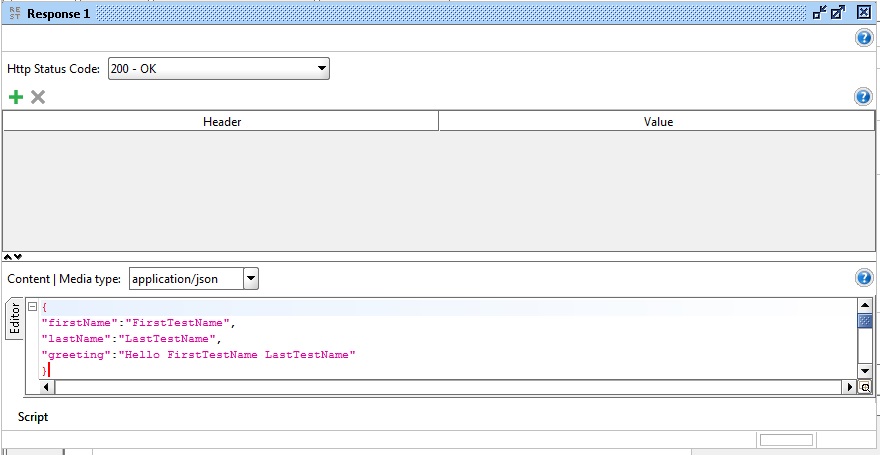
h) Set ‘Content / Media type’ to ‘Application/json’, and paste the following default response:
{
"firstName":"FirstTestName",
"lastName":"LastTestName",
"greeting":"Hello FirstTestName LastTestName"
}
The mock will respond to every request with the defined response. Alternatively you can also define multiple responses or use a script to respond. Please consult the SOAPUI documentation for details.
i) Close the response and the get window to return to the mock window.
You are now ready to test the mock.
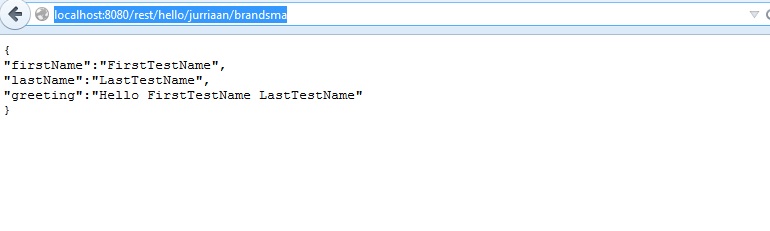
Step 4: Test the mock using a browser
In this step we will use a browser on the localhost to test the mock.
a) Open a browser.
b) Enter the following URL: http://localhost:8080/rest/hello/jurriaan/brandsma
c) You will get the response as shown below.