Hands-on description on building a simple Restful service using the Jersey framework and the Jackson libraries…..
Introduction
Over the last couple of years the the Representational State Transfer (REST) has became increasingly popular. Almost every piece of software or cloud service has a so called API (REST based service). For those unfamiliar to REST, I suggest to read this short article about the REST basics from big blue.
This document contains a simple tutorial on how to build REST services using the Jersey framework. This framework is the reference implementation for the 2007 Java Specification Request (JSR) 311. This standard (also known as JAX-RS [Java API for RESTFul Services]) specifies a Java API for REST.
REST services may use data in various formats like:
- text (in an URL or as output).
- JSON.
- XML.
- HTML.
In this document only text and JSON input and output are covered.
Software needed
In order to follow this tutorial the following software is needed:
1) Eclipse. Download Eclipse Java EE IDE for Web Developers, I used Luna.
2) The Jersey framework. I used version 2.18.
3) Tomcat. The Restful service will run on a Tomcat server. I used Tomcat 8 64 bit for windows. Tomcat can be downloaded here. Unzip tomcat in a directory of your choice and configure Tomcat for Eclipse.
4) SOAPUI. The free version of SOAPUI is used to test some of the rest services we will built. It can be download here. I used version 5.0.
I) Creating our first ‘hello world’ service
In this example we will create a simple RESTFul service on the url http://<host>/<some base path>/hello1/ and responds with the text ‘Hello world’ in plain text.
Step 1: Create a project in Eclipse.
We are going to create a Dynamic Web Project (that will later run on tomcat) to host our restful services.
a) Open Eclipse and create or use a workspace of your choice.
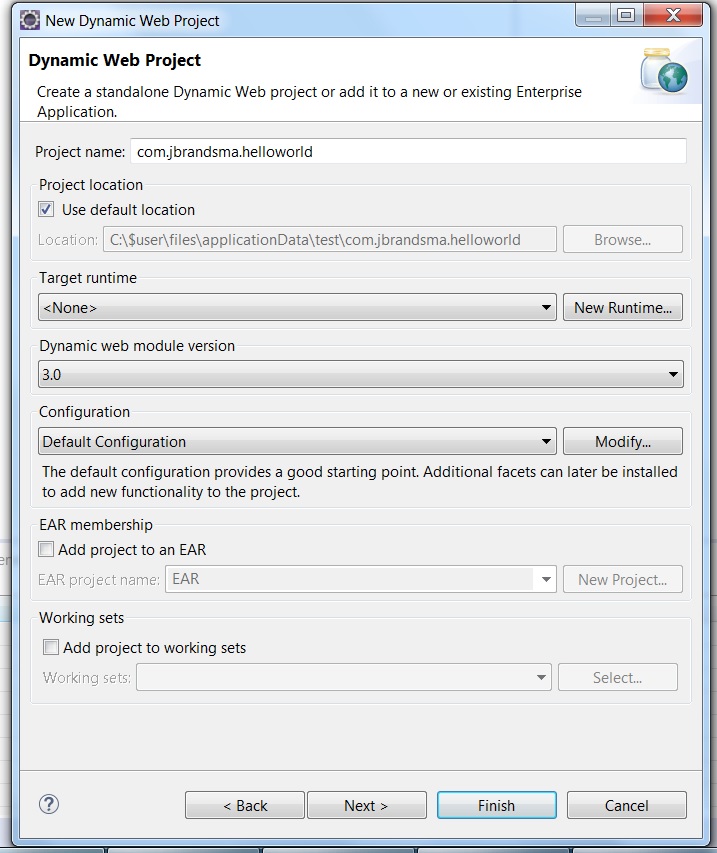
b) Create a Dynamic Web Project named ‘com.jbrandsma.helloworld’.
- Click File –> New –> Other
- Select Web –> Dynamic Web Project and click next.

c) Enter ‘com.jbrandsma.helloworld’ as a name, select ‘Apache Tomcat 8’ as the target runtime.
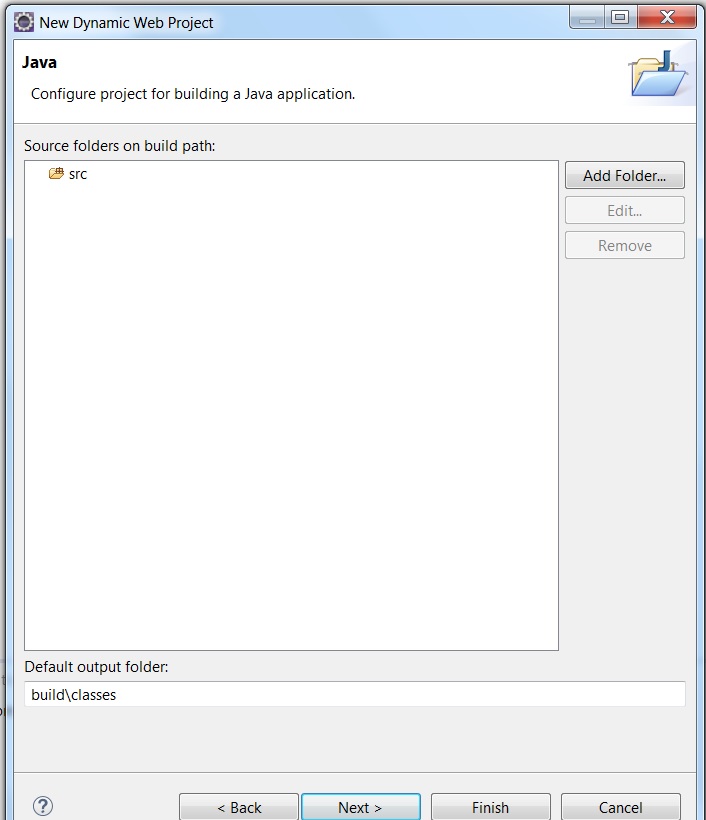
d) Leave the ‘Source folders on build path’ unchanged and click next.
e) Generate a web.xml by selecting the setting ‘generate web.xml deployment descriptor’.
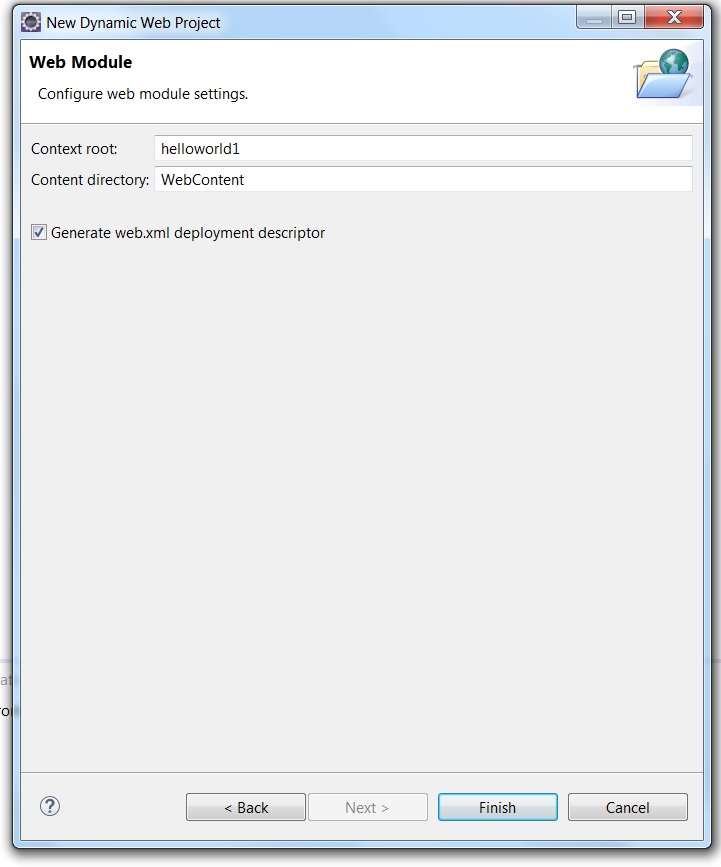
f) Click ‘Finish’.
If Eclipse asks you to open de JavaEE perspective, accept this choice.
Step 2: Add the Jersey JARs.
Eclipse has created a directory structure for the helloworld1 service. We need to import the Jersey JARs.
a) Unzip the downloaded Jersey zip to a temporary directory.
b) In the project explorer select helloworld1 –> Webcontent –> WEB-INF –> Lib
c) Drag all unzipped jar files from the Jersey zip to the lib directory. Eclipse will ask you to copy or link the files. Choose ‘copy’.

Step 3: Create the helloworld1 java class
a) In the Project Explorer go to the folder com.jbrandsma.helloworld –> Java Resources / src
b) Right click and select new –> class
c) Enter Hello1 as the name of the class

d) Add the following content for the class
package com.jbrandsma.helloworld;

import javax.ws.rs.GET;
import javax.ws.rs.Path;
import javax.ws.rs.Produces;
import javax.ws.rs.core.MediaType;

@Path("/hello1")
public class Hello1 {

  @GET
  @Produces(MediaType.TEXT_PLAIN)
  public String sayPlainTextHello() {
    return "Hello World";
  }
}
Explanation:
The beauty of the Jersey framework is that it enables you to create Java ‘POJO style‘. All the Restful context is added with annotations. These annotations start with a ‘@’. The java code used in the hello world example above consist of a simple Java class ‘hello1’. It contains one method named ‘sayHello’ that takes to argument (a first and a last name). The method returns a string ‘Hello <firstName> <lastName>’. The code contains the following Jersey annotations:
@Path(“/hello1”) –> this annotation defines the path used to invoke the Restful service.
@GET –> REST services (by default) support 4 methods (get, post, delete and put). These are the HTTP methods. For more information see here. In our example we get information. Therefore the @GET annotation is used.
@Produces(MediaType.TEXT_PLAIN) –> defines the output of the method as plain text.
Step 4: Run the service
Before running the restful service we need to make a couple of changes to the web.xml:
a) Open de web.xml in the project explorer at helloworld1->WebContent->WEB-INF. Use the following:
<?xml version="1.0" encoding="UTF-8"?>
<web-app xmlns:xsi="http://www.w3.org/2001/XMLSchema-instance" xmlns="http://java.sun.com/xml/ns/javaee" xsi:schemaLocation="http://java.sun.com/xml/ns/javaee http://java.sun.com/xml/ns/javaee/web-app_3_0.xsd" id="WebApp_ID" version="3.0">
  <display-name>helloworld</display-name>
 <servlet>
    <servlet-name>Jersey REST Service</servlet-name>
    <servlet-class>org.glassfish.jersey.servlet.ServletContainer</servlet-class>
    <init-param>
        <param-name>jersey.config.server.provider.packages</param-name>
        <param-value>com.jbrandsma.helloworld</param-value>
    </init-param>
    <load-on-startup>1</load-on-startup>
  </servlet>
  <servlet-mapping>
    <servlet-name>Jersey REST Service</servlet-name>
    <url-pattern>/rest/*</url-pattern>
  </servlet-mapping>
</web-app>
b) Select com.jbrandsma.helloworld and choose run –> run.
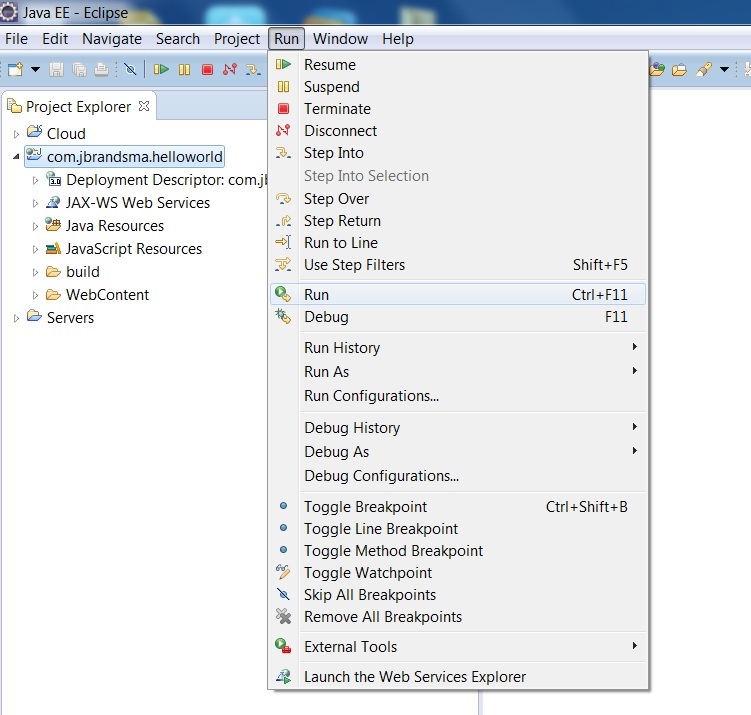
c) Select ‘run on server’.
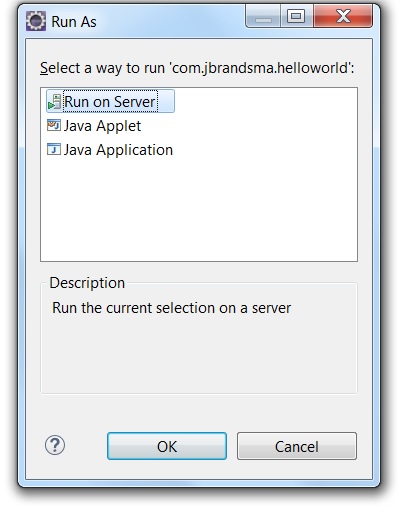
d) Select ‘tomcat 8.0 server’ and select ‘next’.
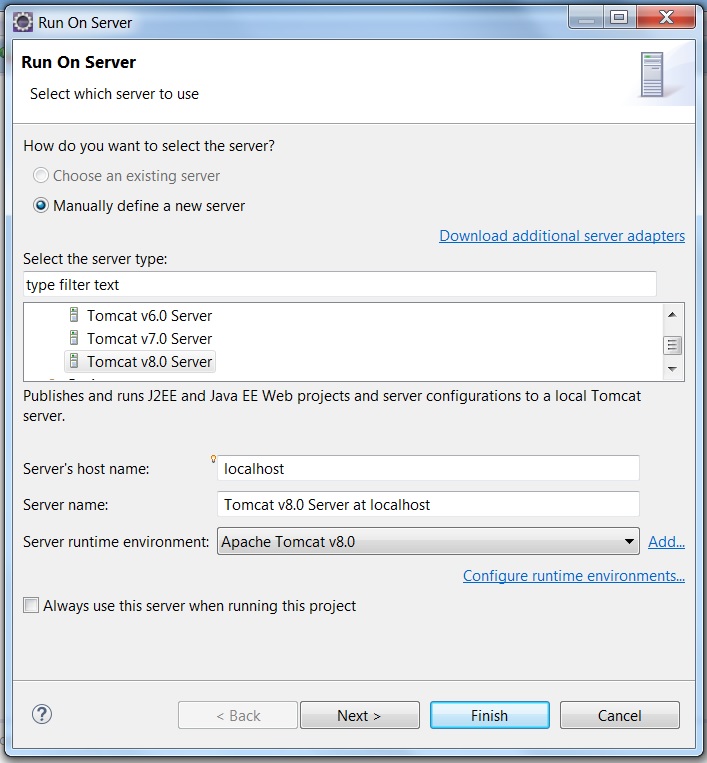
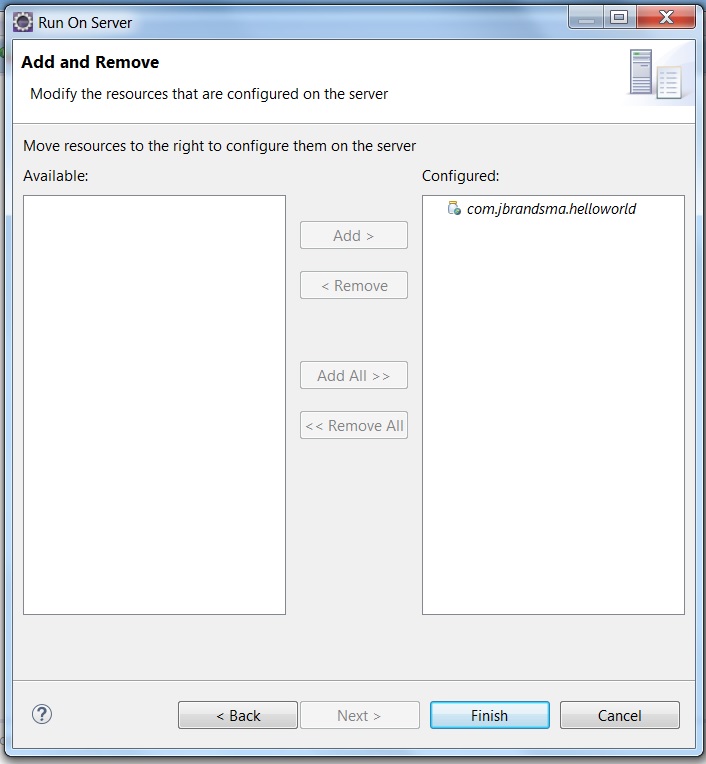
e) Accept the default values and click ‘finish’.
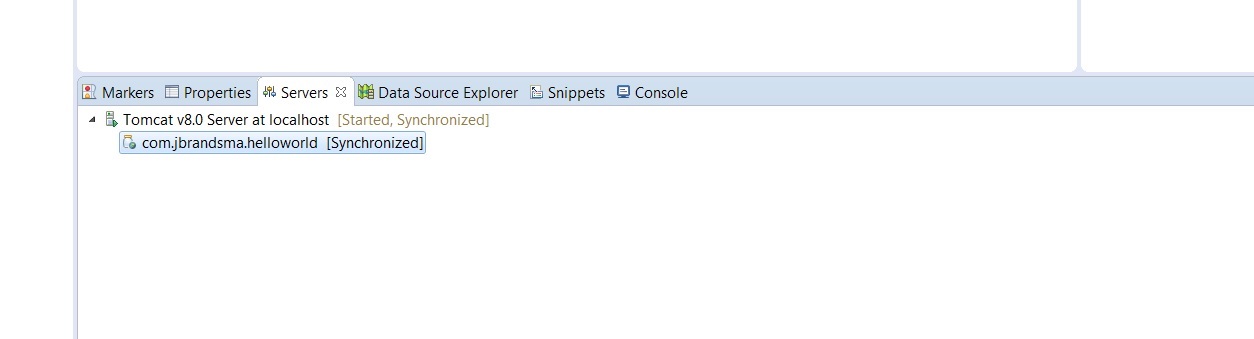
The Tomcat server will start and it will load restful service. If both are loaded, you’ll find the following rules in the bottom eclipse window.
Step 5: run the hello1 rest service
We will test te restful service using a browser.
a) Open a browser and enter the following address: http://localhost:8080/com.jbrandsma.helloworld/rest/hello1
The following content is shown in the browser:
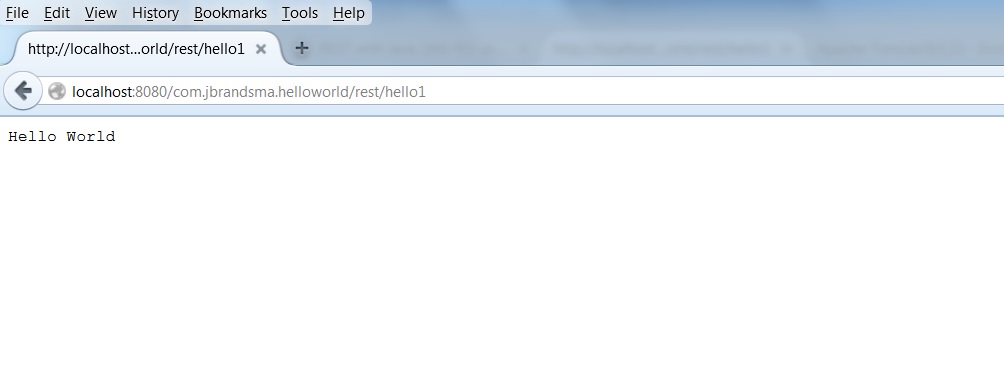
What happened?
The resful service was loaded in the Tomcat service. We configured service to listen on path ‘/hello1’ for requests. In the web.xml we configured com.jbrandsma.helloworld as a provider package at path ‘/rest/*’. Therefore the path is compiled as ‘/com.jbrandsma.helloworld’ + ‘/rest’ + ‘/hello1’.
The service doesn’t take any arguments, it returns ‘hello world’ as plain text for every request.
II) Creating ‘hello world’ service with parameters
In this example we will create a slightly more complex RESTFul service that takes your first and last name on the url http://<host>/rest/hello2/<firstName>/<lastName> and responds with the text ‘Hello <first name> <last name>’.
Step 1: Create a new java class helloworld2
a) In the Project Explorer go to the folder com.jbrandsma.helloworld –> Java Resources / src
b) Add a new class hello2. See step A3 for instructions.
package com.jbrandsma.helloworld;
import javax.ws.rs.GET;
import javax.ws.rs.Path;
import javax.ws.rs.PathParam;
import javax.ws.rs.Produces;
import javax.ws.rs.core.MediaType;
@Path("/hello2")
public class Hello2 {
 @GET
 @Path("/{firstName}/{lastName}")
 @Produces(MediaType.TEXT_PLAIN)
 public String sayHello(@PathParam("firstName") String firstName, @PathParam("lastName") String lastName) {
 return "Hello "+firstName+" "+lastName;
 }
}
Explanation:
Compared with hello1 the following changes were made:
- An annotation @Path(“/{firstName}/{lastName}”) is added–> Our service is supposed to get two URL parameters: ‘firstName’ and ‘lastName’.
- @PathParam(“firstName”) and @PathParam(“lastName”) –> The defined URL parameters are mapped to parameters of the java method.
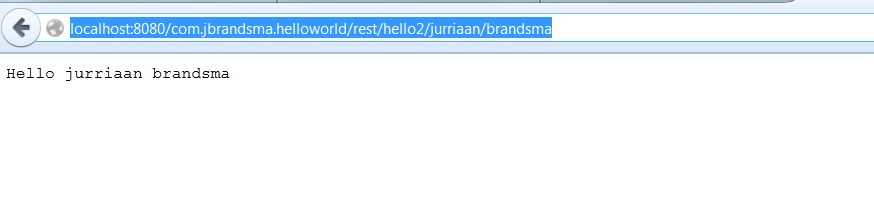
c) Make sure the embedded Tomcat server is running. Go to your browser and open the url http://localhost:8080/com.jbrandsma.helloworld/rest/hello2/jurriaan/brandsma. This will result in the following:
III) Creating a rest service that returns json
So far we made restful service that return text. The popularity of rest services mainly has to do with the fact that json can be returned. Json can easily be ‘consumed’ in JavaScript based web applications. Unlike XML, the consumption of json doesn’t require ‘expensive’ parsing in JavaScript.
We want to be able to call the service with two parameters <FirstName> and <LastName> on the URL and return the following json:
{
"firstName":<first name>,
"lastName":<last name>,
"greeting":"Hello "+<first name>+<space>+<last name>
}
In order to produce json, we need a json generation library. Various libraries exist. We will use the Jackson Libraries. Unfortunately, just adding the required Jackson jars doesn’t work (very well). The developers of the Jackson libraries assume that you use Maven to dynamically load the required jars. In step 1 we will change our Eclipse project in order to support Maven.
Next to that (in step 2) we need to make a change to web.xml.
Furthermore (in step 3) we will create the necessary java code.
Finally (in step 4) we will run our newly created
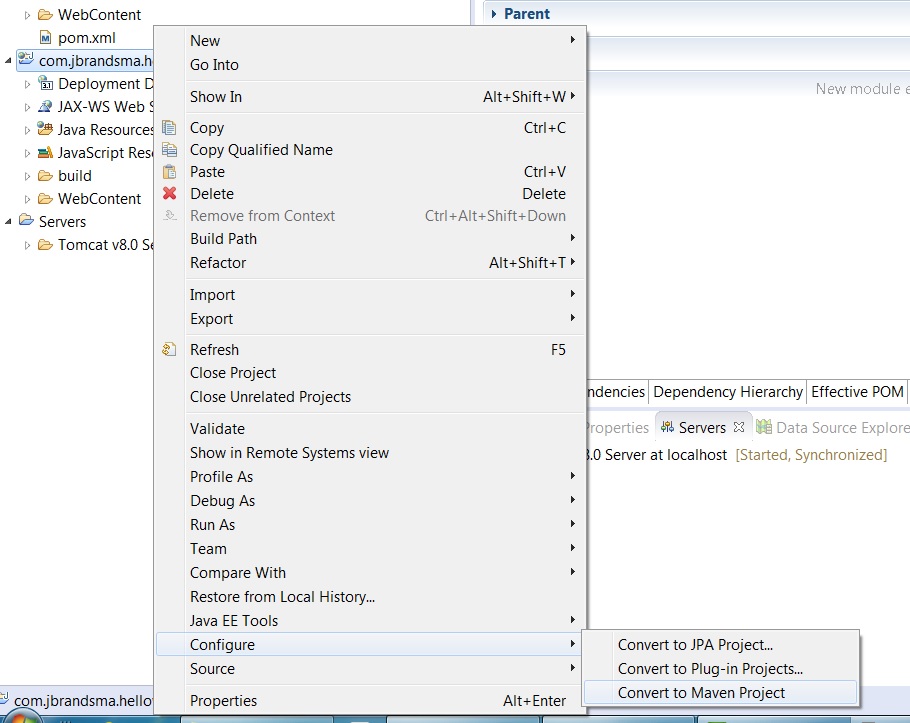
Step 1: Transform the rest project into a maven project.
a) Right click the previously created project com.jbrandsma.helloworld and select configure –> convert to maven project.
b) Eclipse will ask you to provide some settings for the pom file to be created. Don’t change the default values and click ok.
c) Open the newly created pom.xml and select the ‘dependencies tab’.
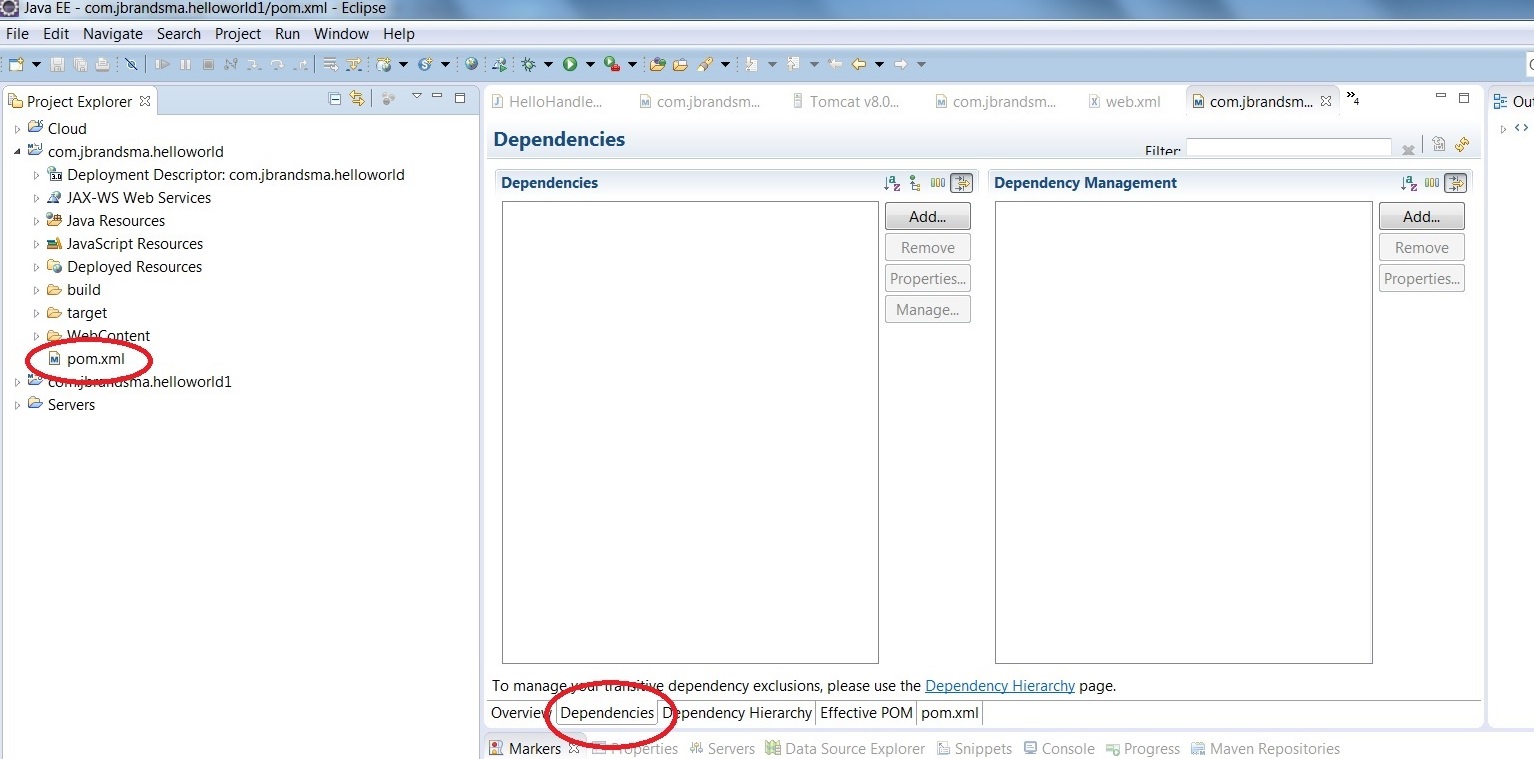
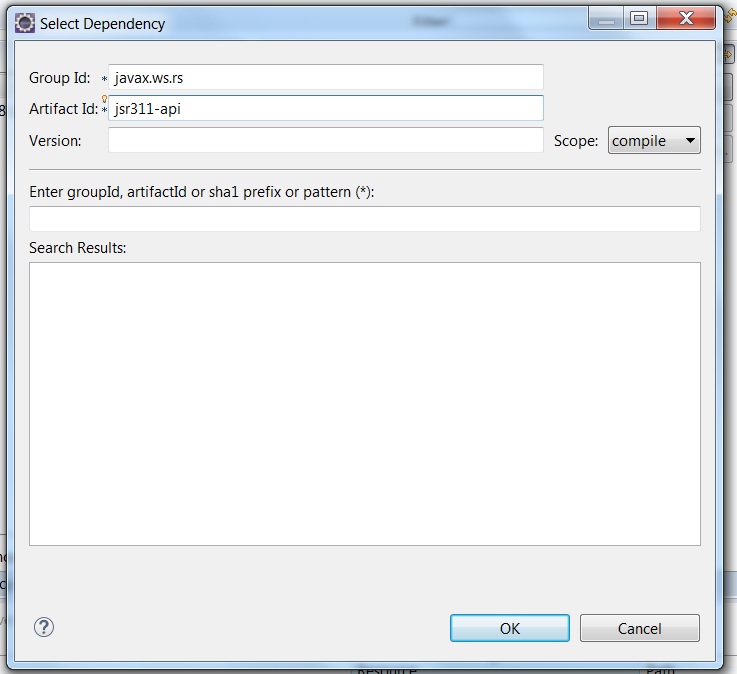
d) Add the Jersey dependencies. Click add and enter the following data
group id: javax.ws.rs
artifact id: jsr311-api
version: 1.1.1
scope: compile
Click ok.
e) Add the Jackson dependencies.
Click add and enter the following data
group id: org.glassfish.jersey.media
artifact id: jersey-media-json-jackson
version: 2.18
scope: runtime
Click ok.
f) Save the pom file.
e) select your project com.jbrandsma.helloworld, right click on it and select maven –> update project.
Step 2: modify the web.xml
In order to use the jackson parser, we need to make Tomcat aware.
a) Open the web.xml in the project explorer at com.jbrandsma.helloworld->webcontent->WEB-INF->lib.
b) Add the following lines:
  <init-param>
            <param-name>com.sun.jersey.api.json.POJOMappingFeature</param-name>
            <param-value>true</param-value>
   </init-param>
The web.xml should now like like this:
<?xml version="1.0" encoding="UTF-8"?>
<web-app xmlns:xsi="http://www.w3.org/2001/XMLSchema-instance" xmlns="http://java.sun.com/xml/ns/javaee" xsi:schemaLocation="http://java.sun.com/xml/ns/javaee http://java.sun.com/xml/ns/javaee/web-app_3_0.xsd" id="WebApp_ID" version="3.0">
  <display-name>helloworld</display-name>
 <servlet>
    <servlet-name>Jersey REST Service</servlet-name>
    <servlet-class>org.glassfish.jersey.servlet.ServletContainer</servlet-class>
    <init-param>
        <param-name>jersey.config.server.provider.packages</param-name>
        <param-value>com.jbrandsma.helloworld</param-value>
    </init-param>
    <init-param>
        <param-name>com.sun.jersey.api.json.POJOMappingFeature</param-name>
        <param-value>true</param-value>
     </init-param>
    <load-on-startup>1</load-on-startup>
  </servlet>
  <servlet-mapping>
    <servlet-name>Jersey REST Service</servlet-name>
    <url-pattern>/rest/*</url-pattern>
  </servlet-mapping>
</web-app>
Step 3: Add java code
We will first create a ‘hello3’ class (similar to the hello1 and hallo2 classes created earlier). With one main difference: we will no longer return text, but json.
a) In the project explorer go to com.jbrandsma.helloworld->Java Resources->src->com.jbrandsma.helloworld.
b) Right click and select new->class. Type hello3 as the name of the new class. Click ‘Finish’.
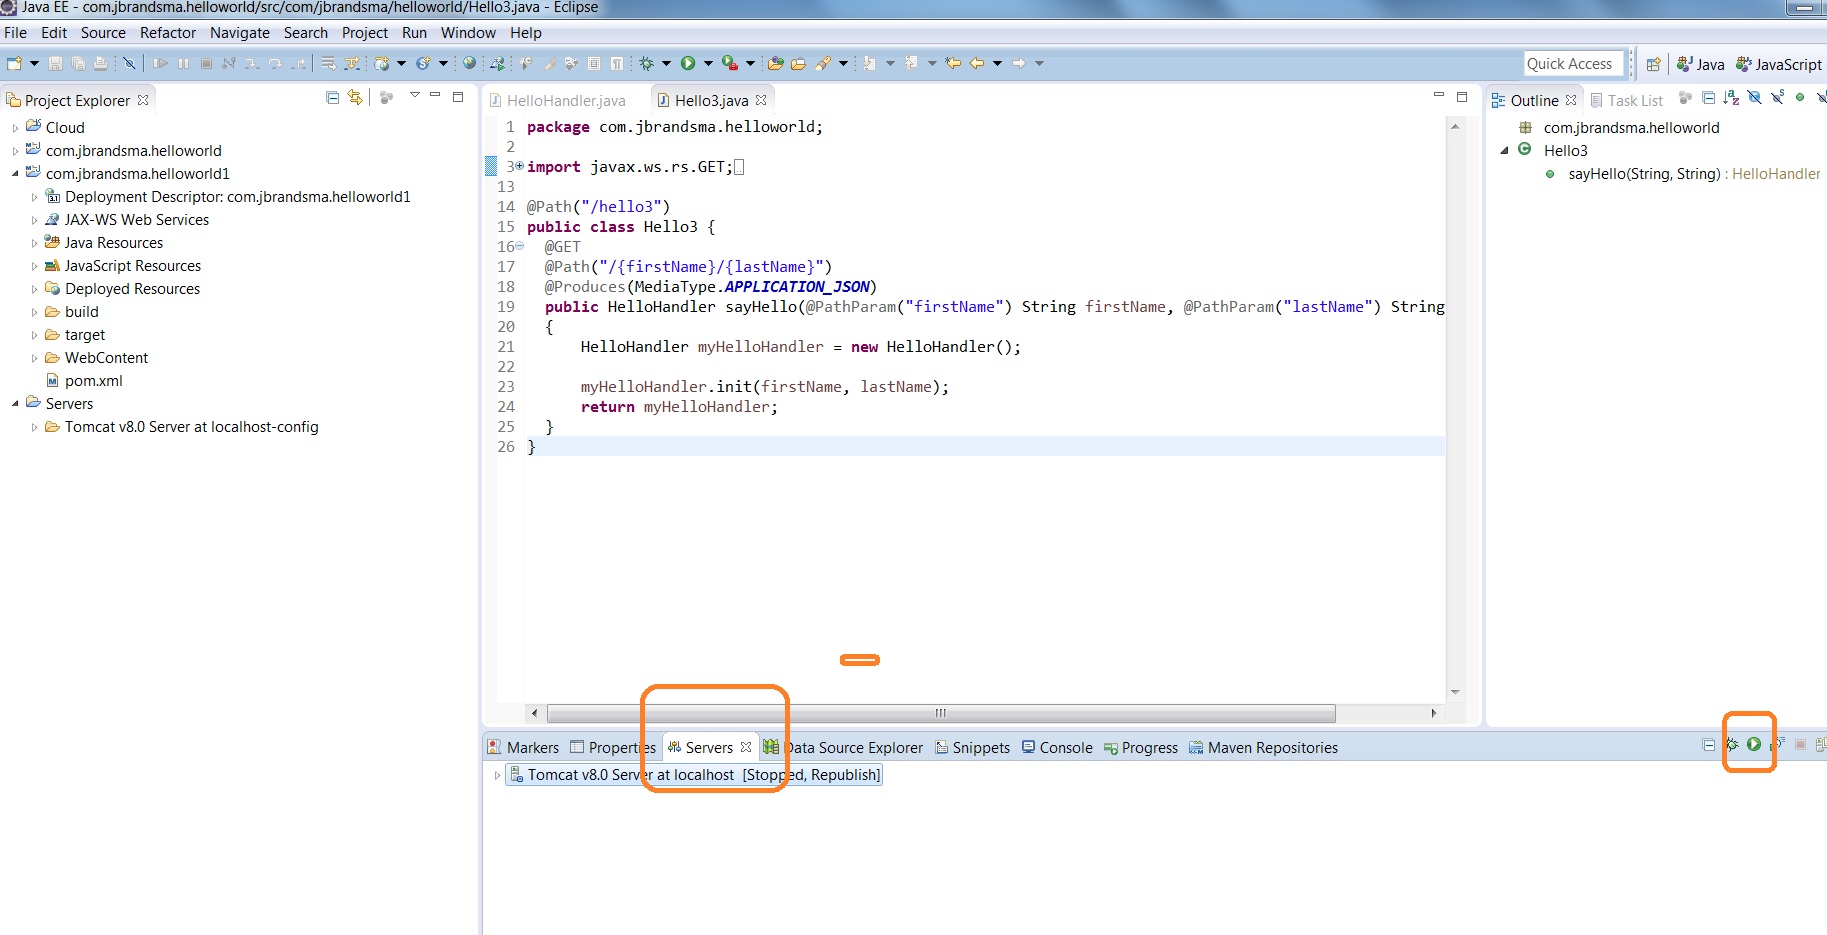
c) Paste the following code into the newly created class and save it. Don’t worry about the fact that Eclipse will complain about the fact that the HelloHandler doesn’t exist. We will work on that later…
package com.jbrandsma.helloworld;

import javax.ws.rs.GET;
import javax.ws.rs.Path;
import javax.ws.rs.PathParam;
import javax.ws.rs.Produces;
import javax.ws.rs.core.MediaType;
import com.jbrandsma.helloworld.HelloHandler;

@Path("/hello3")
public class Hello3 {
  @GETe
  @Produces(MediaType.APPLICATION_JSON)
  public HelloHandler sayHello(@PathParam("firstName") String firstName, @PathParam("lastName") String lastName)
  {
      HelloHandler myHelloHandler = new HelloHandler();

      myHelloHandler.init(firstName, lastName);
      return myHelloHandler;
  }
}
Lets focus on the changes that were made:
- @Produces(MediaType.APPLICATION_JSON): we here define that fact that we will return JSON (and like we did earlier text).
- HelloHandler myHelloHandler = new HelloHandler();: In order to return JSON we create an instance of the class HelloHandler. We will define this class later.
- myHelloHandler.init(firstName, lastName);: The instance of the HelloHandler class is initiated.
- return myHelloHandler;: The instance of the HelloHandler is returned. This is were the jackson parser comes in. It takes the instance of the class and transforms it into JSON. We will see later on in this document how this works.
In order to be able to return json we created an instance of the HelloHandler class. We haven’t defined it yet. We are going to do so now:
d) In the project explorer go to com.jbrandsma.helloworld->Java Resources->src->com.jbrandsma.helloworld.
e) Right click and select new->class. Type HelloHandler as the name of the new class. Click ‘Finish’.
f) Paste the following code into the newly created class and save it.
package com.jbrandsma.helloworld;

import com.fasterxml.jackson.annotation.JsonAutoDetect;
import com.fasterxml.jackson.annotation.JsonAutoDetect.Visibility;
import com.fasterxml.jackson.annotation.JsonProperty;
import com.fasterxml.jackson.databind.annotation.JsonSerialize;


@JsonAutoDetect(fieldVisibility = Visibility.NONE, getterVisibility = Visibility.NONE, setterVisibility = Visibility.NONE)
public class HelloHandler {

    @JsonSerialize
    @JsonProperty("firstName")
    String firstName;

    @JsonSerialize
    @JsonProperty("lastName")
    String lastName;

    @JsonSerialize
    @JsonProperty("greeting")
    String sayHello;

    public HelloHandler()
    {

    }

    public void init(String inputFirstName, String inputLastName)
    {
        firstName=inputFirstName;
        lastName=inputLastName;
        sayHello="Hello "+firstName+" "+lastName;
    }
}
Let’s take a closer look at the code.
- @JsonAutoDetect….: By default public fields and all public getters and setters are automatically transformed into JSON. While in this case we want to have more control over what we return, we disabled this feature.
- @JsonSerialize @JsonProperty(“firstName”) String firstName; :Creating a class that will be returned as a JSON object is not much different from creating any other class. You create fields and methods. In this case we defined the field private field ‘firstName’. We use the annotations @JsonSerialize and @JsonProperty(“firstName”) to tell Jackson to return this field with the name firstName. While this is the actual name of field in the class, the latter is actually redundant. We could have only used the annotation ‘@JsonSerialize’.
Step 4: Test the service
a) In the bottom Eclipse window go to ‘servers’.
b) Select the tomcat server and click ‘run’.
c) Once the server is running, go to your browser and enter the following url: http://localhost:8080/com.jbrandsma.helloworld/rest/hello3/jurriaan/brandsma
You will get the following JSON reply:
{"firstName":"jurriaan","lastName":"brandsma","greeting":"Hello jurriaan brandsma"}
IV) Creating a rest service that takes json parameters
So far we created restful services that take parameters from the URL. Although this is a valid way of feeding input, there are many cases in which you want to provide the parameters as json objects. This may for example be the case when you need to feed many parameters into the service. Next we are going to create our fourth iteration of the helloWorld restful service that takes parameters as a json object.
We want to provide the following JSON input:
{"firstName":"jurriaan","lastName":"brandsma"}
and get the same JSON output that we got before:
{"firstName":"jurriaan","lastName":"brandsma","greeting":"Hello jurriaan brandsma"}
Step 1: Create input class
As a first step we are going to create a class (named HelloInput) that will hold the input received by our rest service.
a) In Eclipse select right click com.jbrandsma.helloworld->Java Resources->src->com.jbrandsma.helloworld
b) Select new–>class
c) Fill out the ‘HelloInput’ as a name and click Finish.
A new class named HelloInput will be show. This class will contain our input.
d) Open the newly created class and replace the content with the following:
package com.jbrandsma.helloworld;

import com.fasterxml.jackson.annotation.JsonAutoDetect;
import com.fasterxml.jackson.annotation.JsonAutoDetect.Visibility;
import com.fasterxml.jackson.annotation.JsonProperty;
import com.fasterxml.jackson.databind.annotation.JsonSerialize;


@JsonAutoDetect(fieldVisibility = Visibility.NONE, getterVisibility = Visibility.NONE, setterVisibility = Visibility.NONE)
public class HelloInput {

    @JsonSerialize
    @JsonProperty("firstName")
    String firstName;

    @JsonSerialize
    @JsonProperty("lastName")
    String lastName;

    public String getFirstName()
    {
        return firstName;
    }

    public String getLastName()
    {
        return lastName;
    }
}
Explanation:
- HelloInput is mostly a simple class with two parameters (firstName and lastName). For each of the parameters a ‘getter’ is available. No ‘putters’ are created. An instance of the class including the parameters will be created using a restful call.
- @JsonAutoDetect… Just like we did previously, we disable automatic conversion of parameters, getters and putters. By doing this we keep control of what we are doing.
- @JsonSerialize and @JsonProperty…. We define firstName and lastName as parameters used in our (input) JSON. We set the JSON names with @JsonProperty….. In this particular case, the class parameters are the same json parameters, so strictly speaking the @JsonProperty are redundant. I decided to add the annotation anyway to avoid any confusion.
Step 2: Create the hello4 class.
In this step we are going to create the hello4 class that will define our restful service that uses both json as input and as output.
a) In Eclipse select right click com.jbrandsma.helloworld->Java Resources->src->com.jbrandsma.helloworld
b) Select new–>class
c) Fill out the ‘Hello4’ as a name and click Finish.
A new class named Hello4 will be show. This class will contain our service.
d) Open the newly created class and replace the content with the following:
package com.jbrandsma.helloworld;

import javax.ws.rs.POST;
import javax.ws.rs.Path;
import javax.ws.rs.Produces;
import javax.ws.rs.Consumes;
import javax.ws.rs.core.MediaType;

import com.jbrandsma.helloworld.HelloHandler;

@Path("/hello4")
public class Hello4 {
  @POST
  @Produces(MediaType.APPLICATION_JSON)
  @Consumes(MediaType.APPLICATION_JSON)
  public HelloHandler sayHello(HelloInput helloInput)
  {
      HelloHandler myHelloHandler = new HelloHandler();

      myHelloHandler.init(helloInput.getFirstName(), helloInput.getLastName());
      return myHelloHandler;
  }
}
Explanation:
- import javax.ws.rs.POST; import javax.ws.rs.Consumes; -> We need to add some specific imports, more on this below.
- @POST. Up until now, we have only implemented @GET services. For more information on the four rest methods, see the rest wiki document. For now remember: while we use input we implement the @POST method.
- @Consumes(MediaType.APPLICATION_JSON) -> Use this annotation to tell Jersey that we now also consume JSON.
- public HelloHandler sayHello(HelloInput helloInput) -> We no longer use path parameters. Instead we use an instance of the previously created class HelloInput as input.
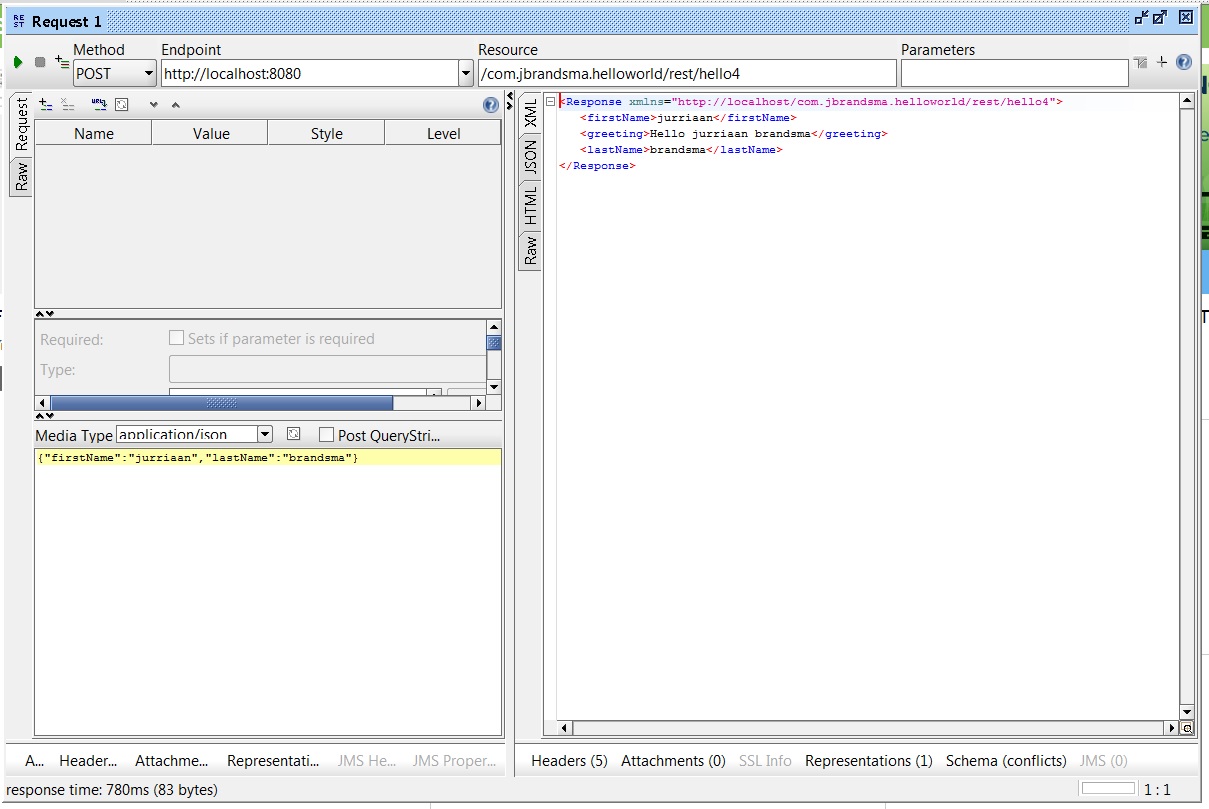
Step 3: Test hello4 class
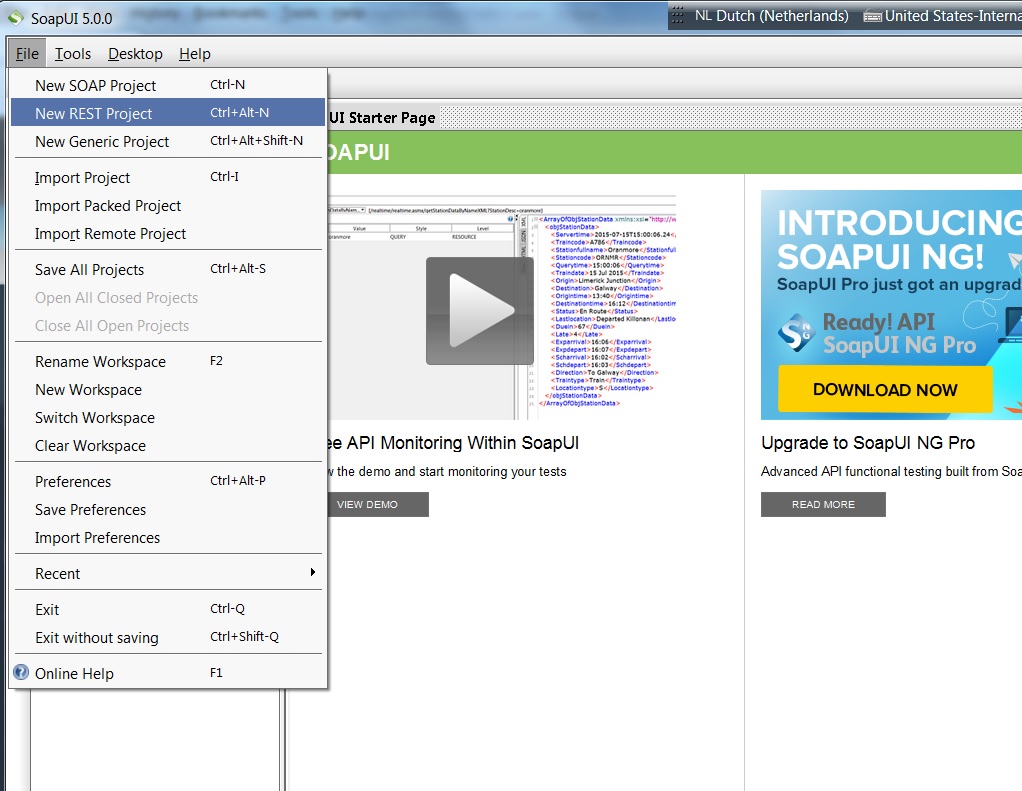
In order to test the newly created service, we will use SOAPUI.
a) Start SOAPUI.
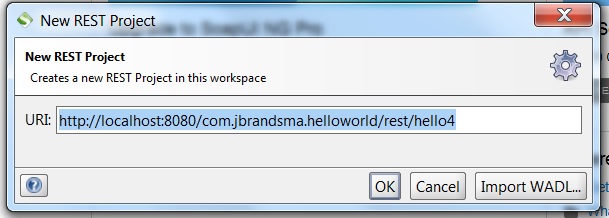
b) Click File -> New rest project.
c) Enter http://localhost:8080/com.jbrandsma.helloworld/rest/hello4 as the URI and click OK.
d) Select the ‘POST’ method and enter {“firstName”:”jurriaan”,”lastName”:”brandsma”} as input.
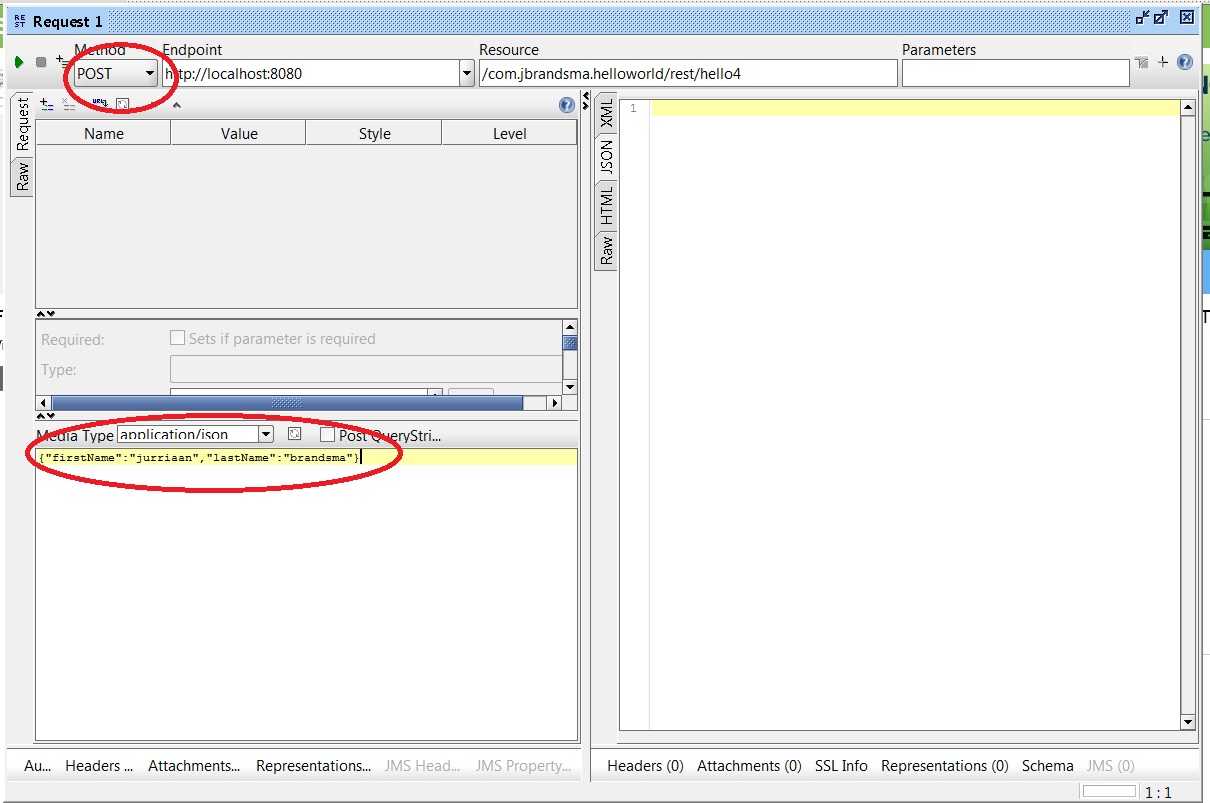
e) You will get the following JSON response…..